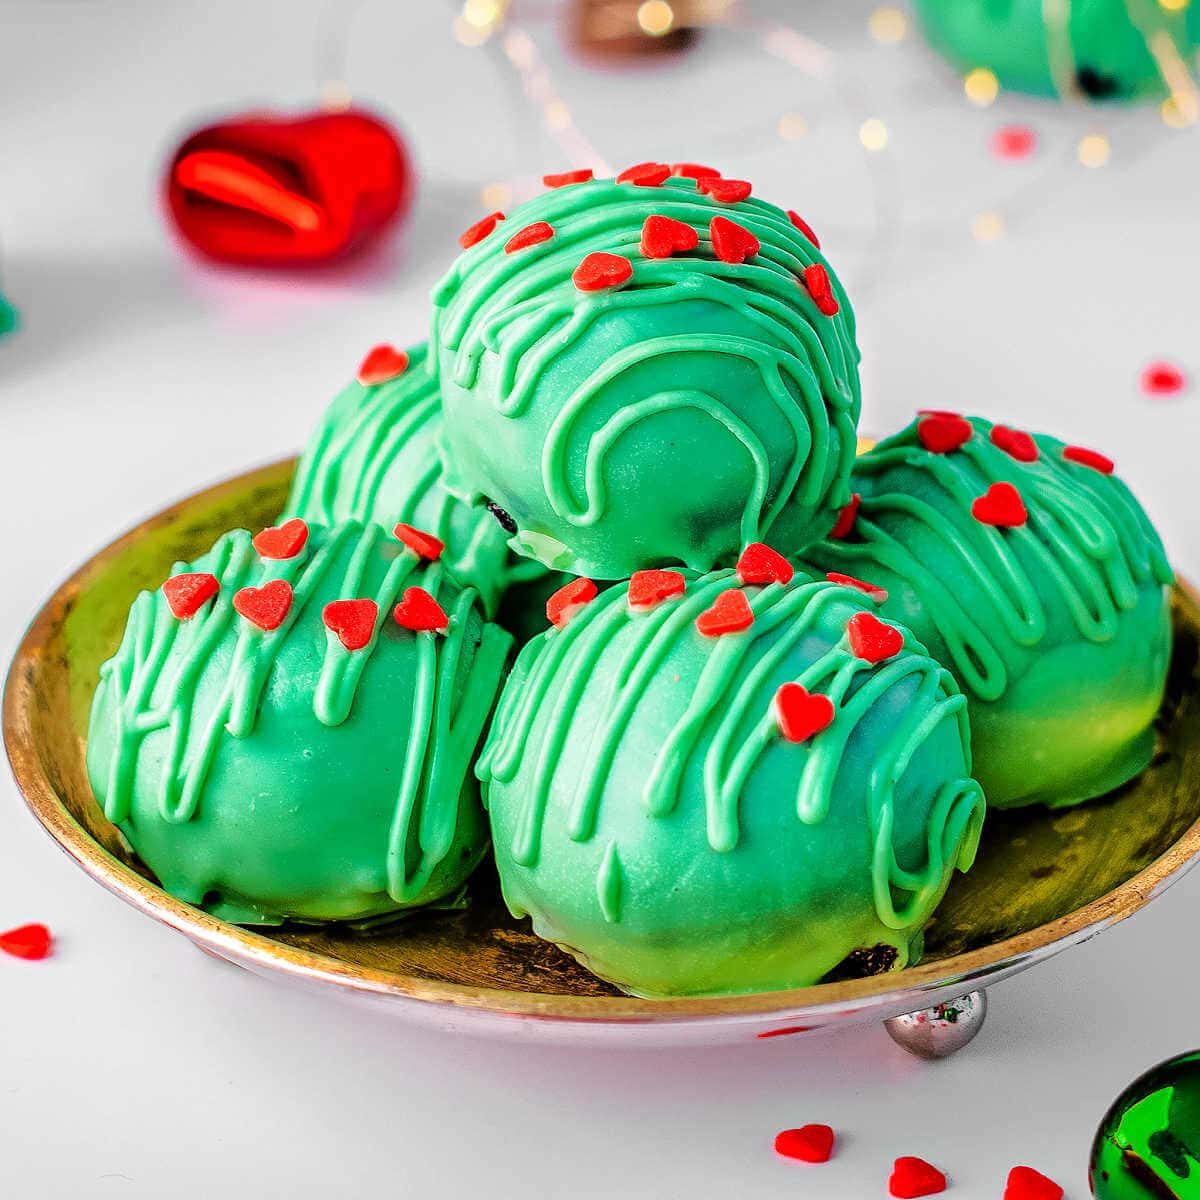
Grinch Inspired Christmas Oreo Balls


This post may contain affiliate links. Please read my disclosure policy.
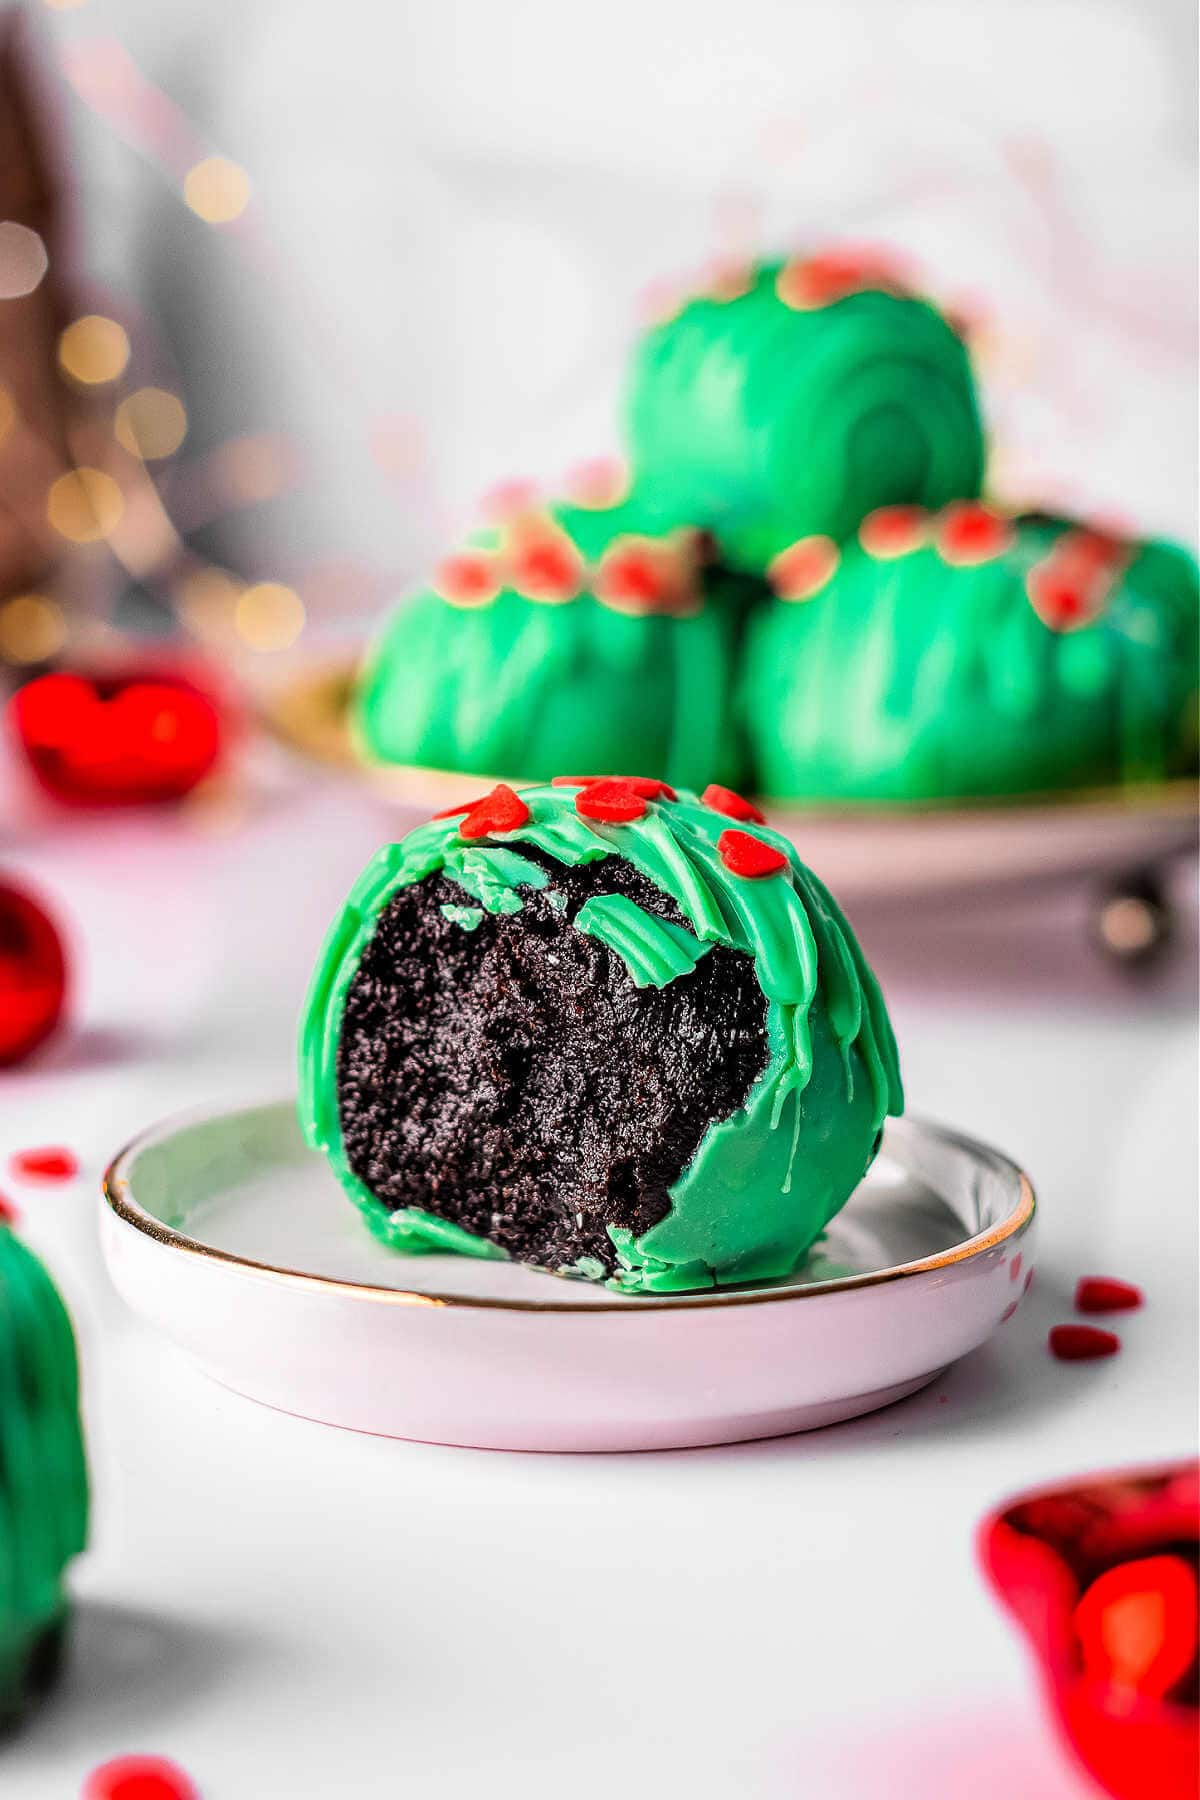
If your holiday schedule is as packed as mine, you’ll love how easy these Christmas Oreo Balls are to make. This fun Grinch-themed version is the perfect no-bake dessert when you want something festive, simple, and make-ahead friendly. With their bright green candy coating, these Grinch Oreo Balls look stunning on any holiday table and are easy enough for anyone to whip up. Inside is a rich, velvety chocolate filling that’s guaranteed to be a hit.

Sheila’s Recipe Snapshot for Christmas Oreo Balls
This no-bake crowd-pleaser brings instant holiday spirit, making it a fun dessert for kids and adults to make together.
Hosting friends and family this time of year is one of my greatest joys, and simple recipes like this one help me keep things stress-free.
These little bites are adorable, beginner-friendly, and surprisingly sturdy, making them perfect for holiday gatherings, cookie swaps, and even traveling across town.
This version starts with red velvet Oreos paired with vibrant green candy melts, giving them the perfect Grinch-green hue! The process is straightforward: crush Oreos, blend them with cream cheese, and chill.
My biggest tip here is to make sure the cream cheese is room temp! Then dip them in melted candy melts and decorate however you’d like.
Whether you’re new to holiday baking or simply pressed for time, these Grinch-themed Oreo balls are guaranteed to be a hit at any gathering. If you’re looking for another easy, no-fuss treat, these Nutter Butter Reindeer Cookies are also lots of fun to make.
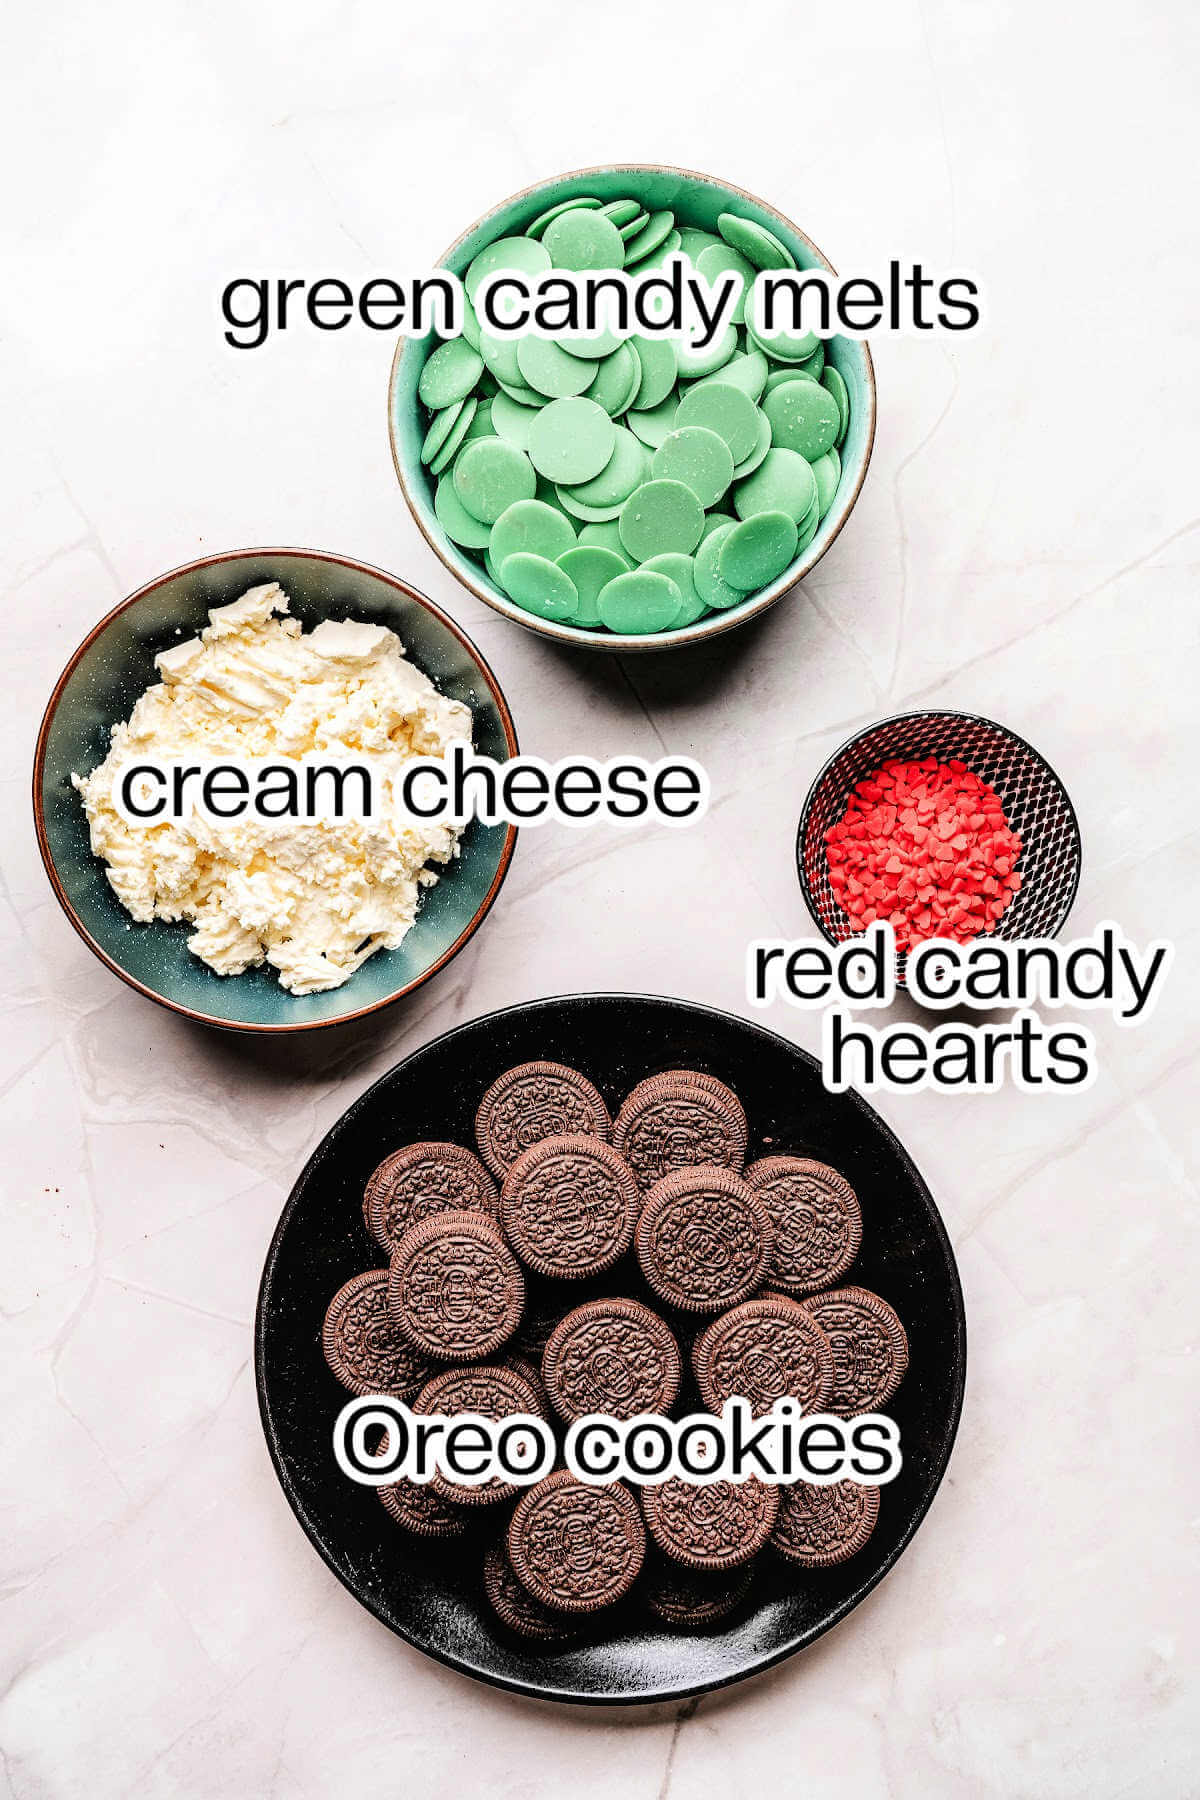
Ingredient Notes for Oreo Balls
- Red Velvet Oreo Cookies | These are the base of the truffle. They add a classic cookie-and-cream flavor that is seriously delicious. I used red velvet Oreos for the red color, but if you can’t find them, just use regular Oreos!
- Cream Cheese | Must be fully softened to room temperature to blend smoothly with the cookie crumbs for a moldable texture.
- Light Green Candy Melts | Used for the exterior coating. I chose green for the festive “Grinch green” color and a quick-setting, crunchy shell. You can also use red or a combination of the two.
- Red Candy Hearts | For a little bit of red color added to the top!
Variations and Substitutions
- Cookie options: Use regular, original Oreos for a classic black-and-white truffle, or peppermint Oreos for a minty truffle.
- Candy coating: Instead of candy melts, you can use almond bark or white chocolate melting wafers and add food coloring after melting.
- Coating colors: Change the candy melts to red or white for different Christmas themes! Or, change the colors based on the season. For Halloween, you can use orange, or for Easter, you can use blue!
- Dipping method: If you don’t have candy melts, you can coat them in a mixture of powdered sugar, milk, and vanilla for a classic “buckeye” style frosting. Just add food coloring to the mix, too!
- Toppings: Instead of hearts, try a sprinkle of red and green sanding sugar or crushed candy canes before the coating fully sets.
How to Make This Recipe for Oreo Balls
This recipe is so easy to put together; all you need is a food processor (or a bag and rolling pin) and a few mixing bowls!
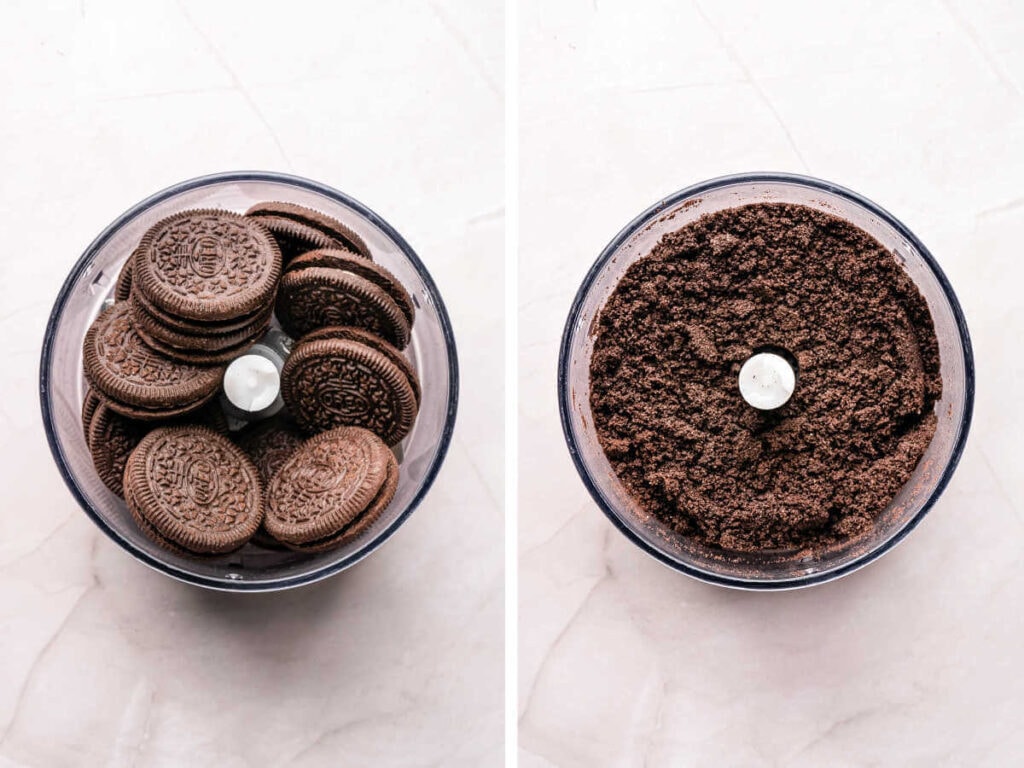
CRUSH THE OREOS. Place the Red Velvet Oreos into the food processor, and pulse until you have fine crumbs. (If you don’t have a food processor, you can put the Oreos in a ziplock bag and crush with a rolling pin, or use a blender.)
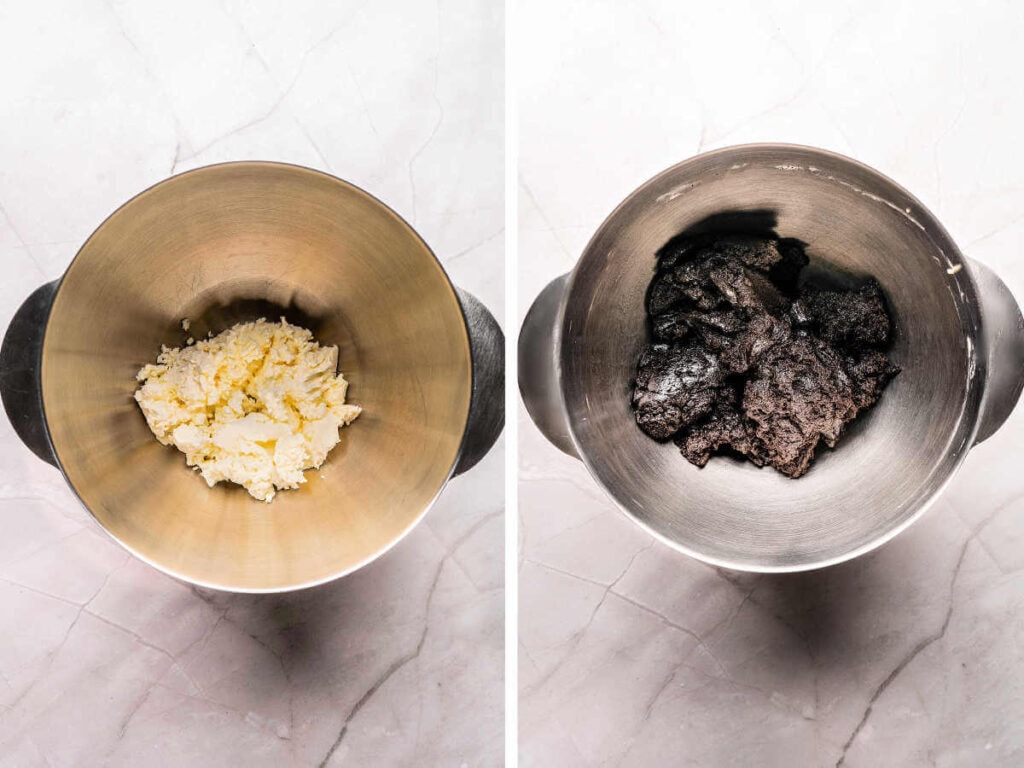
BEAT THE CREAM CHEESE & ADD OREO CRUMBS. In a large bowl, add the softened cream cheese and beat with an electric mixer on high until smooth. Add the Oreo crumbs to the cream cheese and mix until combined into a moist, moldable mixture.

ASSEMBLE THE BALLS. Using a small cookie scoop, portion out the mixture into 1.5-inch scoops. Roll each scoop with your hands to form smooth, round balls. Place them on the prepared baking sheet.
CHILL. Chill in the refrigerator for at least 2 hours to firm up. (If you’re short on time, you can place them in the freezer for about 30 minutes — but avoid freezing solid.)
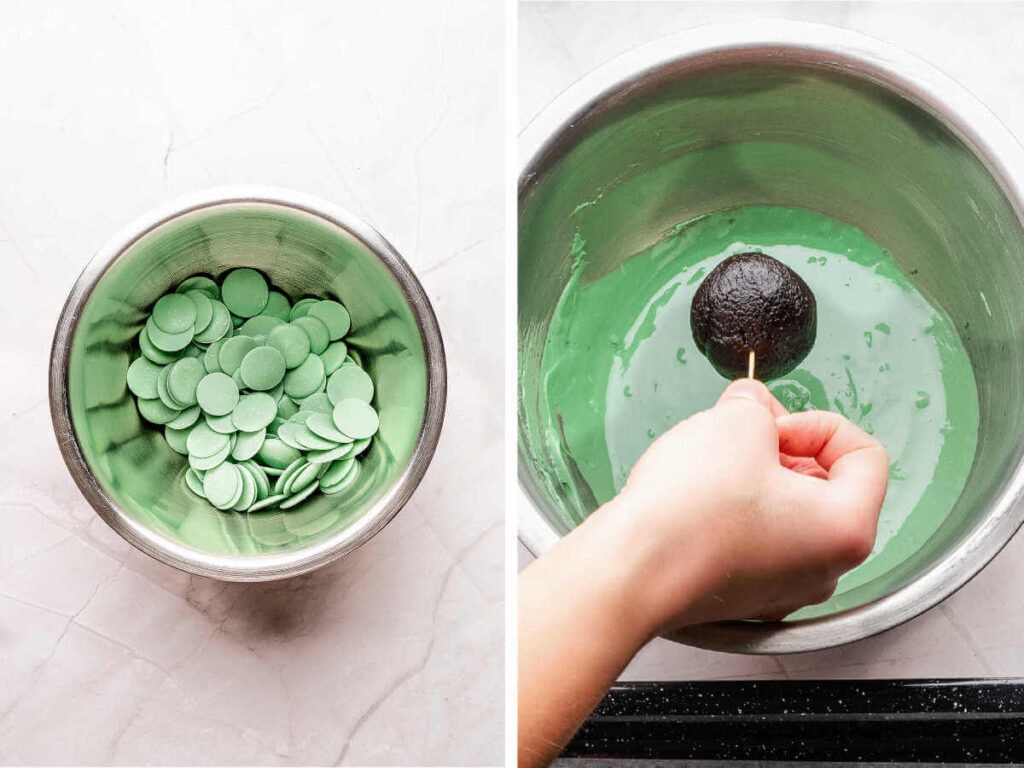
MELT THE CANDY MELTS. Melt the light green candy melts in a double boiler (or in the microwave in short bursts, stirring often) until smooth and lump-free. Be cautious about overheating, and ensure no water gets in, to prevent seizing. Optional: Reserve about ½ cup of the melted candy melts for drizzling later.
DIP EACH BALL INTO THE CANDY MELTS. Take each chilled Oreo ball and dip it into the melted “Grinch green” candy melt coating using a fork or toothpick. Tap off any excess chocolate so the coating looks neat. Return each dipped ball to the parchment-lined tray.
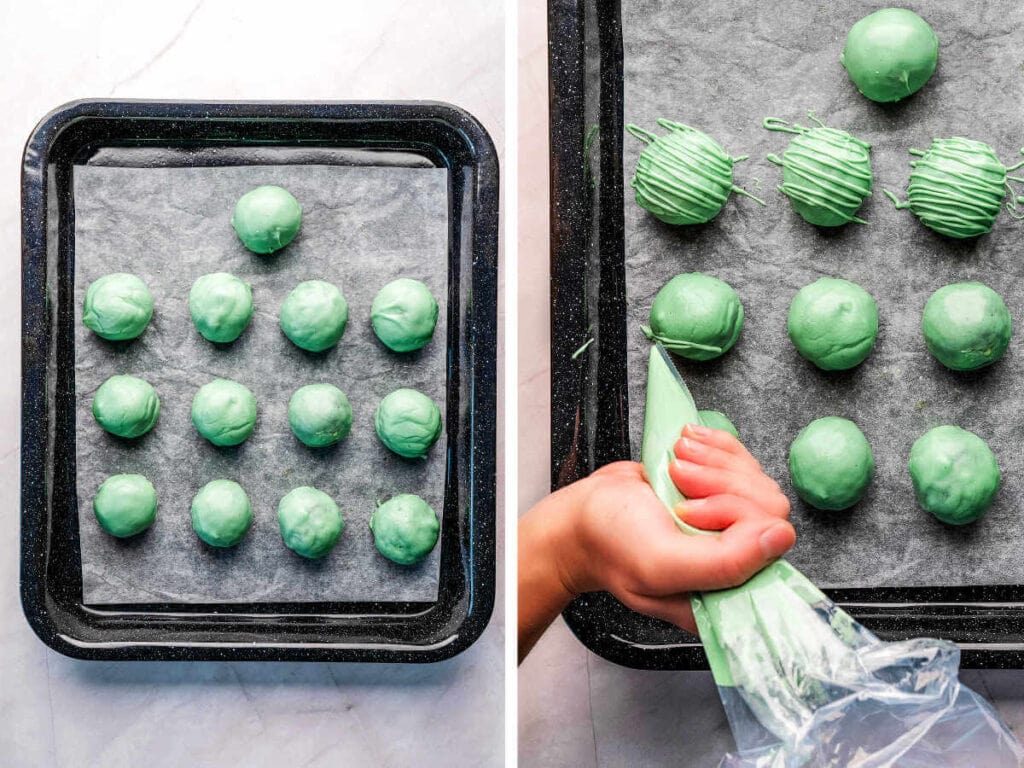
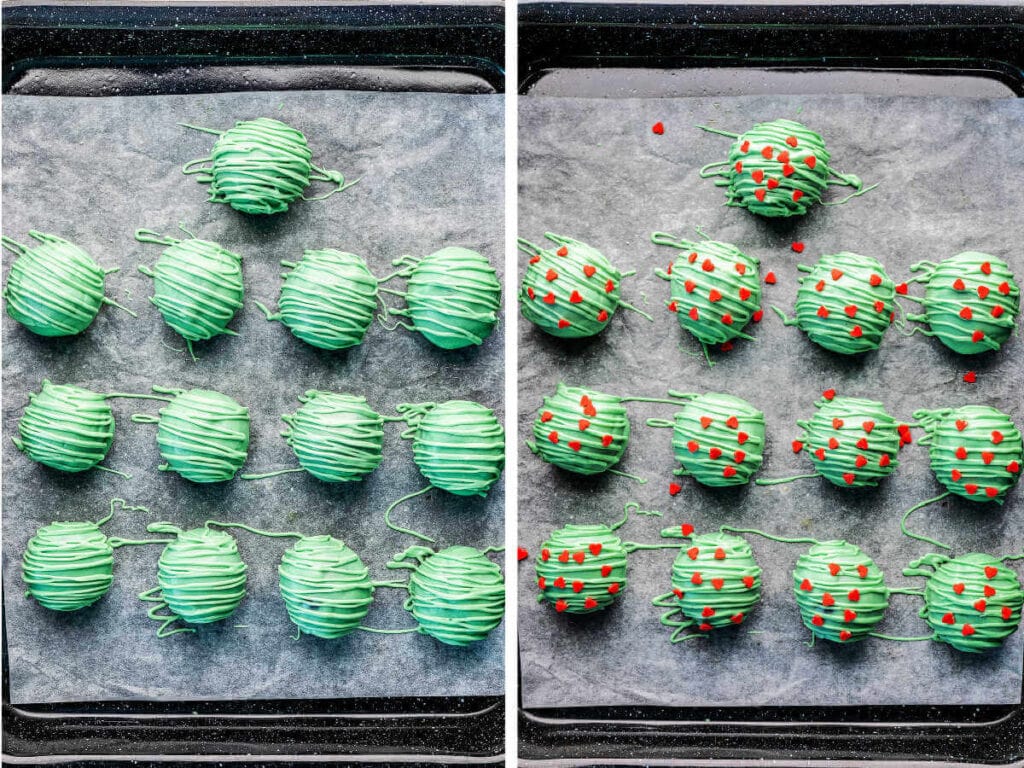
DECORATE. If using the reserved candy melts, drizzle over the coated balls once the coating has set a little. Or use a piping bag with a small opening for neater drizzles. Immediately press a red candy heart on top of each ball while the coating is still soft.
CHILL AGAIN. After decorating, return the tray with the Oreo balls to the refrigerator so the candy shell can fully set.

More Recipe Success Tips

Storage Tips
- To store: Store finished Grinch Oreo balls in an airtight container in the refrigerator. They will stay fresh and delicious for up to one week.
- To freeze (Undipped): You can freeze the undipped Oreo balls for up to 3 months. Place the balls on a parchment-lined tray until solid, then transfer them to a freezer bag. Thaw them in the refrigerator before coating and decorating.
- To freeze (Dipped): Freezing the finished, dipped Christmas Oreo balls is possible, but they must be thawed very slowly in the refrigerator to prevent condensation from spotting the candy coating.
Frequently Asked Questions
Yes, Christmas Oreo balls need to be refrigerated. This is due to the main ingredient holding them together: cream cheese. Because cream cheese is a dairy product, it must be stored in the fridge to prevent spoiling!
Unfortunately, seized candy melts (where they turn hard and lumpy) are difficult to recover. This usually happens from overheating or contact with water. Melt slowly and carefully next time!
The most common reason for sticky Oreo balls is that they weren’t chilled long enough before dipping, which causes the soft filling to become tacky. A second major cause is condensation. If you take the very cold balls directly from the freezer and dip them, moisture forms on the surface, making them sticky and ruining the candy coating. Ensure the balls are cold but not frozen solid, and minimize their time out of the fridge before coating.


Looking for More Grinch-Inspired Recipes?
To keep the Christmas theme going, I have a few other simple, festive favorites you should try next. Whip up a batch of my swirled Christmas pinwheel cookies for a stunning baked treat, or try white chocolate peppermint bark. For a melt-in-your-mouth cookie that’s easy to make, sand tart cookies are always a winner.
What to Serve With Oreo Balls
These festive Oreo balls can be served on their own for dessert at holiday parties, or served with a few other holiday desserts like my cranberry bliss bars and my white chocolate peppermint cookies!
They would also go amazingly with a peppermint mocha or some spiced apple cider!

Love this recipe? Bookmark it for the future!
Simply tap the heart symbol in the lower-right corner of your screen, and the recipe will be securely stored in your own recipe box.

Christmas Oreo Balls
Ingredients
- 44 Red Velvet Oreo cookies
- 8 oz. cream cheese softened to room temperature
- 15 oz. light green candy melts
- Red candy hearts for topping
Instructions
Prep Work
- Line a large baking sheet with parchment paper; set aside.
- Gather your tools: you’ll need a food processor (or alternative for crushing the cookies), a mixing bowl and electric mixer, and a cookie scoop (about 1.5-inch) for forming the balls.
Crush & Blend
- Place the Red Velvet Oreos into the food processor, and pulse until you have fine crumbs. (If you don’t have a food processor, you can put the Oreos in a ziplock bag and crush with a rolling pin, or use a blender.)
- In a large bowl, add the softened cream cheese and beat with an electric mixer on high until smooth.
- Add the Oreo crumbs to the cream cheese, and mix until the two combine to form a moist, moldable mixture.
Form & Chill the Balls
- Using the cookie scoop, portion out the mixture into 1.5-inch scoops. Roll each scoop with your hands to form smooth, round balls. Place them on the prepared baking sheet.
- Chill in the refrigerator for at least 2 hours to firm up. (If you’re short on time, you can place them in the freezer for about 30 minutes — but avoid freezing solid.)
Melt & Coat
- Melt the light green candy melts using a double boiler (or microwave in short bursts, stirring often), making sure they’re smooth and free of lumps. Be cautious about overheating, and ensure no water gets in, to prevent seizing.
- Optional: Reserve about ½ cup of the melted candy melts for drizzling later.
Dip & Decorate
- Take each chilled Oreo ball, dip it using a fork or toothpick into the melted “Grinch green” candy melt coating. Tap off any excess chocolate so the coating looks neat. Return each dipped ball to the parchment-lined tray.
- If using the reserved candy melts, drizzle over the coated balls once the coating has set a little. Or use a piping bag with a small opening for neater drizzles.
- Immediately press a red candy heart on top of each ball while the coating is still soft.
Final Setting & Storage
- After decorating, place the tray with the Oreo balls back in the refrigerator so the candy shell can fully set.
- Store finished Grinch Oreo Balls in an airtight container in the fridge; they should stay good for up to one week.
- You can also freeze them before dipping (for up to three months). Once you’re ready, thaw in the refrigerator, then continue with coating and decorating.
Notes
- Fully soften the cream cheese. If the cream cheese is cold, it won’t blend evenly, leaving you with lumps that make it impossible to form smooth balls!
- Crumb finely and mix thoroughly. Use a food processor to crush the cookies into a very fine, sand-like texture. When you mix the crumbs with the cream cheese, blend it until the entire mixture is uniform and dark red/brown, and feels moist and moldable.
- Don’t skip the chill time! Chilling for at least 2 hours (or 30 minutes in the freezer) is crucial. Cold balls hold their shape better, don’t melt the coating, and are much easier to dip cleanly without crumbling.
- Keep the Oreo mixture cool. Dip only a few chilled balls at a time, keeping the rest in the refrigerator. Use a fork instead of a toothpick to make release easier and keep the coating thin and smooth.
- Be gentle with the candy melts. Use low, steady heat (like the double-boiler method) and stir frequently. Avoid getting any water into the melts, as even a drop can cause them to seize up and become unusable.
- To store: Store finished Grinch Oreo balls in an airtight container in the refrigerator. They will stay fresh and delicious for up to one week.
- To freeze (Undipped): You can freeze the undipped Oreo balls for up to 3 months. Place the balls on a parchment-lined tray until solid, then transfer them to a freezer bag. Thaw them in the refrigerator before coating and decorating.
- To freeze (Dipped): Freezing the finished, dipped Christmas Oreo balls is possible, but they must be thawed very slowly in the refrigerator to prevent condensation from spotting the candy coating.
Nutrition
Life Love and Good Food does not claim to be a registered dietician or nutritionist. Nutritional information shared on this site is only an estimate. We recommend running the ingredients through an online nutritional calculator if you need to verify any information.