Making Apple Pie From Scratch
This post may contain affiliate links. Please read my disclosure policy.
My homemade dough comes together in just 30 minutes!
Apple pie from scratch may seem intimidating, but anyone can make one with this recipe! Learn my secrets, plus tips to pick good apples for pie.
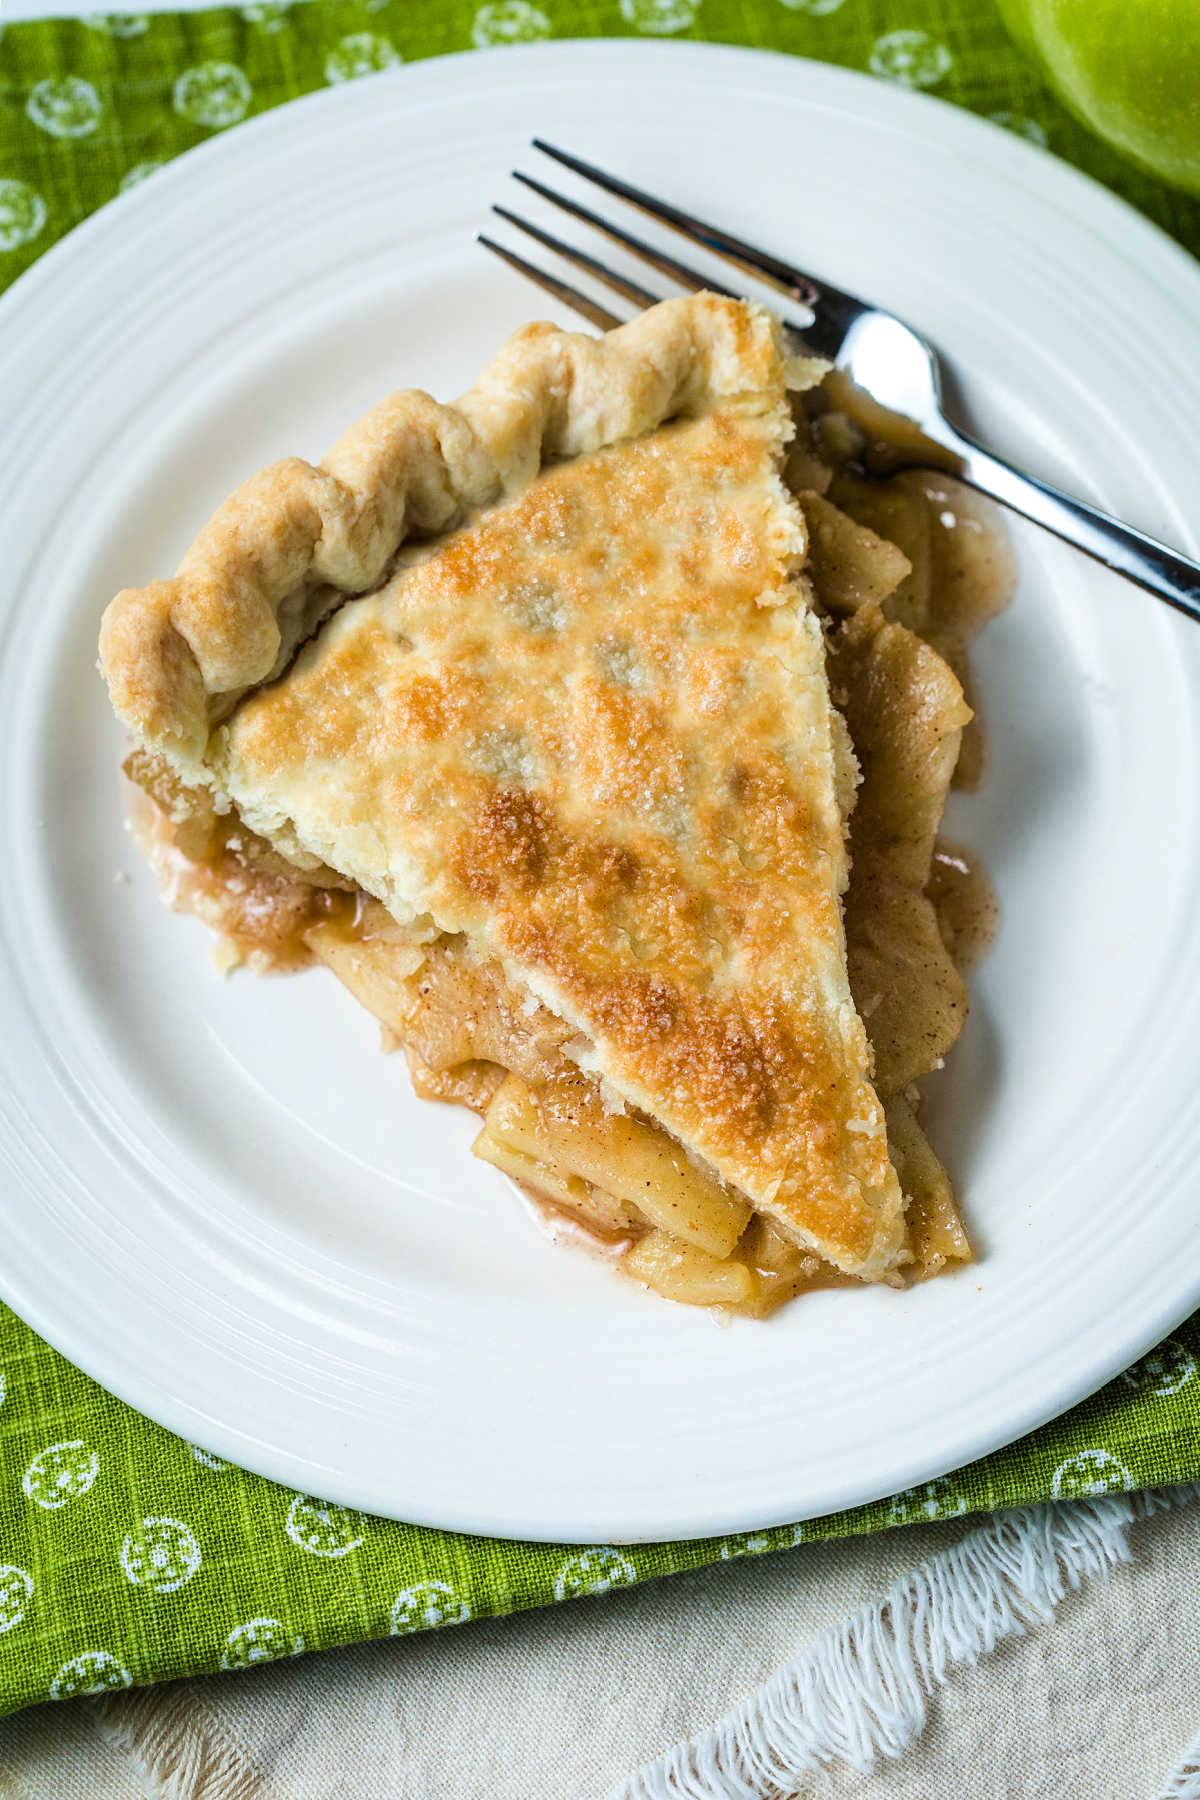
Sweet, spiced filling between layers of flaky golden brown crust brings back years of family memories with each and every bite.
For a delicious twist on this apple pie from scratch, try adding a crumble topping! The filling recipe is a bit different to offset the added sweetness, so pay close attention to the ingredient amounts listed.
I also have a rustic apple tart that tastes as good as it looks. The secret to a shiny finish is brushing melted apricot preserves over the top as soon as it is out of the oven. Adds extra sweetness too!
Key ingredients & substitutions for apple pie from scratch
- Flaky dough — My homemade recipe is so easy to make — just mix it up in a food processor, chill for 30 minutes, and it’s ready to roll out! If you’re short on time, you can use a package of refrigerated crusts instead.
- Apples — The natural tartness of Granny Smith helps to balance all of the other sweet ingredients. Choose fruit that is bright green in color, firm to the touch, and free of any bruises or holes.
- Sugar — I like to use a blend of white and brown sugars to get a touch of caramel flavor in the filling.
- Almond extract — This is my secret ingredient when making apple pie from scratch, and it really does make a difference! Imitation can be used if nut allergies are a concern.
tip
- While the process is simple, there are a few tricks to creating a perfectly flaky crust. You can find detailed instructions in this post.
How to make homemade apple pie
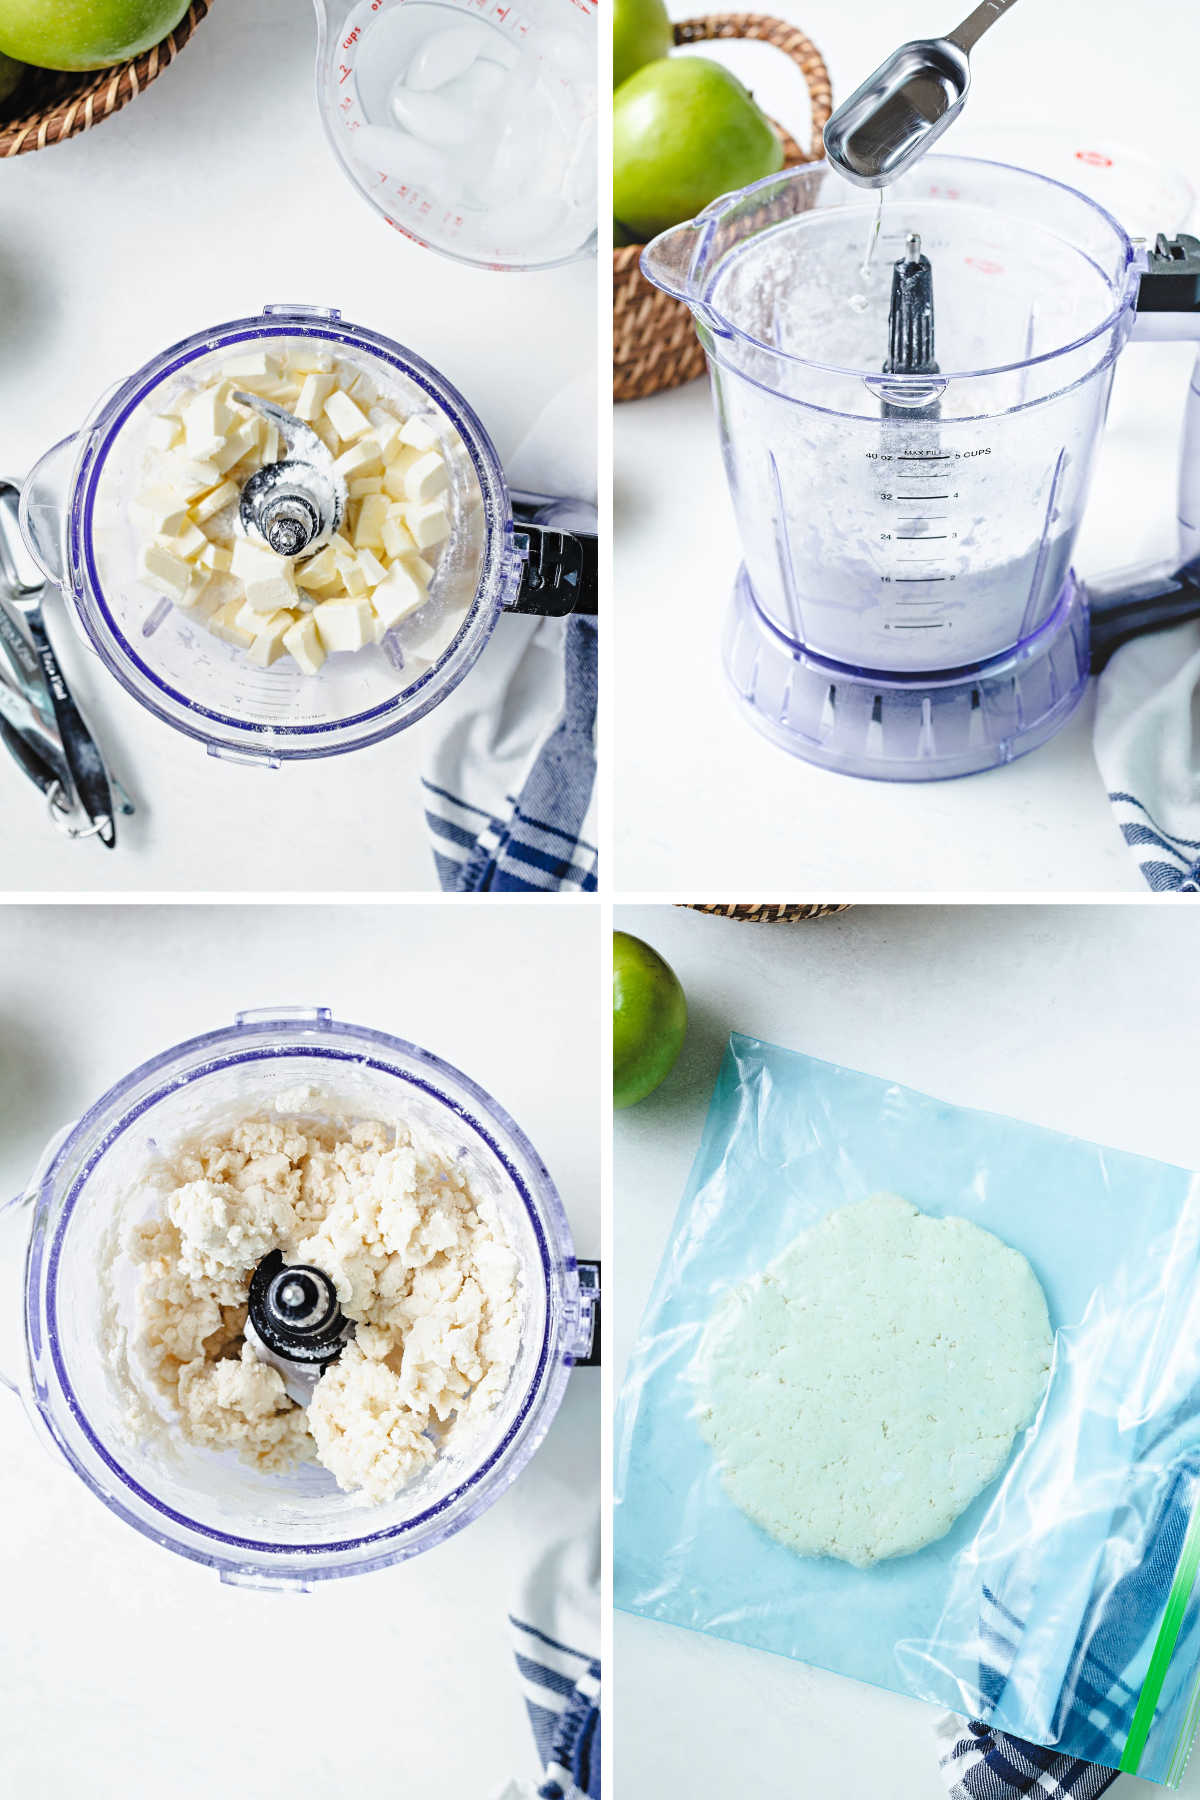
STEP 1 | Mix dough for the crust
Combine the ingredients in a food processor, but make sure the butter and water are extra cold – that’s what creates flaky layers in the crust.
Once it comes together, empty the dough into a resealable plastic bag and shape into a disc. Let it chill in the refrigerator for at least 30 minutes.
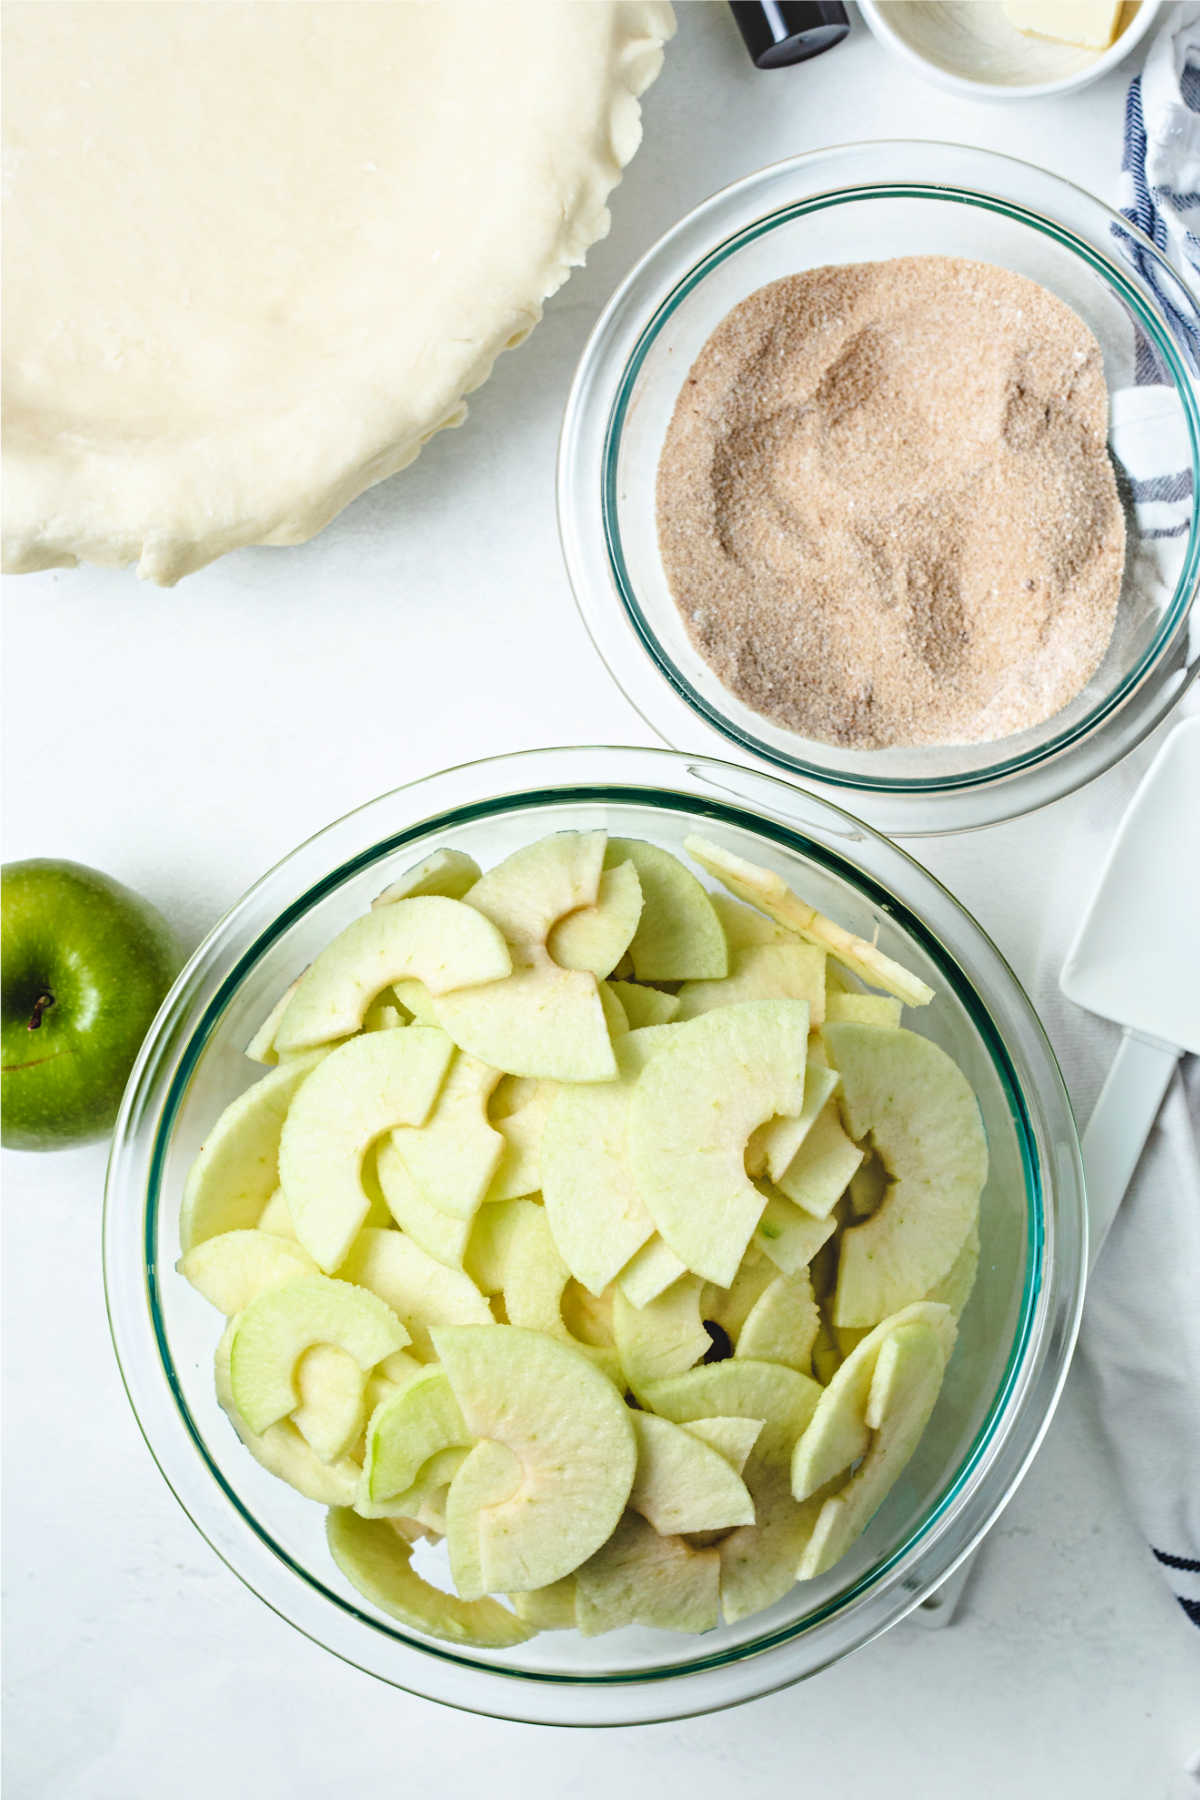
STEP 2 | Prep the apples
If you’ll be slicing the fruit by hand, keep the slices as close to the same thickness as possible for even baking. Then, toss them with sugar, flour, and spices until well coated.
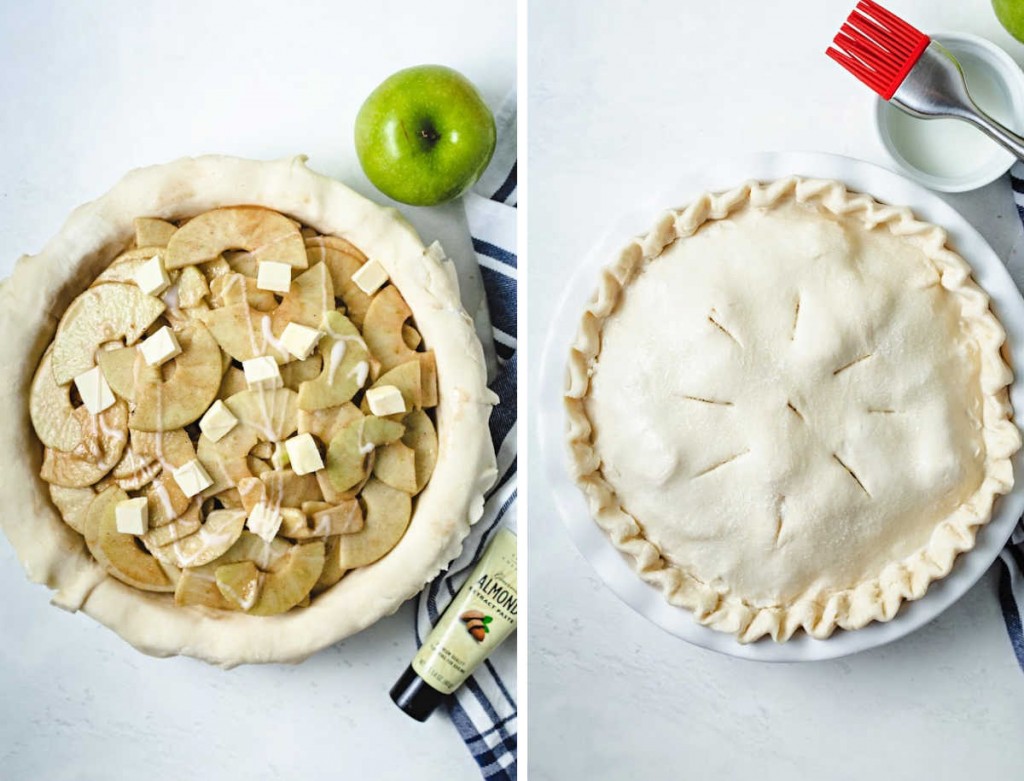
STEP 3 | Assemble the pie
Divide the dough and roll it out before pressing the bottom round into your dish. Add the filling, then sprinkle almond extract and a few small cubes of butter over the top.
Seal it up with the remaining dough, then add vents as needed for the steam to escape.
STEP 4 | Bake
In the oven it goes for about an hour at 375 degrees. Start it on the lowest rack so the bottom is properly browned, then move it to the center rack after a few minutes.
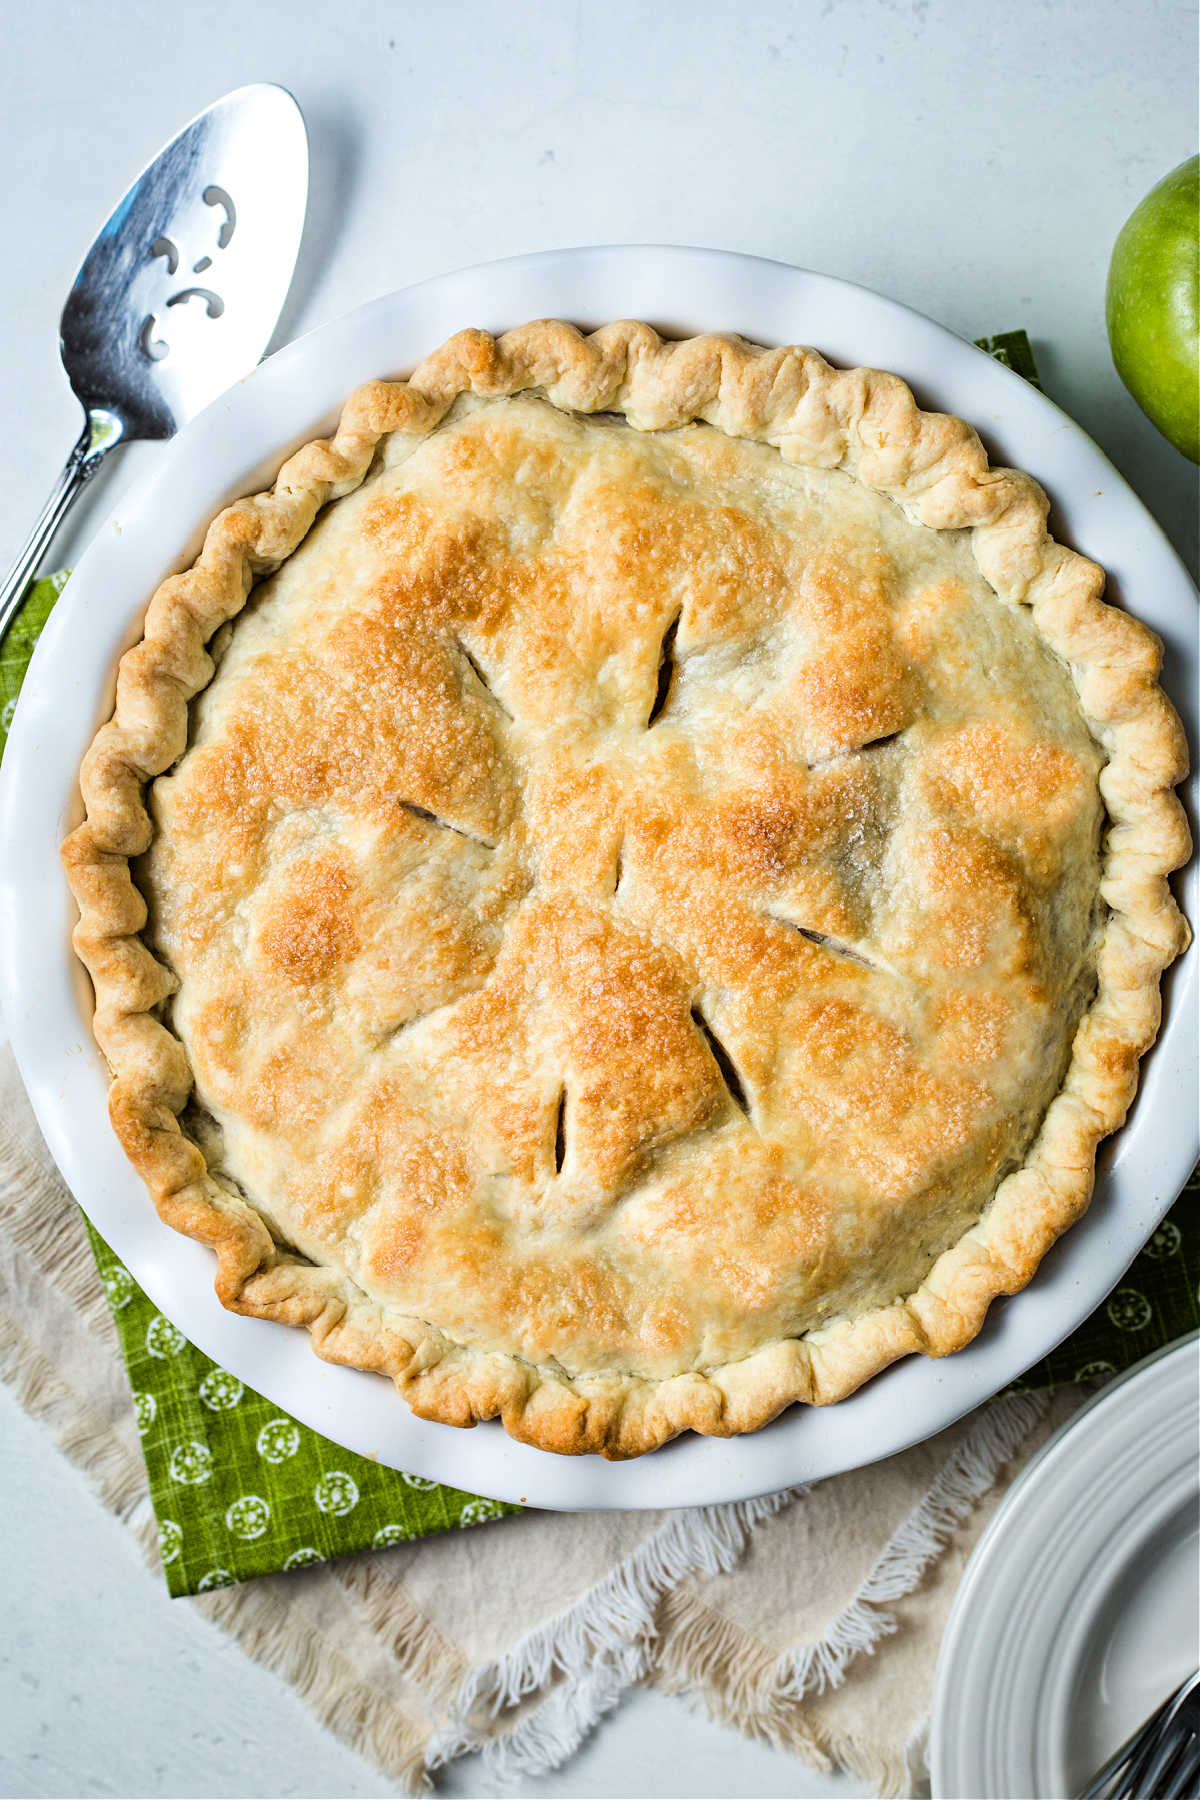
Once the top is golden brown with filling bubbling through the vents and the bottom no longer appears wet in the center, it’s done!
tips
- Pile up the fruit slices nice and high since they will shrink as the dessert bakes. If needed, slice up one last apple to throw on top so it’s really mounded up.
- Brushing the top crust with a little milk or cream and sprinkling with sugar results in a beautiful golden crust.
- A clear baking dish will allow you to easily check the bottom to ensure the crust is properly baked.
- Place a baking sheet lined with foil on the rack below the dessert to prevent spills along the bottom of your oven.
Frequently asked questions
Most recipes use tart varieties like Granny Smith, Pink Lady, or Northern Spy so the pie filling isn’t overly sweet. Honeycrisp is another popular choice, along with Braeburn and Jonagold.
While flavors really come down to preference, it’s important to choose a variety that will hold its shape when baked. If you prefer the milder flavor of McIntosh or Golden Delicious apples, combine them with a firmer variety like one of the ones listed above.
You sure can! Store sealed rounds in the refrigerator for up to 3 days or in the freezer for up to 6 months. In fact, you can create a double or triple batch to freeze so you always have fresh dough on hand for last minute desserts.
Simply move the dessert down a rack and cover the top with foil so it doesn’t burn. Check it again after about 5-10 minutes and go from there.
Serving suggestions
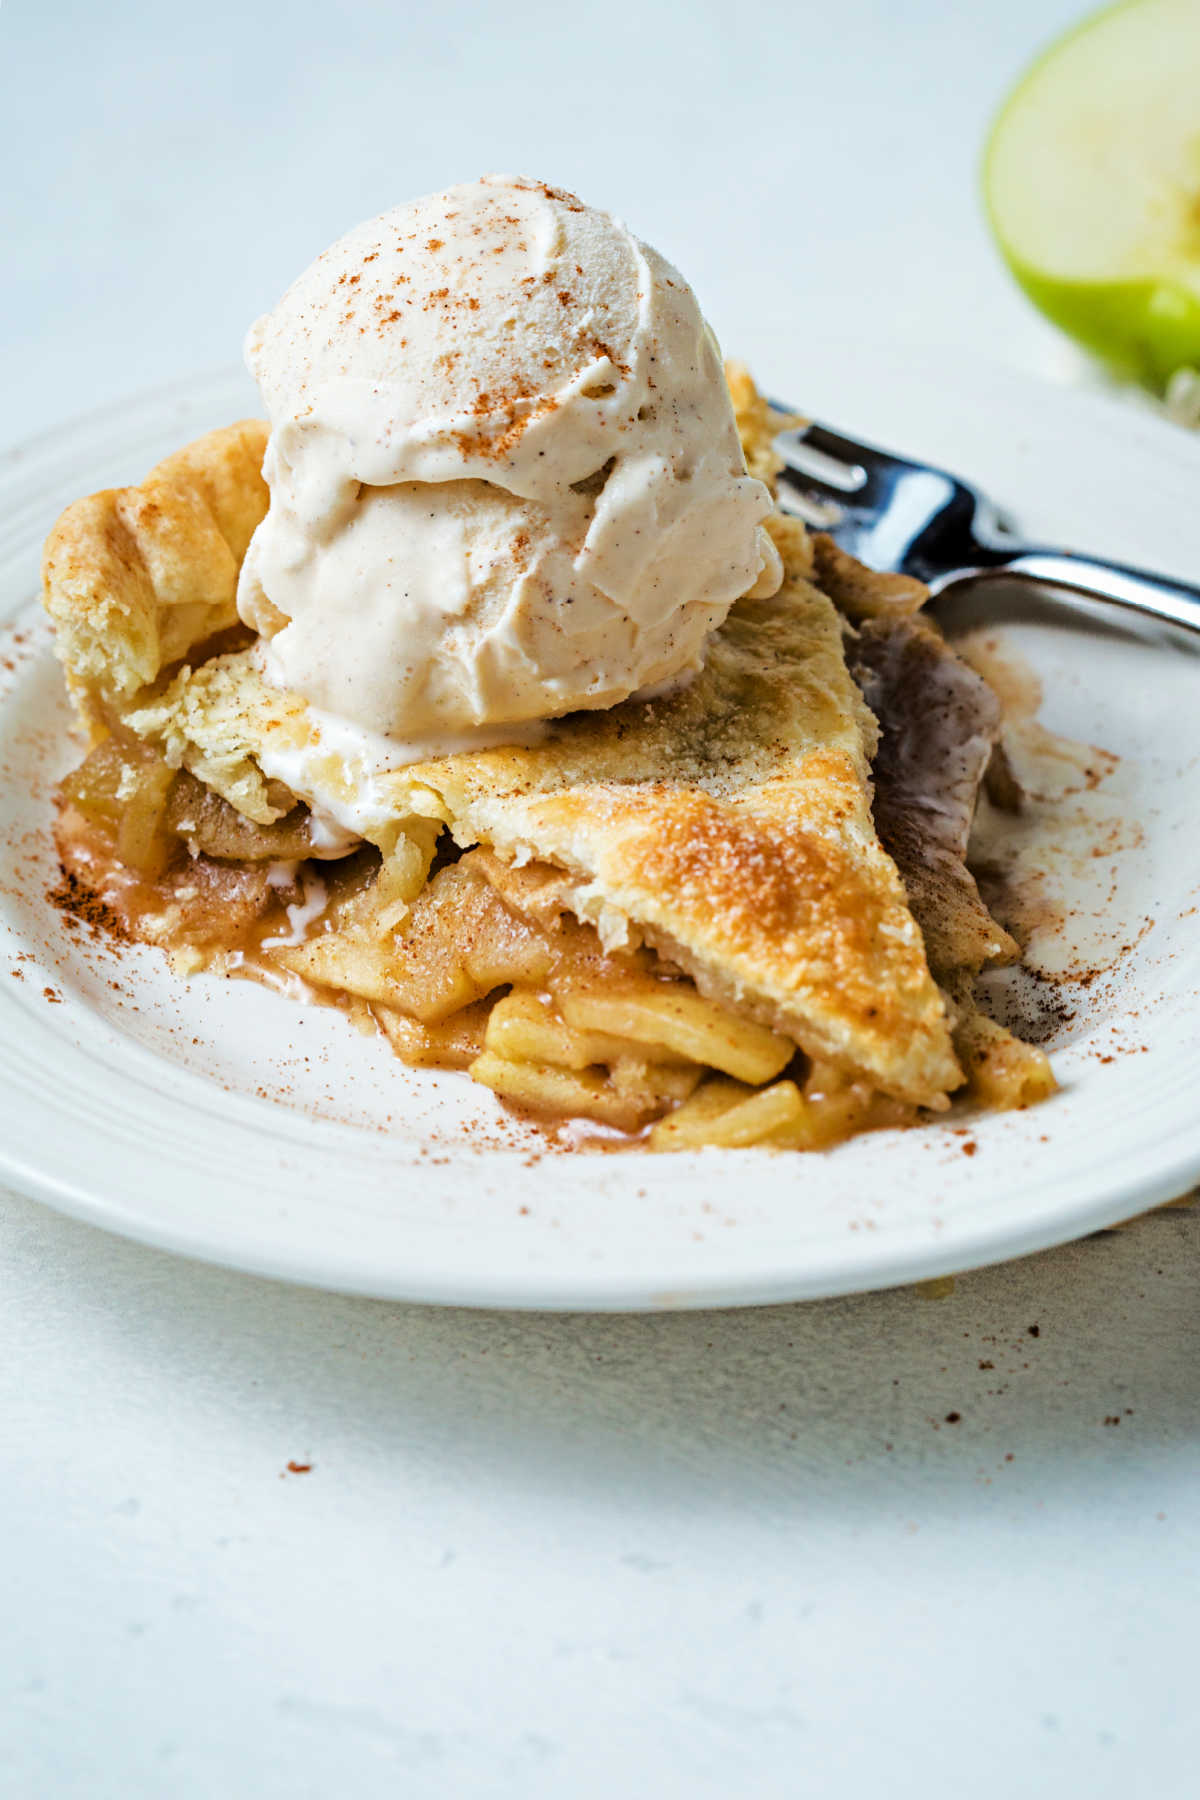
This is best served warm, especially with a scoop of vanilla bean ice cream or a drizzle of caramel sauce!
Don’t slice into it straight out of the oven, though — let it cool for about an hour first so the filling can set. Otherwise, it will spill out all over the plate when sliced.
Recipe inspiration
Our family laughed a lot this past weekend remembering how Apple Pie became my daughter’s traditional birthday dessert.
Back then, I’d never made a “real” pie before — one with a real crust and real fruit — but I saw the Apple-Peeler-Corer-Slicer demonstrated at a Pampered Chef party, ordered one, and baked my first apple pie twenty years ago. My family — especially Allison — loved it!
Allison began requesting apple pie instead of birthday cake, so the tradition began. Those first pies were made using the recipe included with the Pampered Chef Deep Dish Baker and were made with refrigerated pie crusts.
My original baking dish broke long ago, but the apple-peeler-corer-slicer is still going strong. I don’t think I’d ever have made an apple pie if I hadn’t bought this gadget. You can peel, core, and slice enough apples for a pie in no time!
Making Apple Pie From Scratch
Ingredients
Flaky Pie Dough (single crust)
- 1 ¼ cups all-purpose flour
- ¼ teaspoon kosher salt
- ½ teaspoon granulated sugar
- 7 tablespoons cold unsalted butter cut into cubes
- 5 tablespoons ice water
Apple Pie
- 5 Granny Smith apples peeled, cored, and thinly sliced
- ½ cup brown sugar
- ¼ cup granulated sugar
- 2 tablespoons flour
- ½ teaspoon cinnamon
- ⅛ teaspoon nutmeg
- ⅛ teaspoon salt
- ½ teaspoon almond extract
- 1 ½ tablespoons butter
- 1 ½ tablespoons milk or cream
- 2 teaspoons granulated sugar
Instructions
Flaky Pie Dough
- Add the flour, salt, and sugar to the bowl of a food processor. Pulse for just a second to combine.
- Sprinkle the butter over the top and pulse for 2 to 3 seconds to to break up the pieces of butter.
- Sprinkle the ice water on top and process just until the flour is moistened and the dough starts to come together—do not over mix.
- Empty the dough into a large lock-top plastic bag, seal, then press into a flat disc. Chill the dough for at least 30 minutes before using.
- **Repeat this process to make a second disc (for the double crust pie).
Apple Pie
- Preheat the oven to 375 degrees. Peel, core and slice the apples and place in a large bowl.
- Combine the sugars, flour, cinnamon, nutmeg, and salt. Sprinkle over apples and toss gently to cover every slice.
- Remove pie dough from the refrigerator and roll one disc into a 14-inch circle. Carefully place in the bottom and up the sides of a 9-inch deep dish pie plate.
- Pile the apple slices on top of the dough. Sprinkle the almond extract on top and dot with butter (cut into small pieces).
- Roll out the second pie dough disc to about 13-inches and place on top. Seal and flute the crusts, trimming any excess. Cut 4 to 5 small slits in the top crust to allow steam to escape.
- Brush the top crust with the milk and sprinkle evenly with 2 teaspoons granulated sugar. Bake for 50-60 minutes, or until crust is golden brown. Cool completely before slicing.
Notes
- Pile up the fruit slices nice and high since they will shrink as the dessert bakes. If needed, slice up one last apple to throw on top so it’s really mounded up.
- Brushing the top crust with a little milk or cream and sprinkling with sugar results in a beautiful golden crust.
- A clear baking dish will allow you to easily check the bottom to ensure the crust is properly baked.
- Place a baking sheet lined with foil on the rack below the dessert to prevent spills along the bottom of your oven.
Nutrition
Life Love and Good Food does not claim to be a registered dietician or nutritionist. Nutritional information shared on this site is only an estimate. We recommend running the ingredients through an online nutritional calculator if you need to verify any information.







Loved this post, I think I became a Pampered Chef rep back in the day because of that apple, peeler, corer slicer! Brilliant machine! Love this pie, cannot wait to make it!
Is there anything more American than Apple Pie?! This recipe was apple pie PERFECTION and we enjoyed every last crumb of it!