Smoked Boston Butt (Electric Smoker BBQ Pulled Pork)
This post may contain affiliate links. Please read my disclosure policy.
For tender, flavorful Smoked Boston Butt (BBQ pulled pork), it all starts with a good cut of meat and a little patience. Simply coat it in my savory homemade dry rub and cook it low and slow in an electric smoker. The result? Juicy, melt-in-your-mouth pulled pork that’s worth the wait.
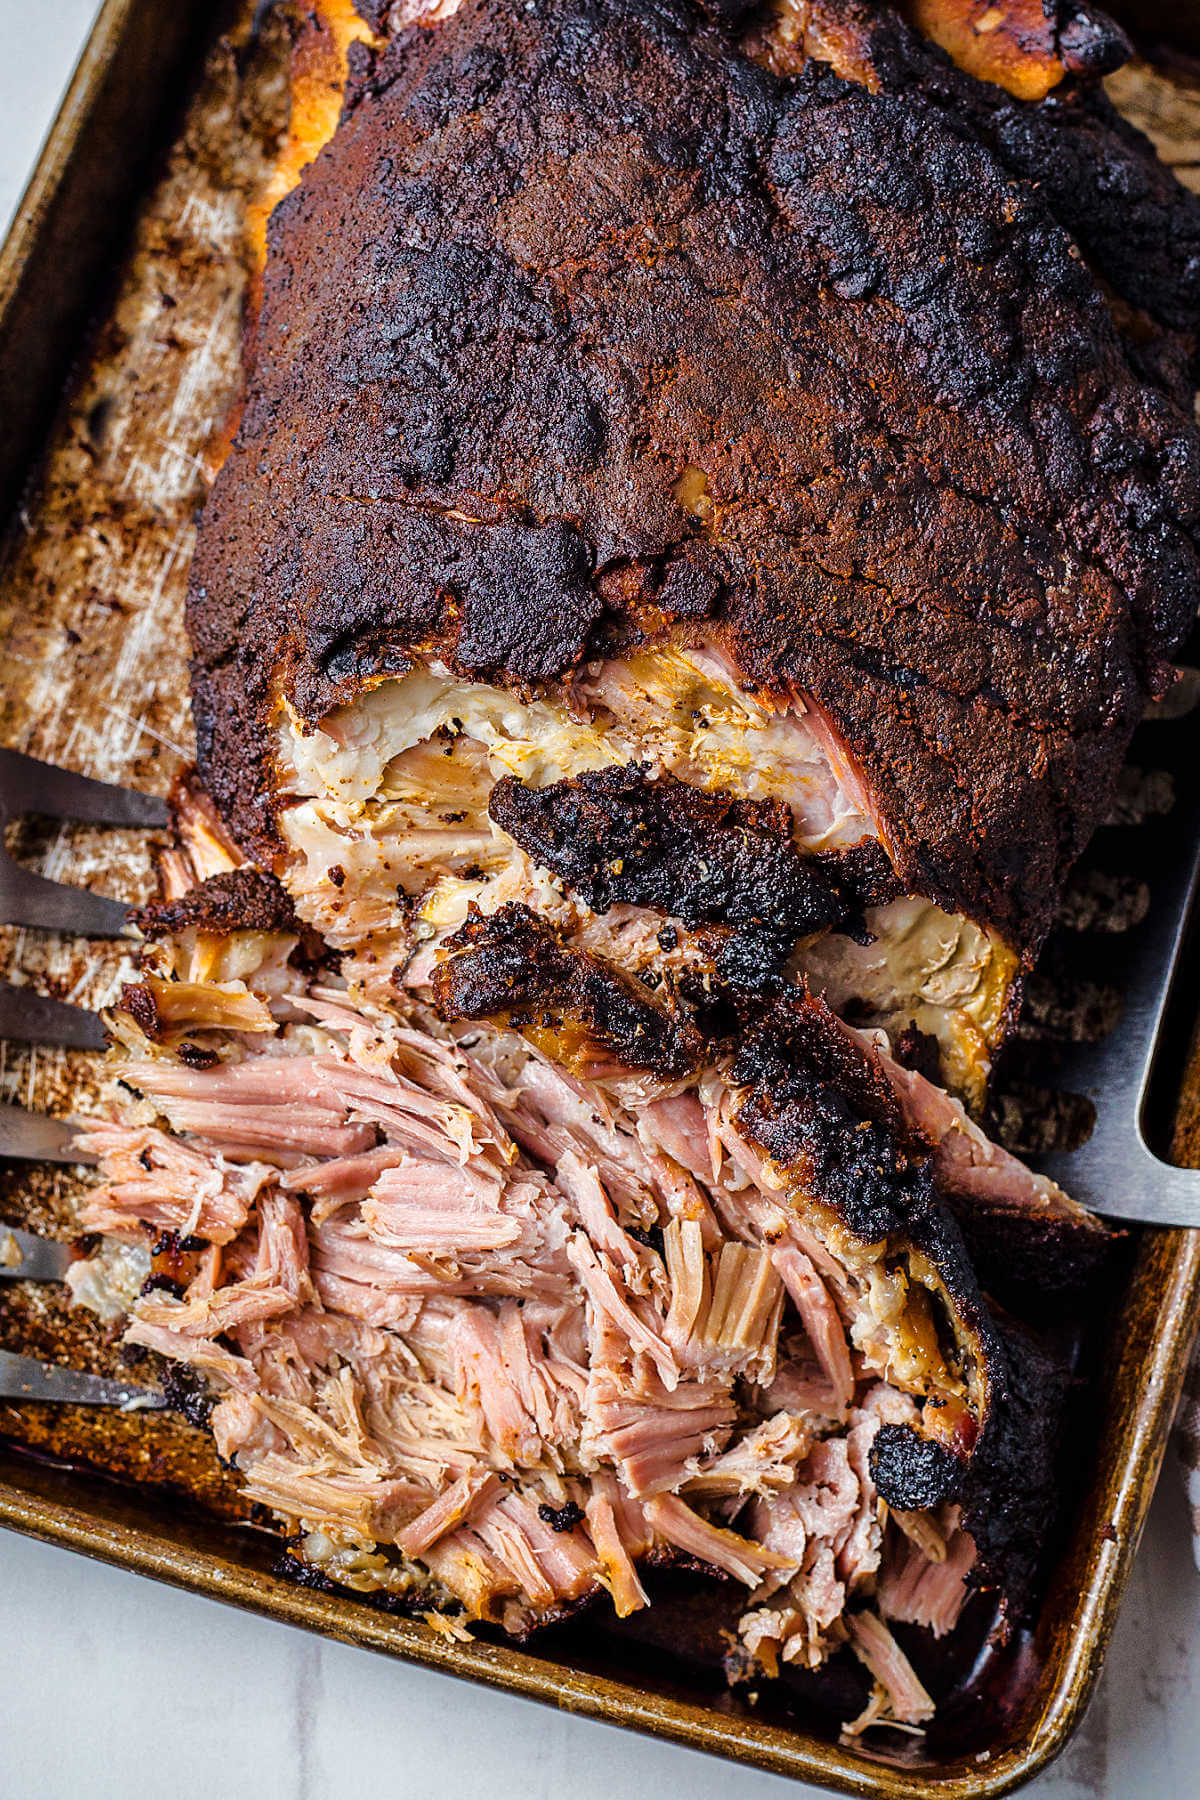
BBQ pulled pork embodies classic Southern cuisine and is perfect for any occasion where people gather to enjoy delicious food. Whether you’re hosting a casual backyard barbecue, tailgating with friends, or having a big family reunion, pulled pork is a crowd-pleaser that never disappoints.
While my go-to for feeding a crowd is a Boston pork butt, don’t sweat it if you can’t find one. This easy recipe works just as well for smoking a pork shoulder (or picnic roast) with the same great results.
For a distinctively delicious sandwich, serve this tender shredded pork on soft buns and top it off with crunchy coleslaw, my favorite barbecue sauce, and your favorite sweet pickles or these fire and ice pickles. Together, the flavors and textures are so mouthwatering you won’t be able to resist going back for seconds … or thirds!
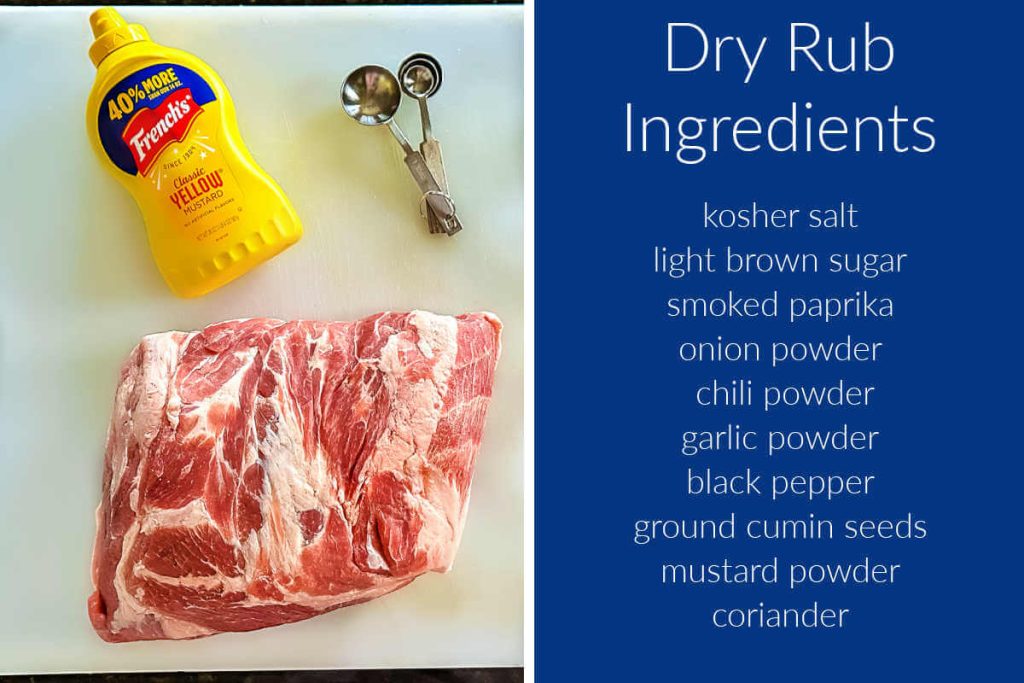
Ingredient Notes
- Pork — Start with a fresh, 8 to 10-pound Boston Butt, pork shoulder roast, or picnic shoulder. Look for meat that is deep red with a lot of marbling. If the meat is frozen, be sure to allow plenty of time to completely thaw the meat in the refrigerator before starting the smoking process.
- Yellow mustard — You’ll use yellow mustard as a base coat for the dry rub to adhere to on the pork. If you prefer, you may use olive oil instead.
- Brown sugar — Brown sugar not only helps balance out the spicy flavors in the dry rub, but also caramelizes and aids in creating a flavorful, slightly sweet bark on the meat.
- Smoked paprika — A common ingredient in many dry rubs, paprika adds a smoky flavor and deep reddish color.
- Garlic powder and onion powder — Adds a savory flavor to the dry rub.
- Chili powder and cumin — For a little spicy heat and added complexity to the rub.
- Coriander — For a slightly citrusy flavor and peppery taste.
- Kosher salt — Salt enhances the meat’s flavor and helps tenderize it.
- Black pepper — Adds a spicy and pungent flavor to the rub.
Equipment Needed
- Electric smoker — We own a Masterbilt smoker so that’s what I have experience with, but you can definitely use this recipe with a pellet grill, too.
- Smoking wood chips — Use either all apple or cherry wood, or a mixture of the two.
- Disposable food safe gloves — for handling the meat
- Digital probe meat thermometer — a digital thermometer will take the guesswork out of whether the pork roast is done. According to the USDA, the minimum safe temperature for pork ribs is 145 degrees.
- Disposable aluminum foil pans — Deep roasting pans are best
- Meat claws or heat-resistant BBQ gloves — You’ll need one of these options for pulling the cooked meat.
- Squeeze bottles — These work really well for serving BBQ sauce!
What is a Boston Butt?
Contrary to popular belief, the pork butt — also known as Boston butt — is not derived from the pig’s hindquarters but rather from its front legs. More specifically, it is sourced from the upper shoulder area behind the pig’s head, whereas the picnic shoulder is obtained from the section below the pork butt.
One of the primary distinctions between the two cuts is that the pork butt contains a significant amount of marbled intramuscular fat, which is less worked and, as a result, less tough compared to the picnic shoulder. This quality makes it an excellent cut of meat for smoking.
Before You Get Started: Clean and Pre-Season
If this is your maiden smoking adventure, cleaning and pre-seasoning the electric smoker before you begin cooking is important to remove any leftover paint, oil, or dust leftover from manufacturing. Wash the interior walls, racks, and water pan with warm, soapy water and rinse well.
Let the interior of the smoker air dry, then proceed with pre-seasoning (also known as curing) the smoker. Get complete details on pre-seasoning your smoker over at my smoked ribs recipe.
How to make Perfectly Smoked Boston Pork Butt
The first rule is don’t get in a hurry! Smoking a Boston butt can take as much as 12 to 15 hours, depending on the size of the cut. You’ll want to plan ahead and allow enough time for the smoking process plus up to 2 additional hours for resting time.
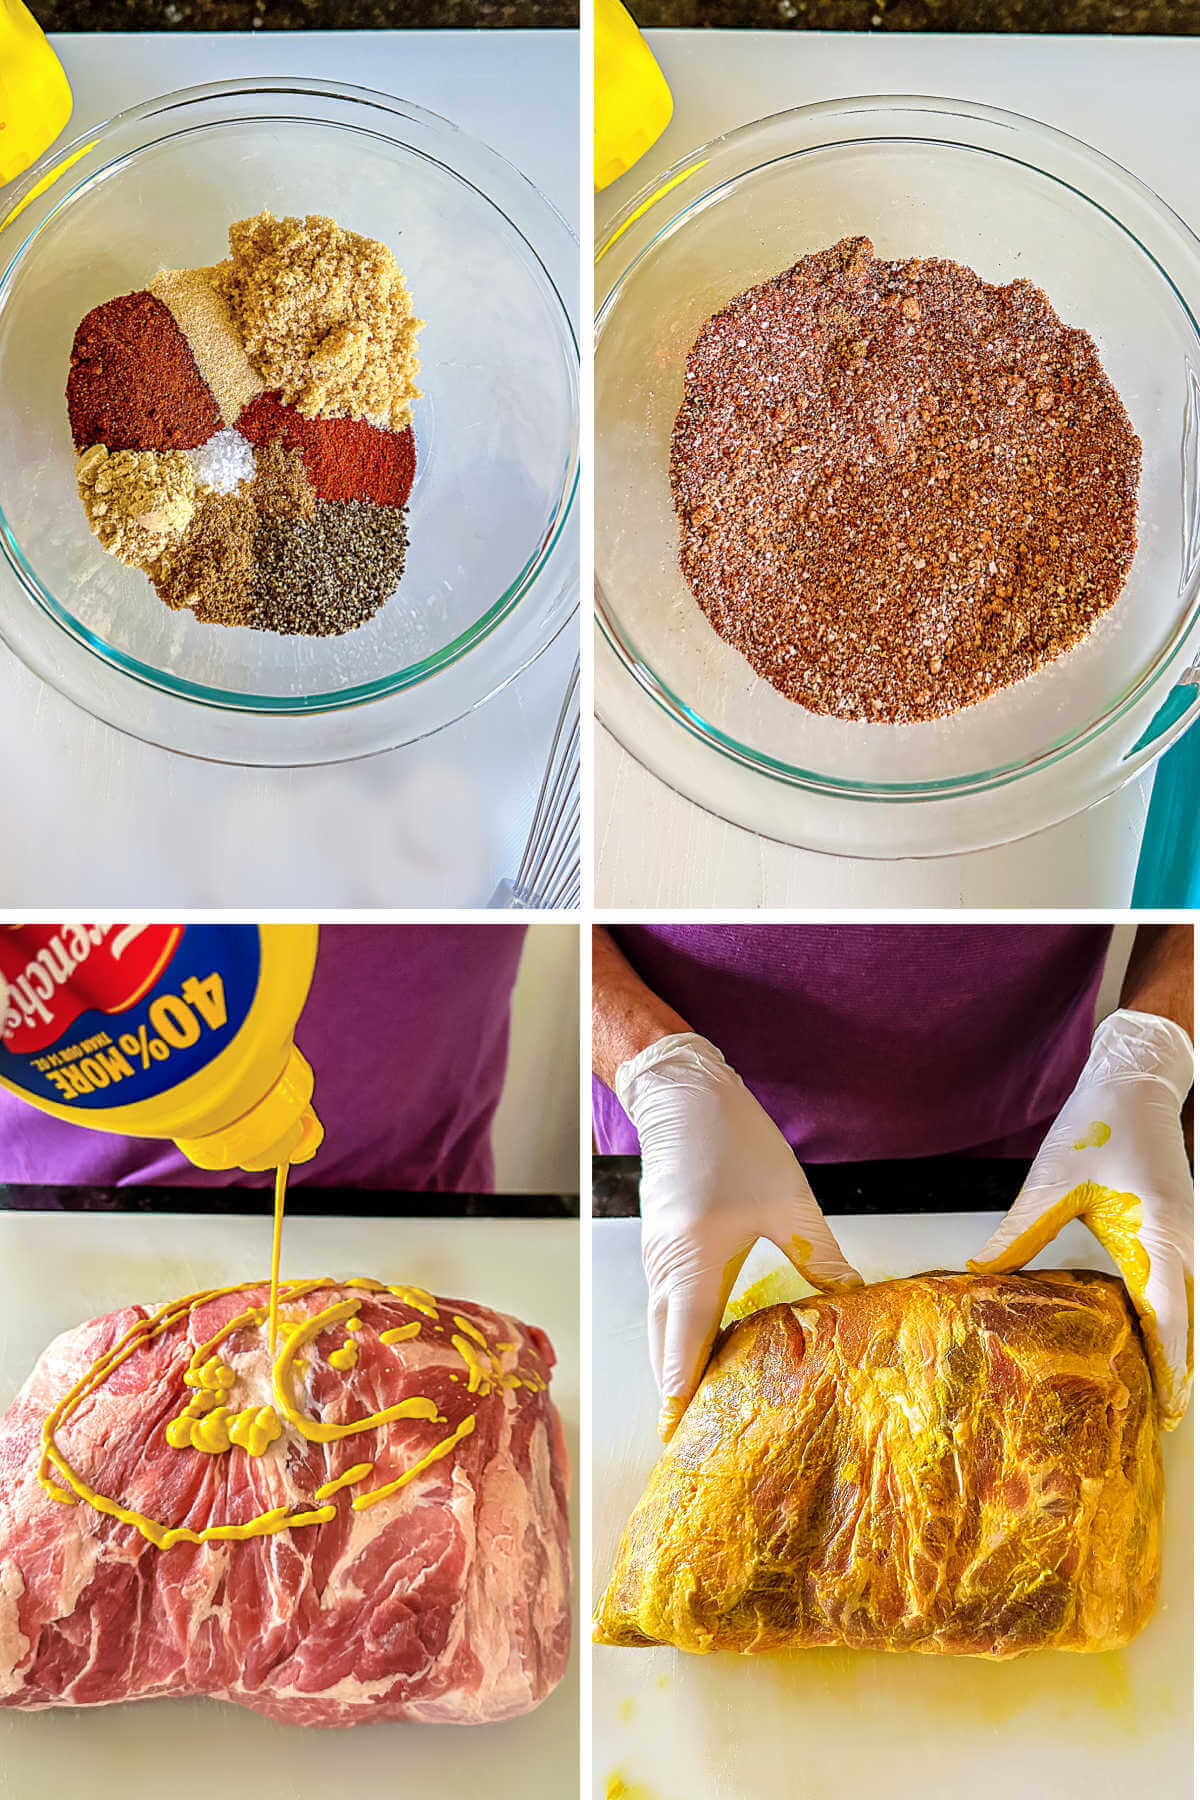
STEP 1 | Combine the spice rub
To prepare the dry rub, carefully measure out all the pantry spices and the brown sugar into a small mixing bowl. Thoroughly combine the ingredients using a spoon or fork until they are evenly mixed.
STEP 2 | Rinse and dry the meat
If your Boston butt has a thick fat cap of more than 1/4 inch, you’ll want to trim that off first with a sharp knife (or ask the butcher to do it for you).
Rinse the Boston butt under cool running water. Transfer it to a large cutting board or deep aluminum pan, then pat the meat dry with paper towels to remove as much moisture from the surface as possible.
After rinsing, remember to sanitize the sink and the surrounding countertop to prevent the spread of any bacteria.
STEP 3 | Coat the surface with yellow mustard
Next, slather a liberal amount of yellow mustard all over the surface of the pork shoulder — wearing food-safe gloves to do this is recommended — so you have a thin layer of mustard on all sides.
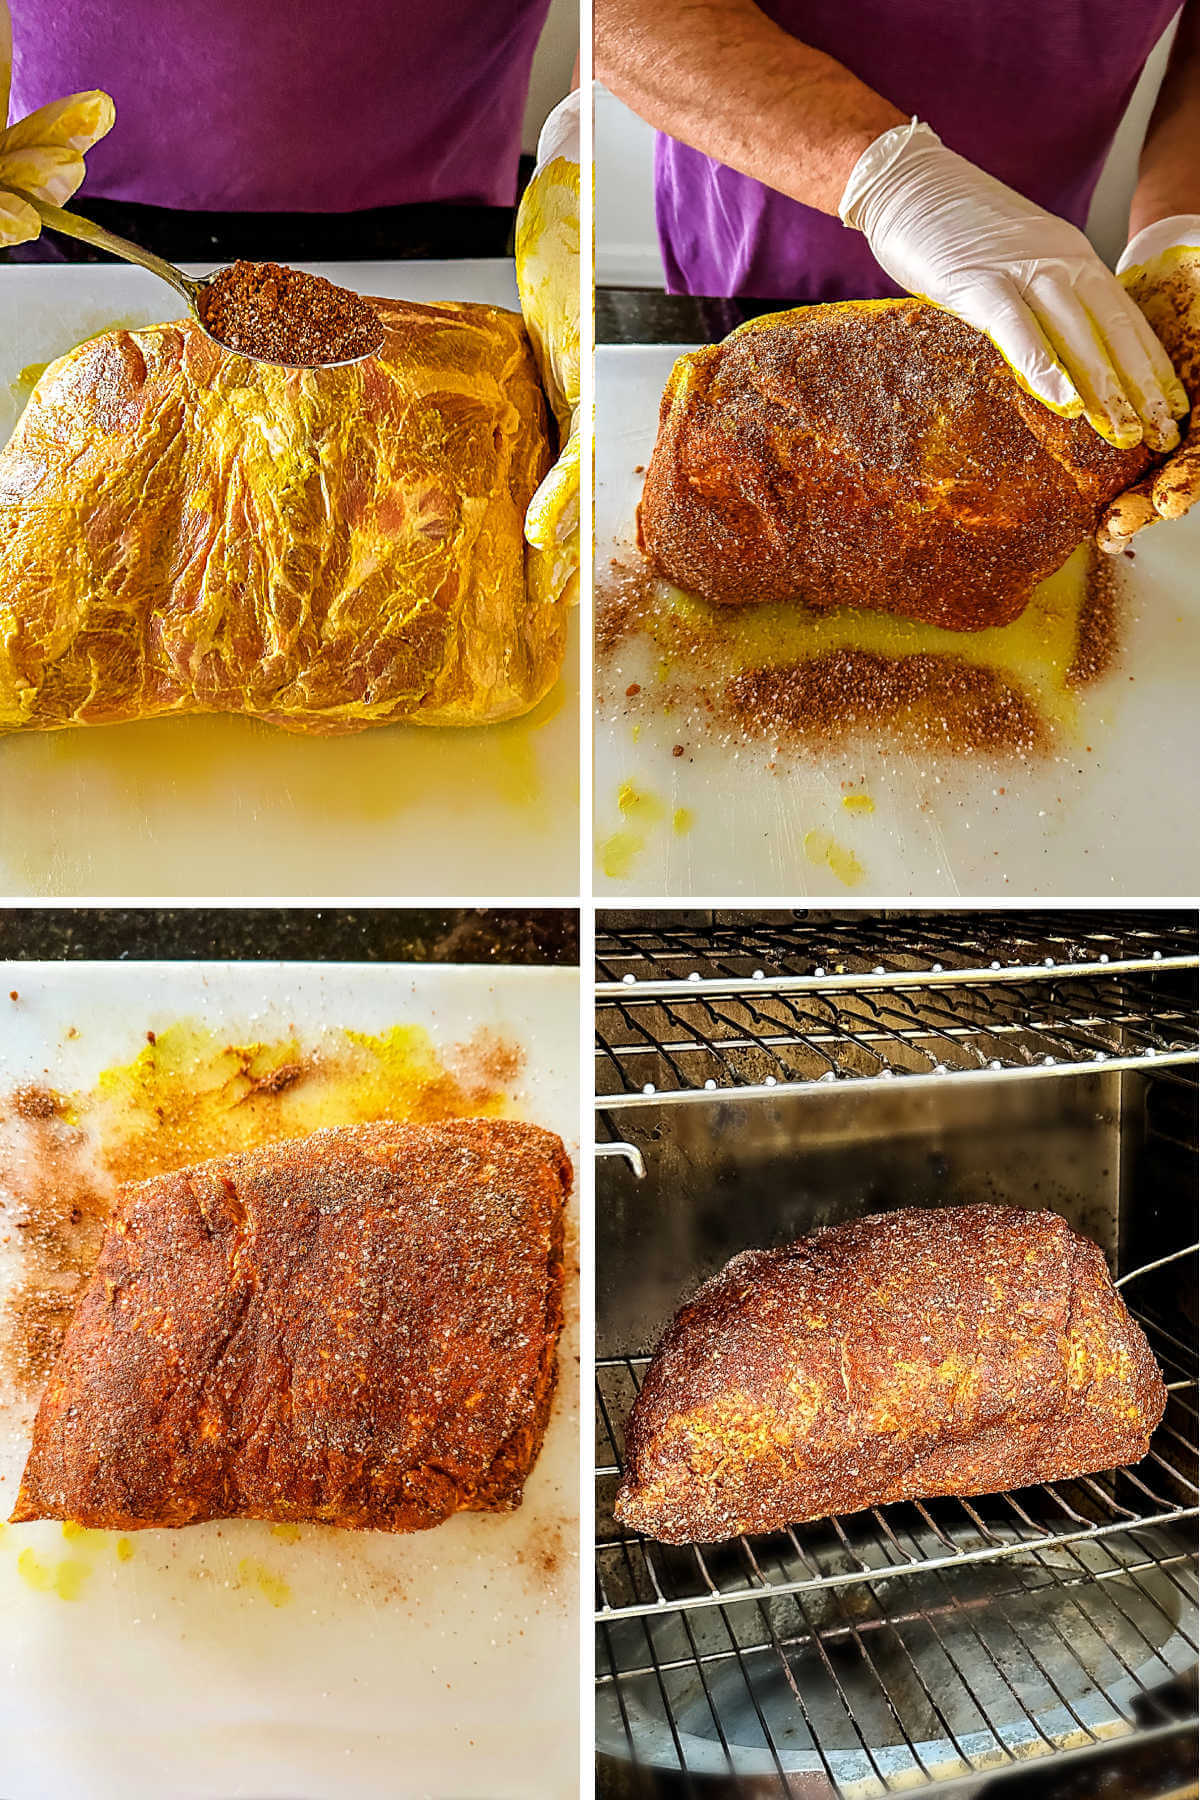
STEP 4 | Apply the dry rub and let it rest
Take the pork spice rub you prepared earlier and sprinkle it evenly on all sides of the meat. Then, use your hands to gently massage the rub onto the meat, getting it into any crevices.
Then, let the Boston butt rest at room temperature for about 1 hour.
STEP 5 | Preheat the smoker
While the meat rests, prepare the smoker by filling the water pan with a mixture of half apple juice and half water. This creates steam inside the smoker, keeping the meat moist as it cooks.
Although you’ll cook the meat at 225 degrees, go ahead now and set the smoker temperature to 250 degrees F. That way, you’ll compensate for any heat lost when you open the door to put the meat and thermometer in place.
Once the smoker has preheated, add cherry or apple wood chips (I like to use a mix of the two) to the smoker box.
STEP 6 | Cook the meat low and slow
Finally, it’s time to cook! Place the pork butt directly on one of the racks in the smoker and insert a digital probe thermometer into the meat away from the bone. Close the smoker door and reset the smoking temperature to 225 degrees F.
The exact amount of time it takes for the pork butt to reach the ideal internal temperature of 205 degrees will depend on the size and cut of meat, anywhere from 12 to 15 hours for a soft and tender pulled pork.
BE AWARE OF THE STALL!
During the cooking process, you’ll notice that the internal temperature of the pork will rise steadily until it reaches about 145 degrees.
After that, it can take hours before the temperature continues to rise — but don’t worry, this is what’s called the stall and is normal. Be patient, the meat is still cooking, and the temperature will begin to inch up to the target.
Basically, what’s happening is a type of cooling called evaporative cooling. When the meat reaches a certain temperature, it starts sweating out some extra moisture, which then evaporates, chills the meat, and stops the temperature from going up too fast.
This lasts until all the surface moisture is gone, and then the meat goes back to getting hotter until it’s cooked through.
Periodically, you will want to check that the smoker temperature is staying steady at 225 degrees F and add wood chips as needed to create more smoke during the first 2 to 3 hours of cooking. This should be ample enough time for the smoke created to penetrate the meat.
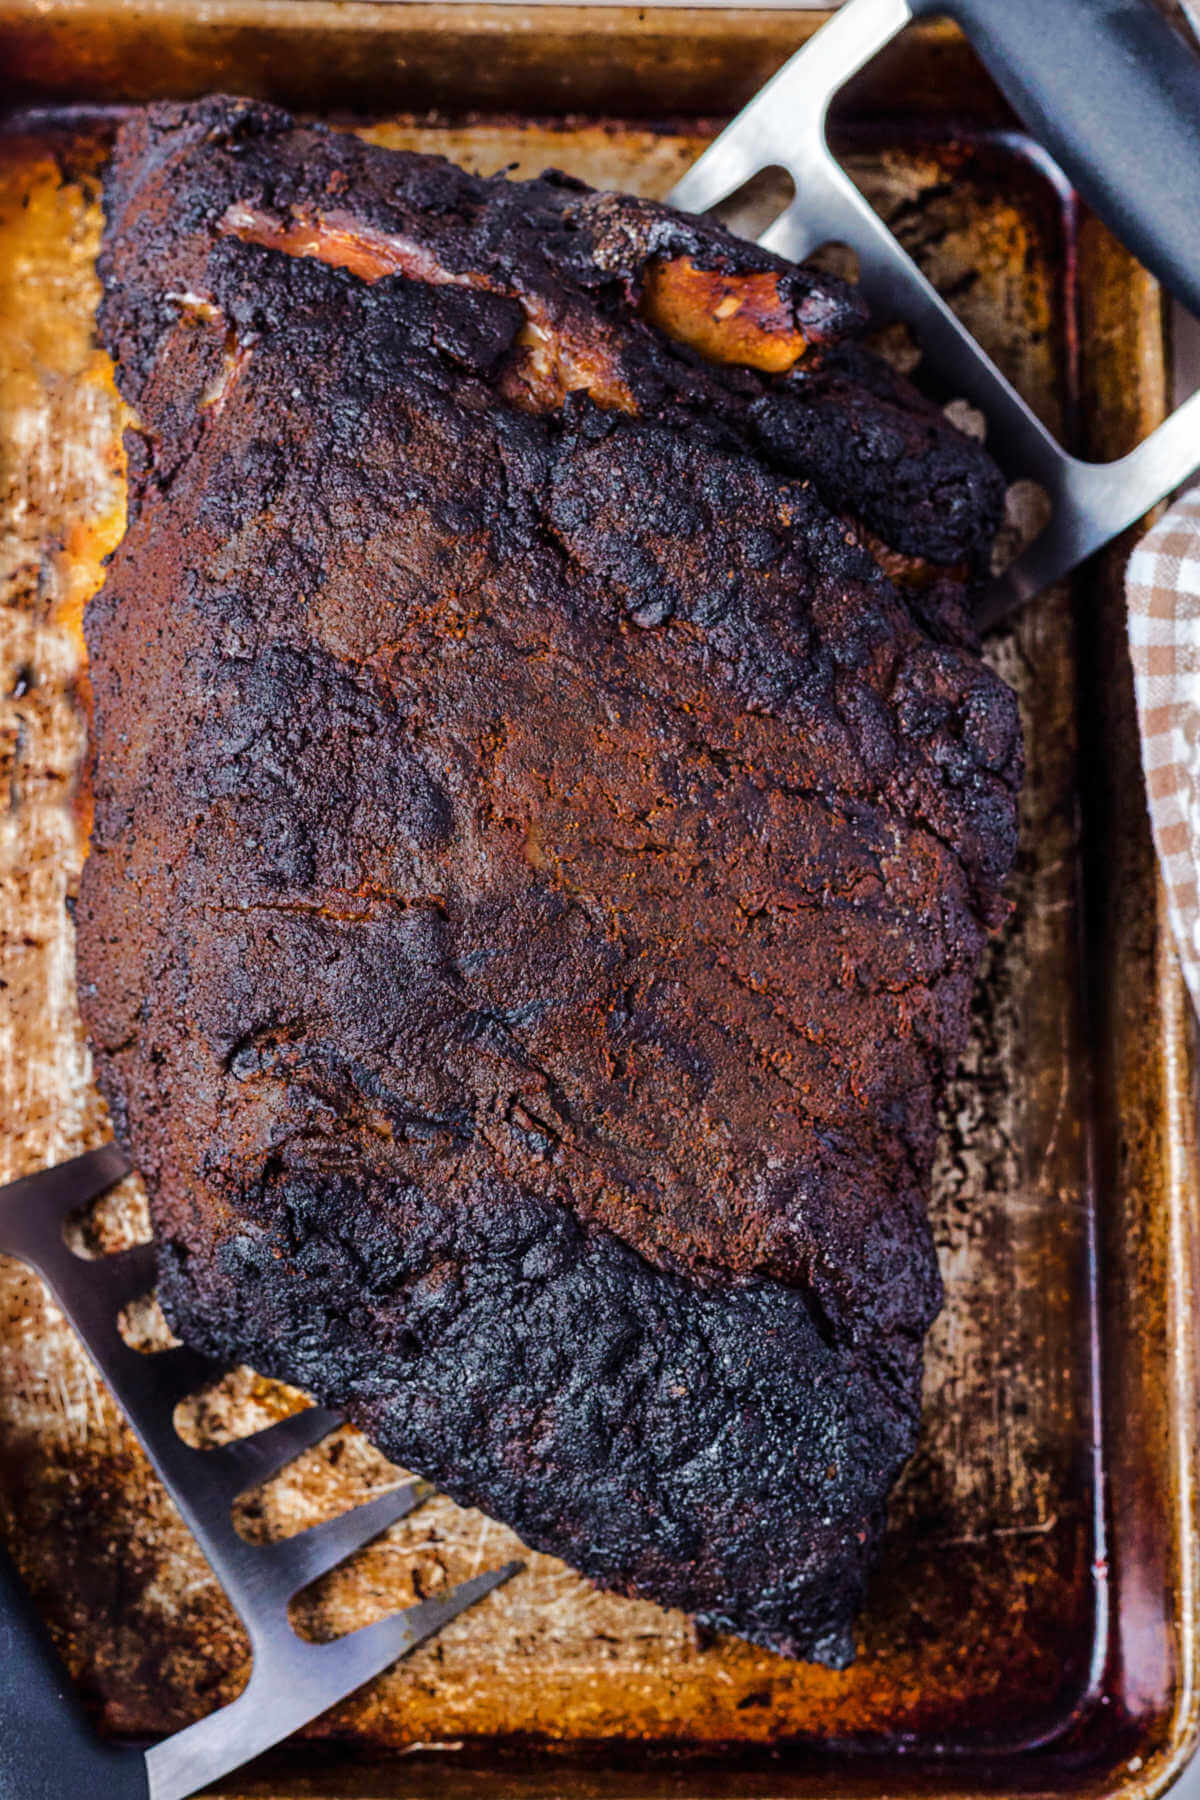
STEP 7 | Rest
When the internal temperature reaches 205 degrees F., remove the pork from the smoker and immediately wrap it in pink butcher paper or aluminum foil. Then, place the wrapped meat inside a large insulated camping cooler or a cold oven for a minimum of 30 minutes (or up to 2 hours), being sure the internal temperature does not go below 165 degrees F.
This is an important step as the process helps the juices to redistribute evenly into the meat for that melt-in-your-mouth tenderness that makes the most delicious pork sandwiches.
STEP 8 | Pull the pork
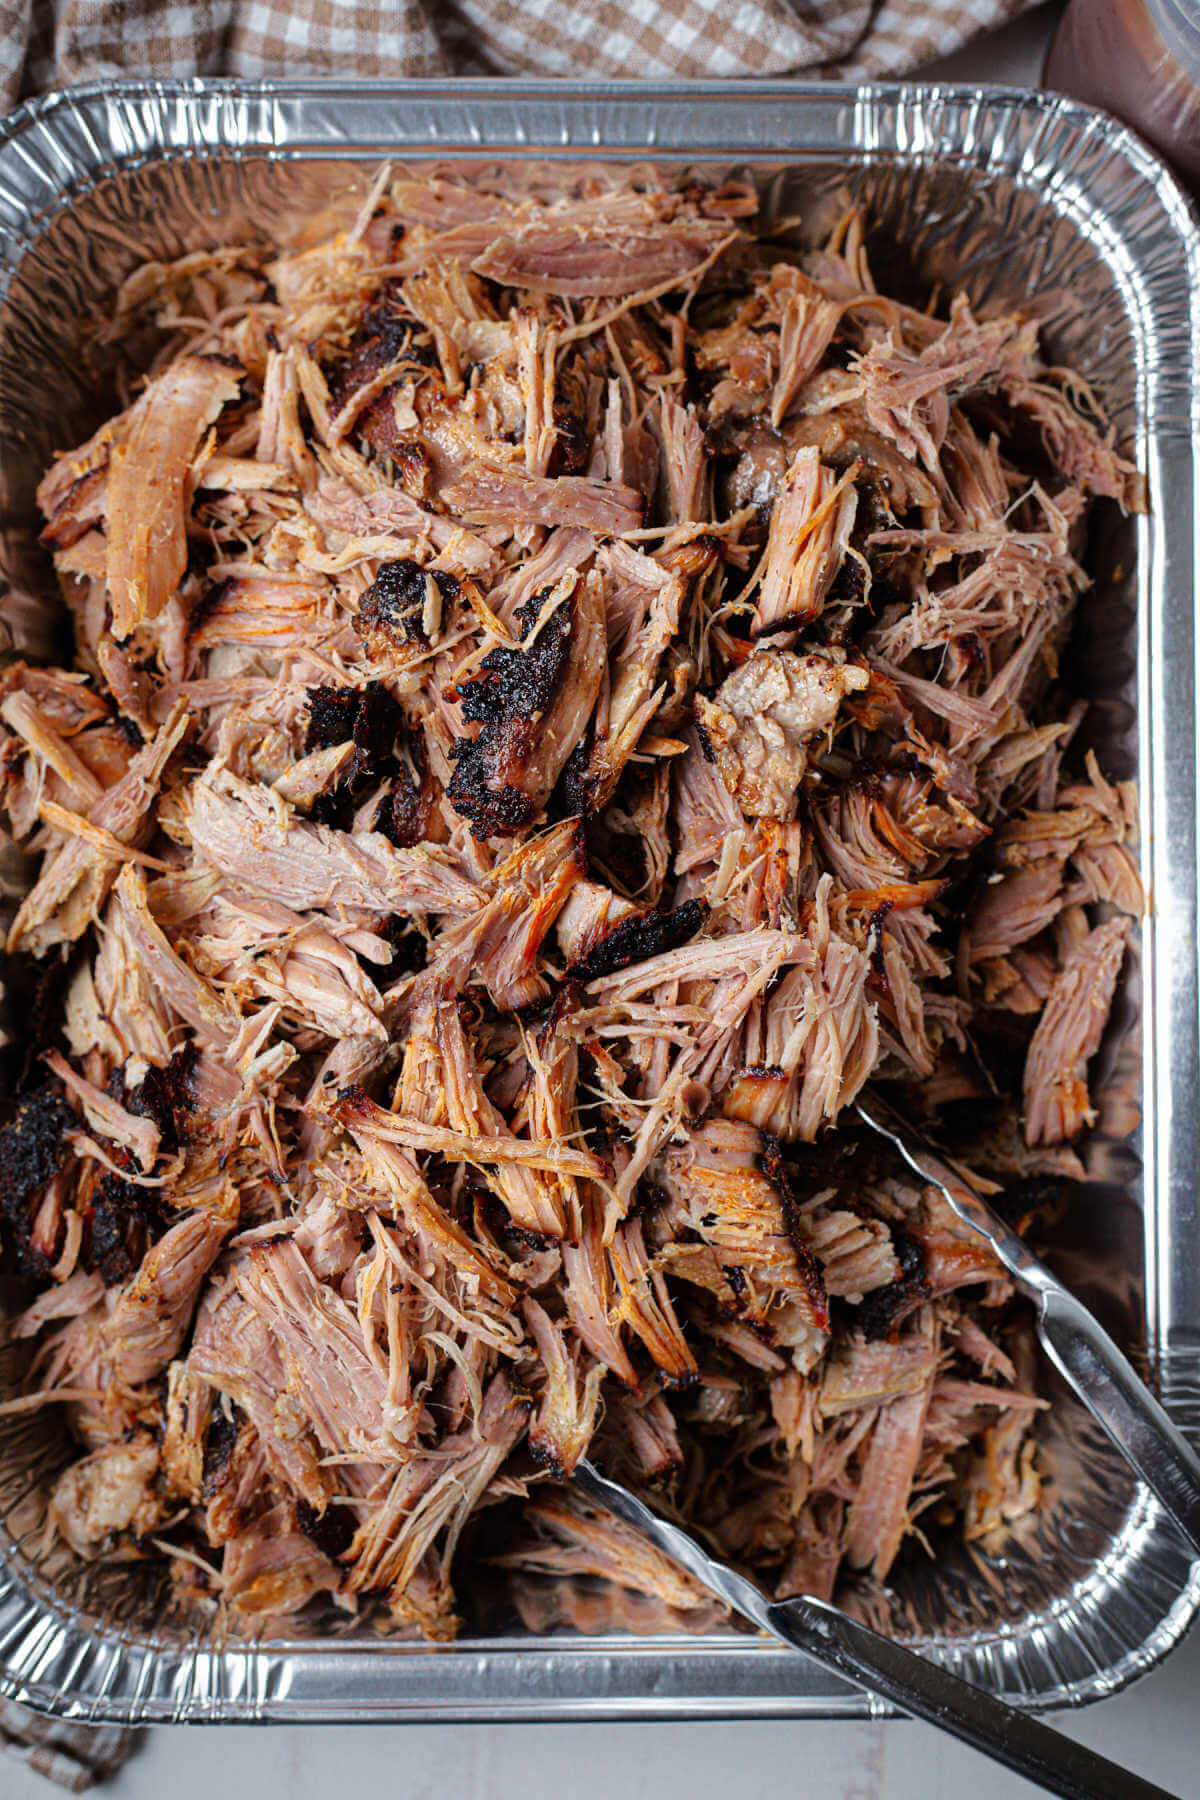
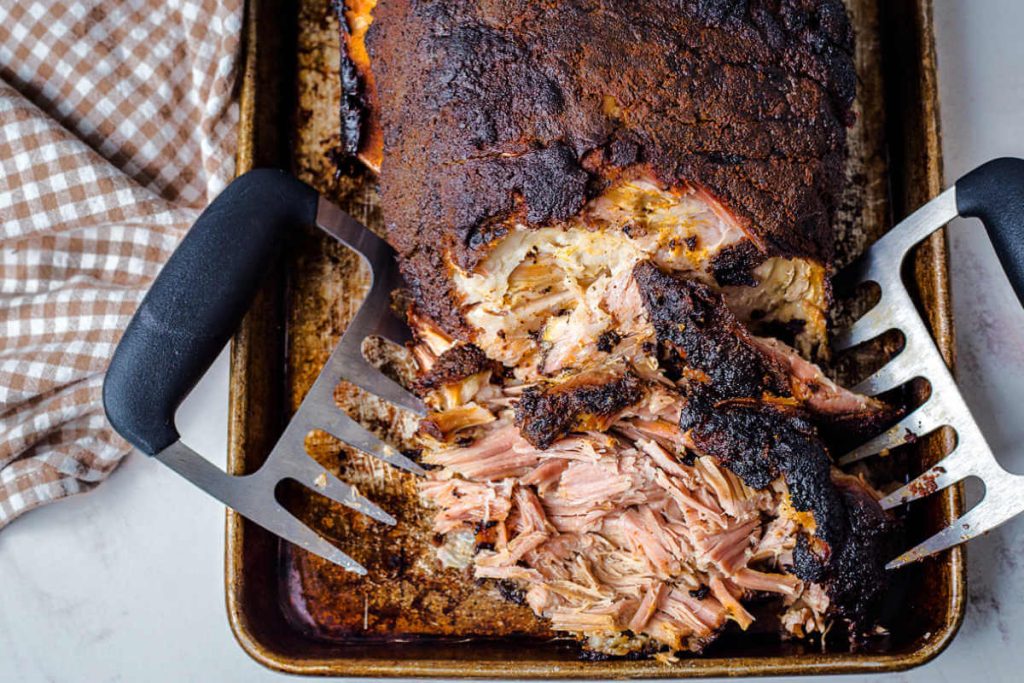
Unwrap the pork butt and place it in a deep aluminum pan, roasting pan, or a rimmed baking sheet. Pull the meat apart using meat claws or special insulated gloves, leaving some of the flavorful bark distributed throughout.
Now, you’re ready to pile the pulled pork high on a bun, dress it with your favorite bbq sauce and coleslaw, and top it off with sweet pickles — YUM!

Tips from the Home Chef’s Kitchen
Frequently Asked Questions
After sitting at room temperature for 3 to 4 hours, pulled pork should be refrigerated to avoid bacteria or spoilage. If it needs to be out longer than that, you may want to place the meat in a slow cooker on the lowest setting to keep it warm.
After all that work, you don’t want to serve a dry pulled pork sandwich because it’s been sitting out for a while. To keep the meat moist, keep a spray bottle filled with apple juice handy and spritz the top of the pork in the foil pan as needed.
Absolutely! Pulled pork freezes well for up to 3 months when sealed in an airtight freezer container.
In fact, one of the most convenient ways I’ve found to freeze pulled pork is to measure out portions and package them with my vacuum sealer. Later when I’m ready to reheat, I simply drop the vacuum-sealed package into a pot of boiling water. After 10 to 15 minutes, I carefully remove the package from the hot water and dry it off before snipping it open. The pork is always as fresh and tender as it was when it originally came out of the smoker!
Serving Suggestions
Now that you’ve put all that work into this delicious smoked pulled pork recipe, it’s time to dress it up with some tasty sides! All of these suggestions go well whether you decide to serve the pulled pork as a sandwich or a pulled pork plate.
Of course, a big bowl of potato salad and cowboy baked beans is always a good bet, but you may enjoy serving up a plate of these homemade hushpuppies — they are my weakness!
For dessert, who could resist warm peach cherry cobbler with ice cream or luscious banana pudding? What a way to end a feast!

Love this recipe? Bookmark it for the future!
Simply tap the heart symbol located in the lower right corner of your screen, and the recipe will be securely stored in your own recipe box.
Smoked Boston Butt (Electric Smoker BBQ Pulled Pork)
Ingredients
- 3 tablespoons kosher salt
- 3 tablespoons light brown sugar
- 1 tablespoon smoked paprika
- 1 tablespoon granulated garlic or garlic powder
- 2 teaspoons granulated onion or onion powder
- 1 tablespoon chili powder
- 1 teaspoon coarse ground black pepper
- 1 teaspoon cumin
- 1 teaspoon dry mustard powder
- 1 teaspoon coriander
- 8 – 10 pound Boston butt or picnic shoulder roast
- ¼ cup yellow mustard
- 1 quart apple juice
- 1 quart water
- apple or cherry smoking wood chips
Instructions
- Add the salt, brown sugar, paprika, granulated garlic and onion, chili powder, pepper, cumin, mustard powder, and coriander to a small bowl and mix until well combined.
- Unpackage and rinse the pork butt under cool running water. If necessary, trim off the fat cap so that it is no more than 1/4 inch thick. Pat the pork dry with paper towels.
- Slather yellow mustard all over the surface of the meat, then apply a generous amount of the dry rub mixture. Massage the rub into the meat so it sticks well. Let the seasoned pork rest at room temperature for 1 hour.
- In the meantime, fill the smoker's water pan with a mixture of half apple juice and half water. Then, preheat it to 250 degrees F. Once preheated, add apple or cherry wood chips (or a mixture of the two) to the smoker box.
- Place the pork butt directly on the smoker rack and insert a digital probe meat thermometer into the thickest part of the meat away from the bone. Close the smoker lid and adjust the cooking temperature to 225 degrees F. Try to avoid opening the lid too often as this will let out heat and smoke.
- Allow the pork butt to smoke for several hours, checking on it periodically to make sure the temperature stays steady. Add more wood chips if necessary during the first couple hours of cooking to create smoke to fill the smoker chamber.
- Cook the pork butt until it reaches an internal temperature of 205 degrees F, anywhere from 8 to 12 hours, depending on the size of the pork butt.
- Once the pork butt is fully cooked, remove it from the smoker and wrap it tightly in pink butcher paper or aluminum foil. Place the wrapped meat in an insulated cooler or cold over and shut the door. Let it rest for at least 30 minutes, or up to 2 hours, before shredding the meat with meat claws or your hands.
Notes
- Make a double batch. You can totally make the dry rub ahead of time and store it for up to 3 months. Just make sure to keep it in an airtight container in a cool and dry place. So, why not make a double batch? This way, you’ll have some ready to go the next time you want to smoke a pork butt.
- Spritz for bark? Some pitmasters like to periodically spritz the meat with apple juice during smoking to aid in creating that delicious bark on the outside. Every time you open the door, you’ll lose heat. I opted not to spritz in this recipe to maintain the cooking temperature inside the smoker better, and it still resulted in a beautiful bark.
Nutrition
Life Love and Good Food does not claim to be a registered dietician or nutritionist. Nutritional information shared on this site is only an estimate. We recommend running the ingredients through an online nutritional calculator if you need to verify any information.
Beyond the Recipe: Smoked Boston Butt
Many southern states are known for their delicious versions of smoked pulled pork. One state that is especially well-known for its smoked pulled pork is North Carolina, with two distinct styles of pulled pork — Eastern-style and Western-style.
Eastern-style pulled pork is typically seasoned with a simple vinegar and pepper-based sauce, while Western-style pulled pork is often served with a tomato-based sauce that is sweeter and tangier.
No matter which style you prefer, North Carolina is home to many great barbecue joints that serve up some of the best smoked pulled pork you’ll ever taste. So if you’re a fan of this classic southern dish, be sure to add North Carolina’s Historic BBQ Trail to your list of must-visit road trips!





The recipe is what I was looking for an easy and simple way to smoke a Pork butt or sholder.With simple and easy instructions to follow. You make it sound so tasty. Your rub looks very tasty and should add a lot of flavor to my Boston butt.
I am constantly searching online for tips that can assist me. Thanks!