Bacon Wrapped Shrimp
This post may contain affiliate links. Please read my disclosure policy.
This succulent shrimp wrapped in crispy bacon and glazed with a tangy sweet barbecue sauce is so irresistible your guests will be licking their fingers and smacking their lips for sure! Sear these easy Bacon Wrapped Shrimp skewers on a Blackstone griddle for crispy good results — without overcooked or rubbery shrimp — every single time.
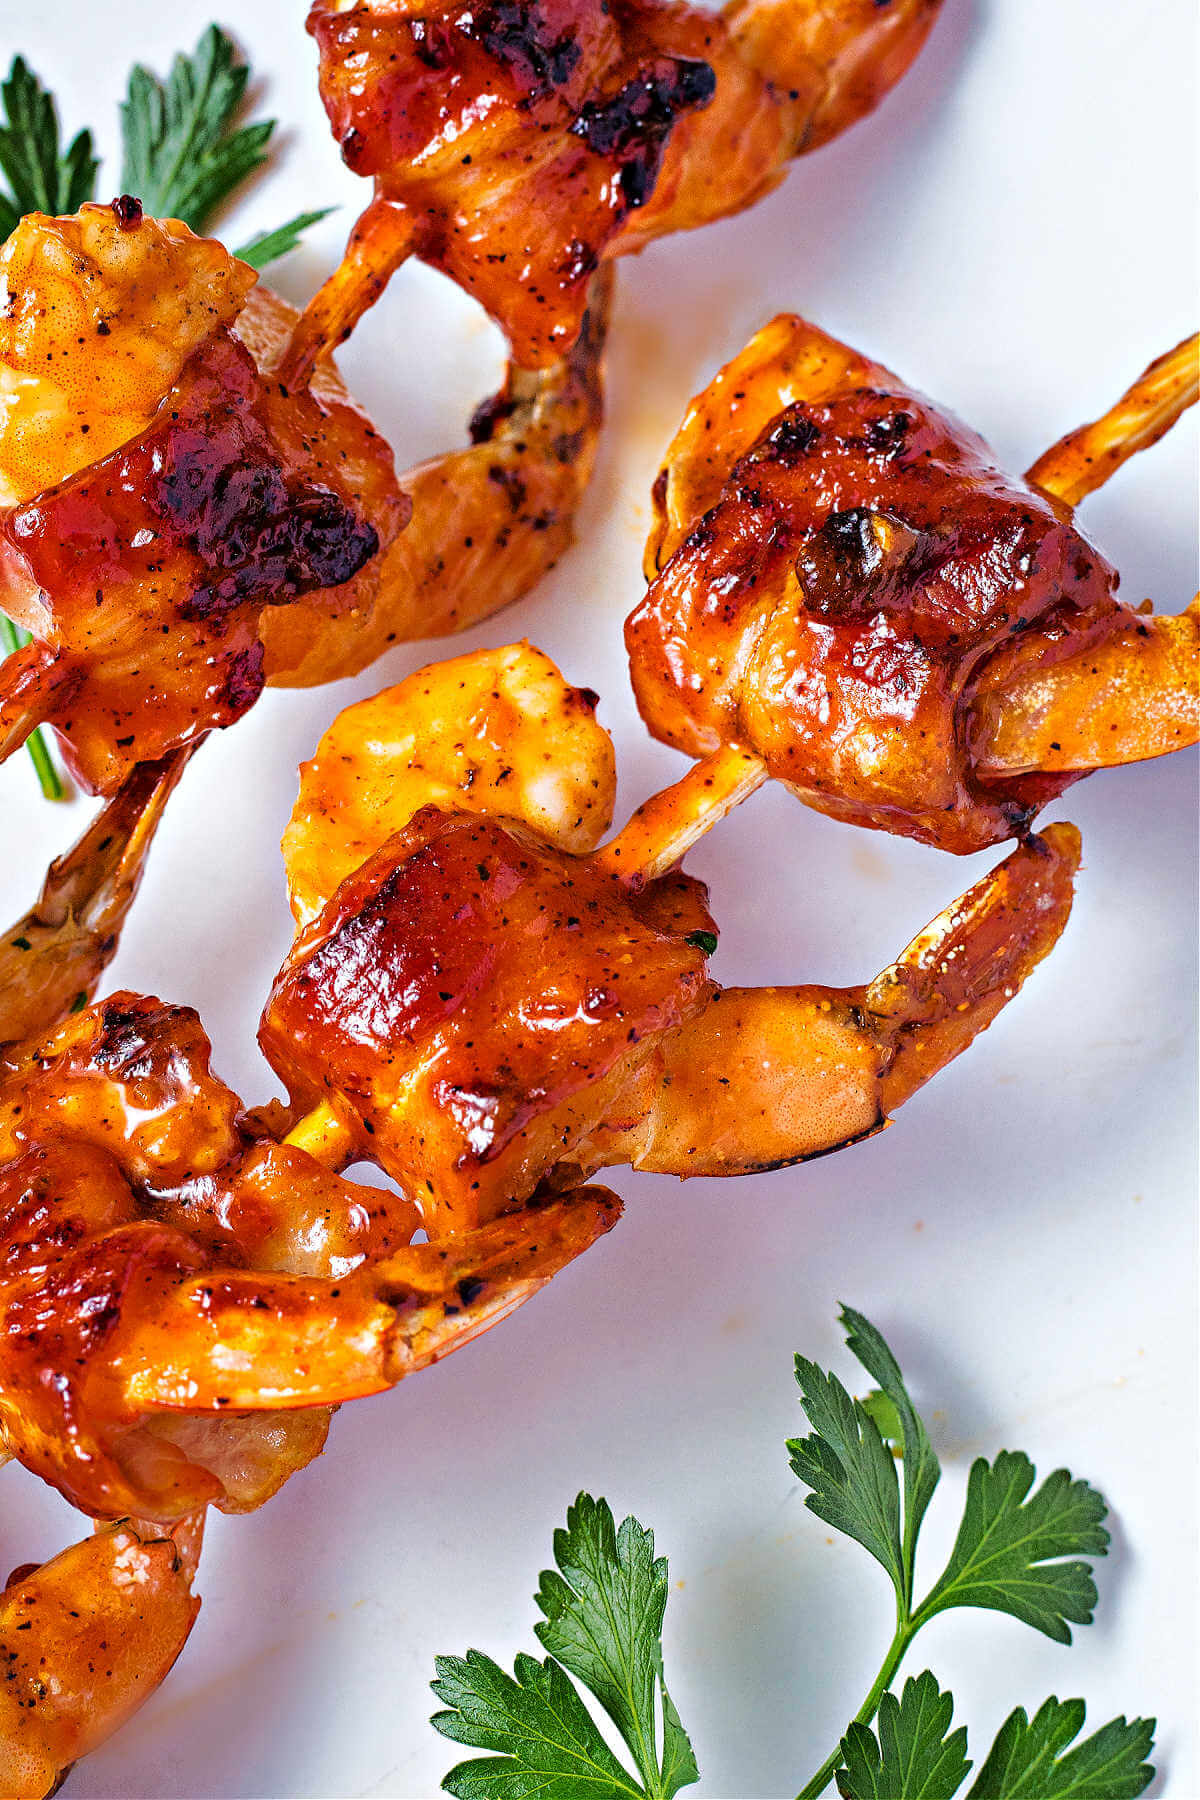
Bacon Wrapped Shrimp is always a popular appetizer (or main dish) for game days, backyard dinner parties, or holidays. If you don’t own a Blackstone griddle, it can also be prepared on an outdoor gas grill or in the oven.
Not only that, with just three ingredients you can easily scale this recipe to make as much or as little as you need.
Looking for more tasty shrimp appetizers? You may like this Shrimp on the Barbie with a homemade Louisiana-style remoulade sauce or my baked Cheesy Shrimp Dip. These Bang Bang Shrimp Tacos and air fried Coconut Shrimp are delicious options, too.
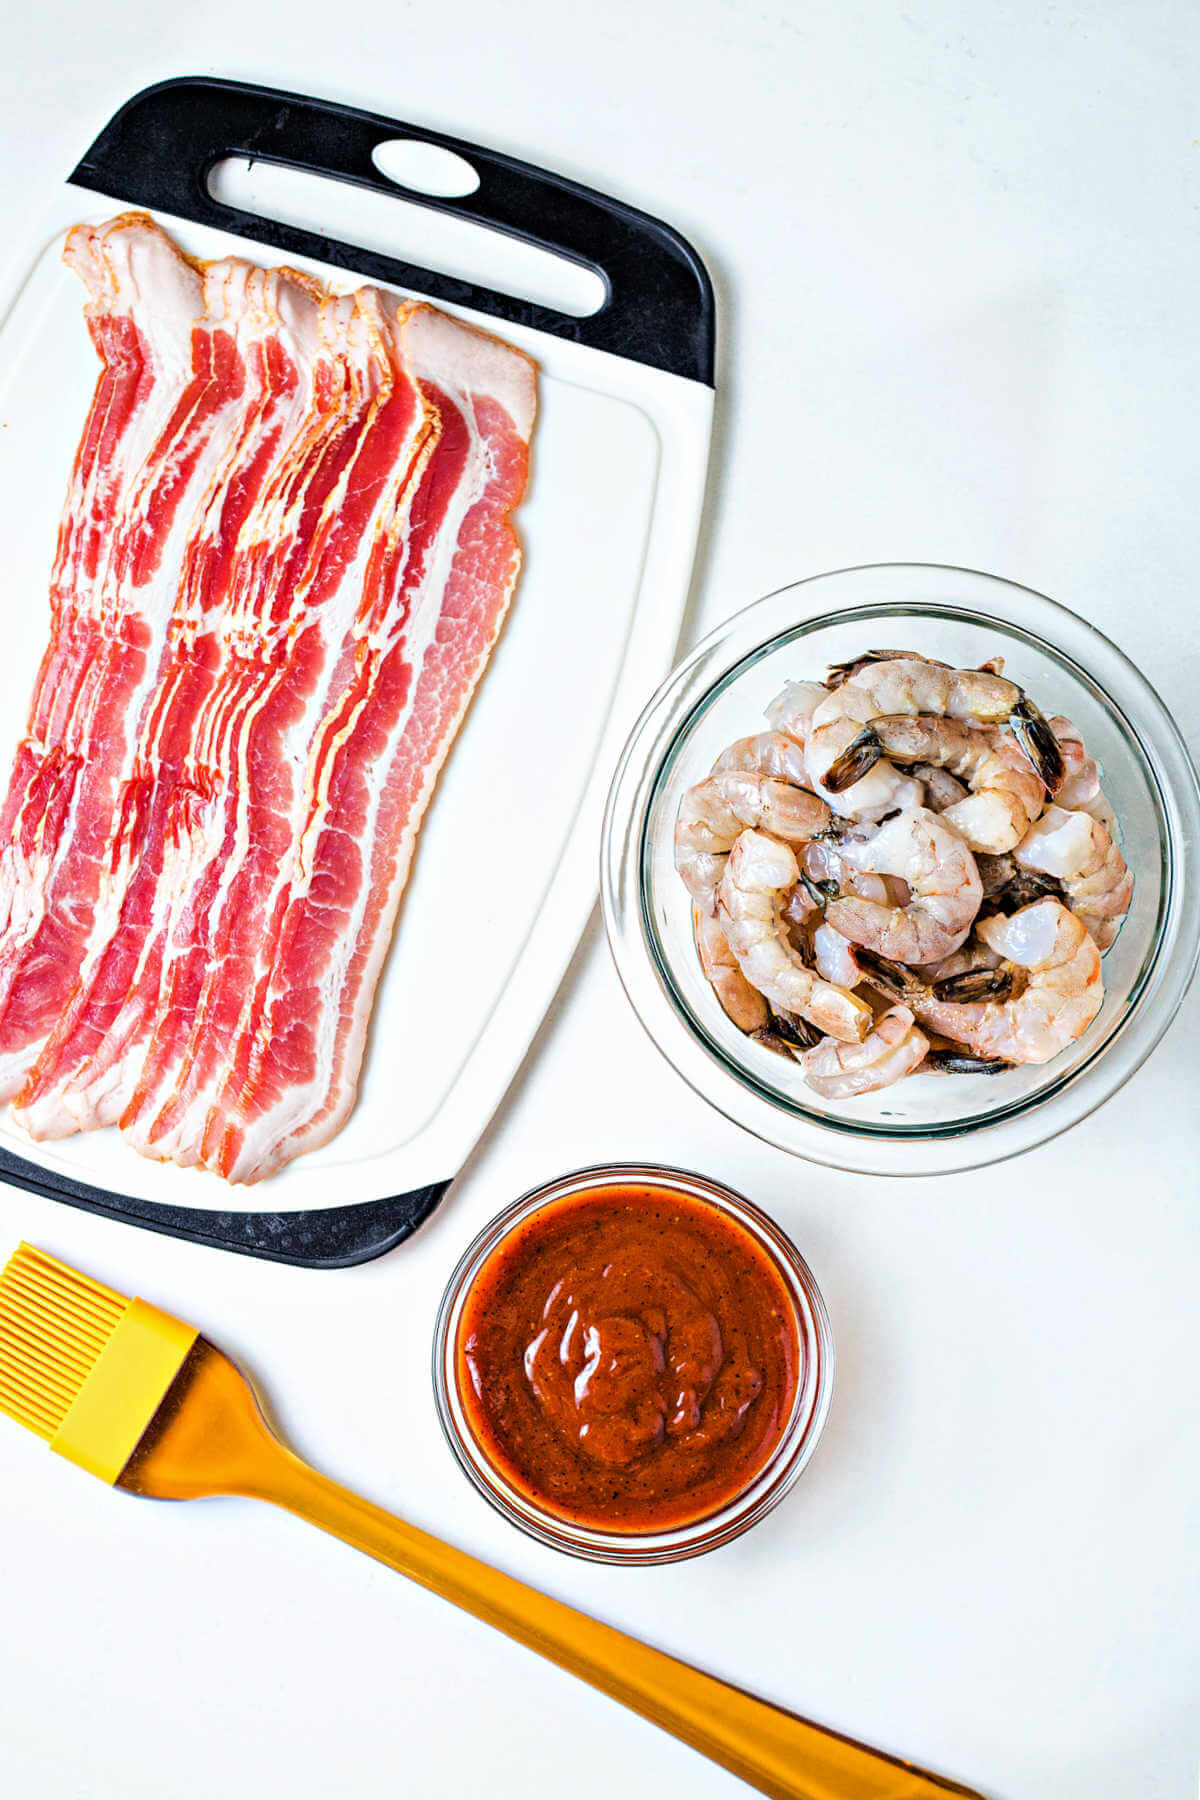
Ingredients for Bacon Wrapped BBQ Shrimp
- Shrimp — Save yourself loads of prep time by buying shrimp that is already peeled and deveined. I used large for this recipe, so increase the cooking time if you choose jumbo shrimp. If using frozen, be sure to thaw it in the refrigerator overnight first and pat dry before cooking.
- Bacon — A lot of recipes call for thick sliced bacon, however the bacon will get crispier if you go with thin sliced. Also, I found that a 12-ounce package of thin sliced bacon was the right amount of bacon slices needed to wrap one pound of large shrimp. That being said, you’ll need a half slice of bacon for each piece of shrimp you cook.
- Barbecue Sauce — Use your favorite brand of bottled smoky or sweet barbecue sauce, or make your own ahead of time. You can even substitute maple syrup, just be careful that it doesn’t scorch on the griddle.
How to make Bacon Wrapped Shrimp on a Blackstone griddle
If you’re hosting a backyard party, the aroma coming off the griddle is nothing less than tantalizing — your guest will hardly be able to wait for that crispy bacon goodness!
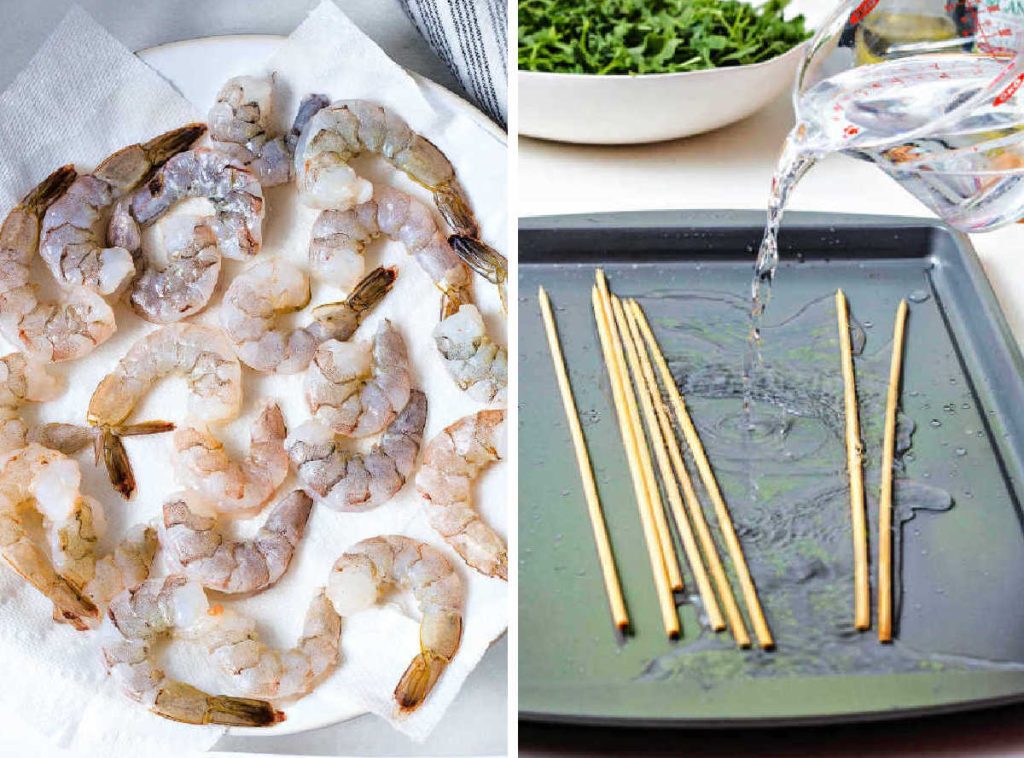
STEP 1 | Devein and dry the shrimp
If your shrimp isn’t deveined, you can simply do it yourself! You will see a dark line running along the outer curve. Run a paring knife alongside that line, keeping the cut shallow, then slide the tip of the knife underneath to lift out the tiny tube. Pull the entire thing out with your fingers and discard.
Next, pat the shrimp dry with paper towels, then cover with plastic wrap and store in the refrigerator until you are ready to start threading the skewers.
tips
- Metal or bamboo skewers? It really doesn’t matter which you use, but with bamboo you’ll need to soak them in water for at least 30 minutes so they don’t burn when placed on the heat. If using metal skewers, I think the flat ones are easier to flip during cooking.
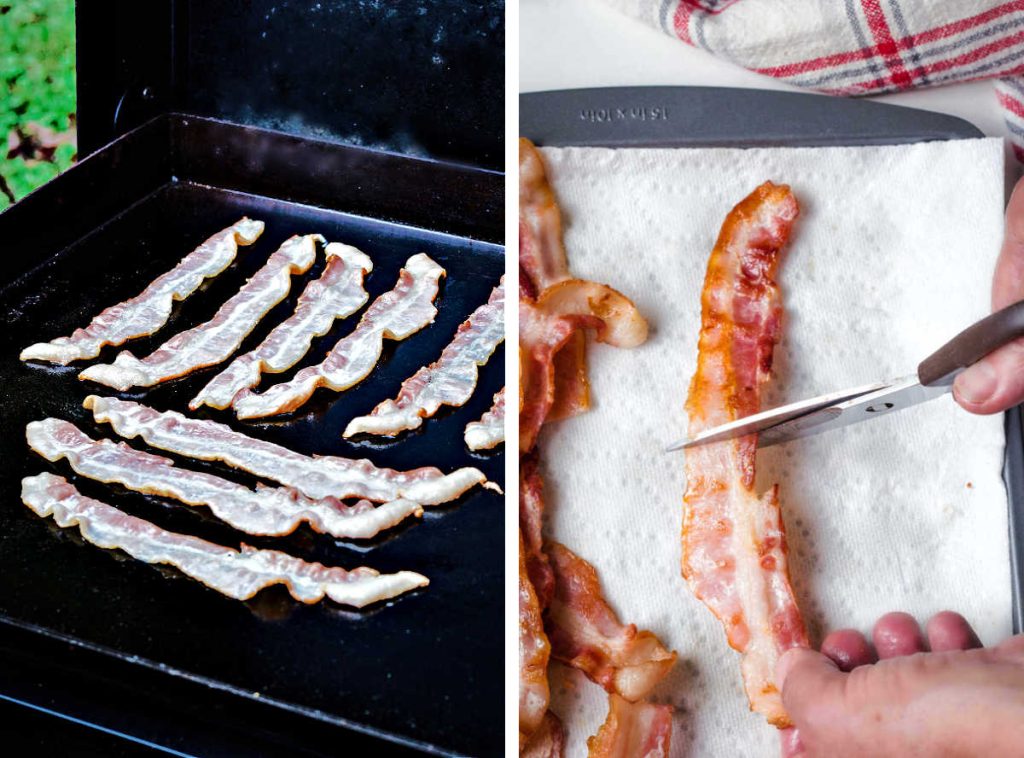
STEP 2 | Partially cook the bacon
This step is key for ending up with crispy barbecue shrimp skewers. You’ll want to cook the bacon just until the fat starts to render and it is still pliable. If it gets too crisp, you’ll have trouble wrapping it around the shrimp.
Preheat the griddle to medium heat, then cook bacon for just 2 to 3 minutes on each side. Transfer it to a paper towel lined plate to drain off some of the grease.
Use kitchen shears to easily and quickly cut the partially cooked bacon slices into two pieces.
tips
- You may also partially cook the bacon in a preheated 400-degree oven. Arrange the bacon slices on a rimmed baking sheet lined with parchment paper and bake for 5 to 10 minutes, being sure it is still pliable for easy wrapping.
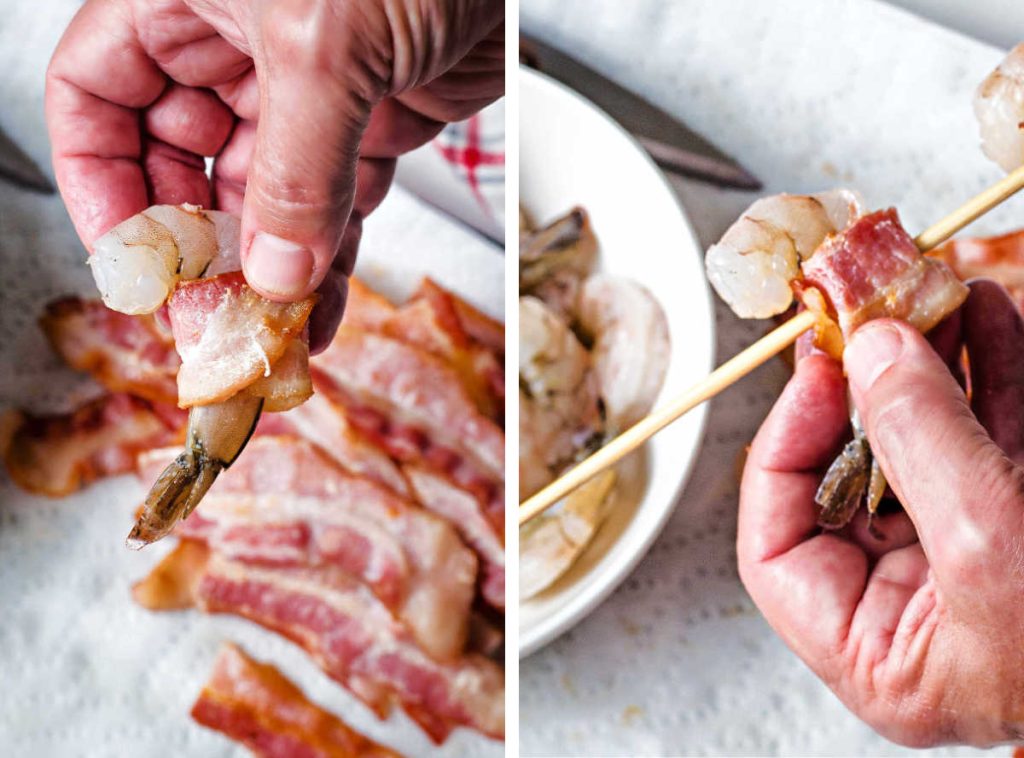
STEP 3 | Wrap and skewer the shrimp
Remove the shrimp from the refrigerator and carefully wrap a piece of the partially cooked bacon around each one. As you go, thread the shrimp onto a skewer to secure the bacon.
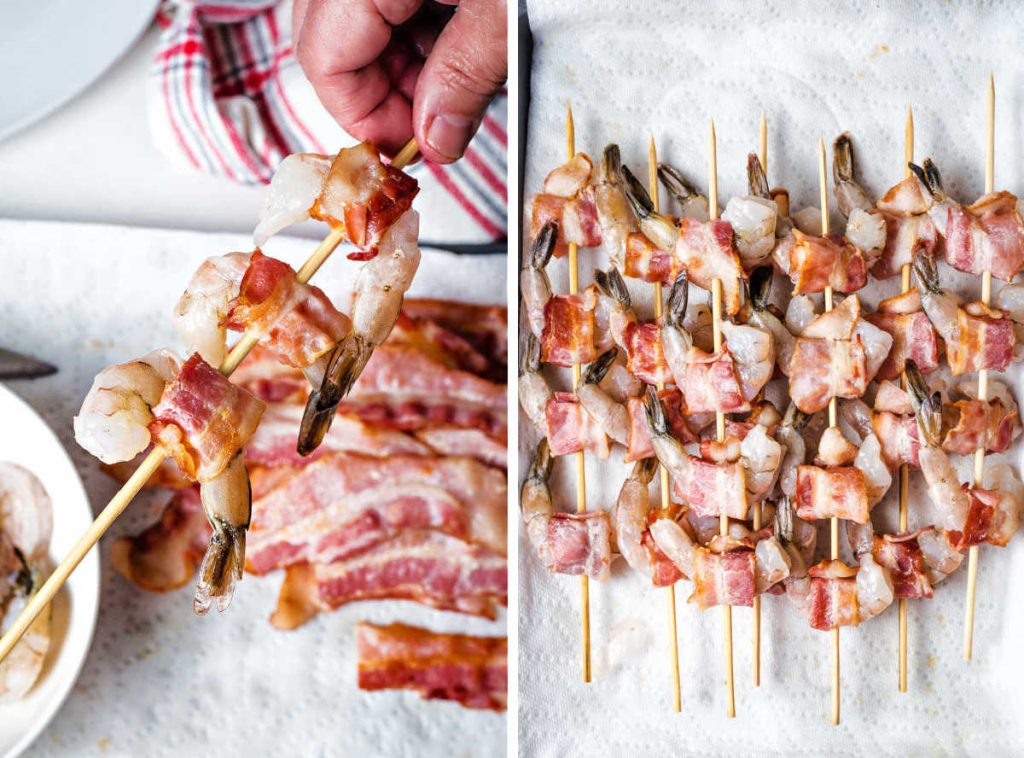
Leave a little space between each bacon wrapped shrimp to ensure even cooking and that the bacon gets perfectly crispy all around.
If serving this shrimp as an appetizer, you may prefer to skewer them individually on toothpicks instead.
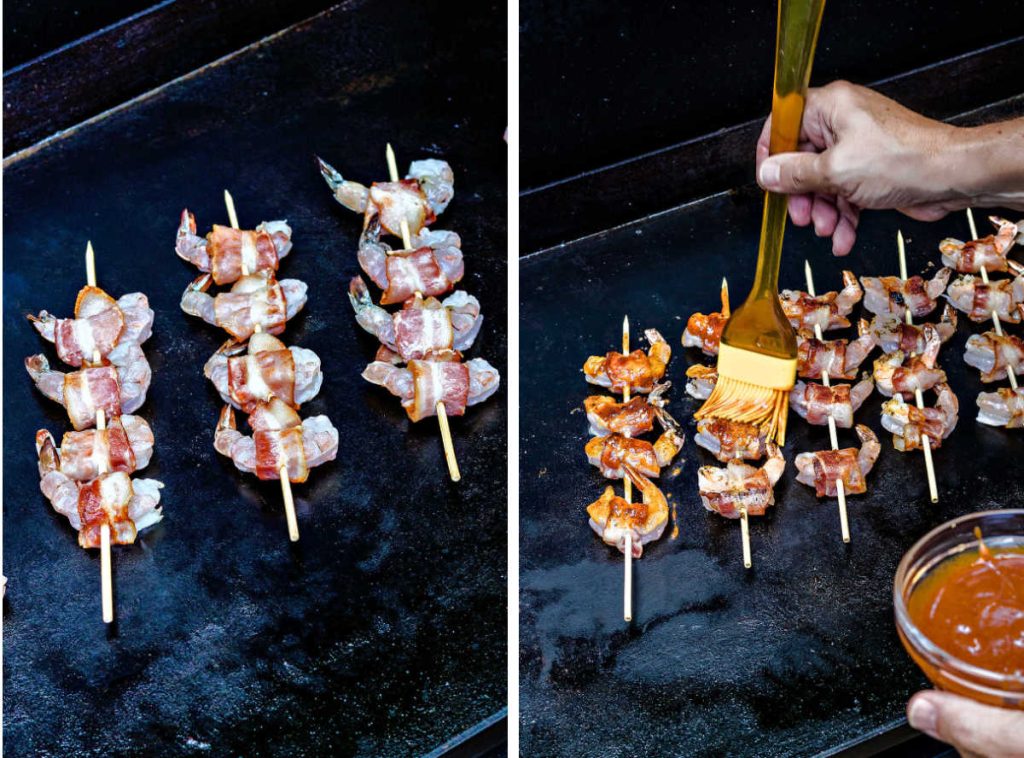
STEP 4 | Cook and baste
This part goes fast! If you cooked the bacon on the Blackstone griddle, there’s no need to oil it up. Cook the wrapped shrimp for 2 to 3 minutes on each side, until the shrimp starts to turn pink and the bacon is getting crispier.
Then, use a long handled basting brush to slather barbecue sauce all over the shrimp and bacon. Flip and slather the other side. Continue cooking and basting until the skewers are looking glazed and scrumptious!
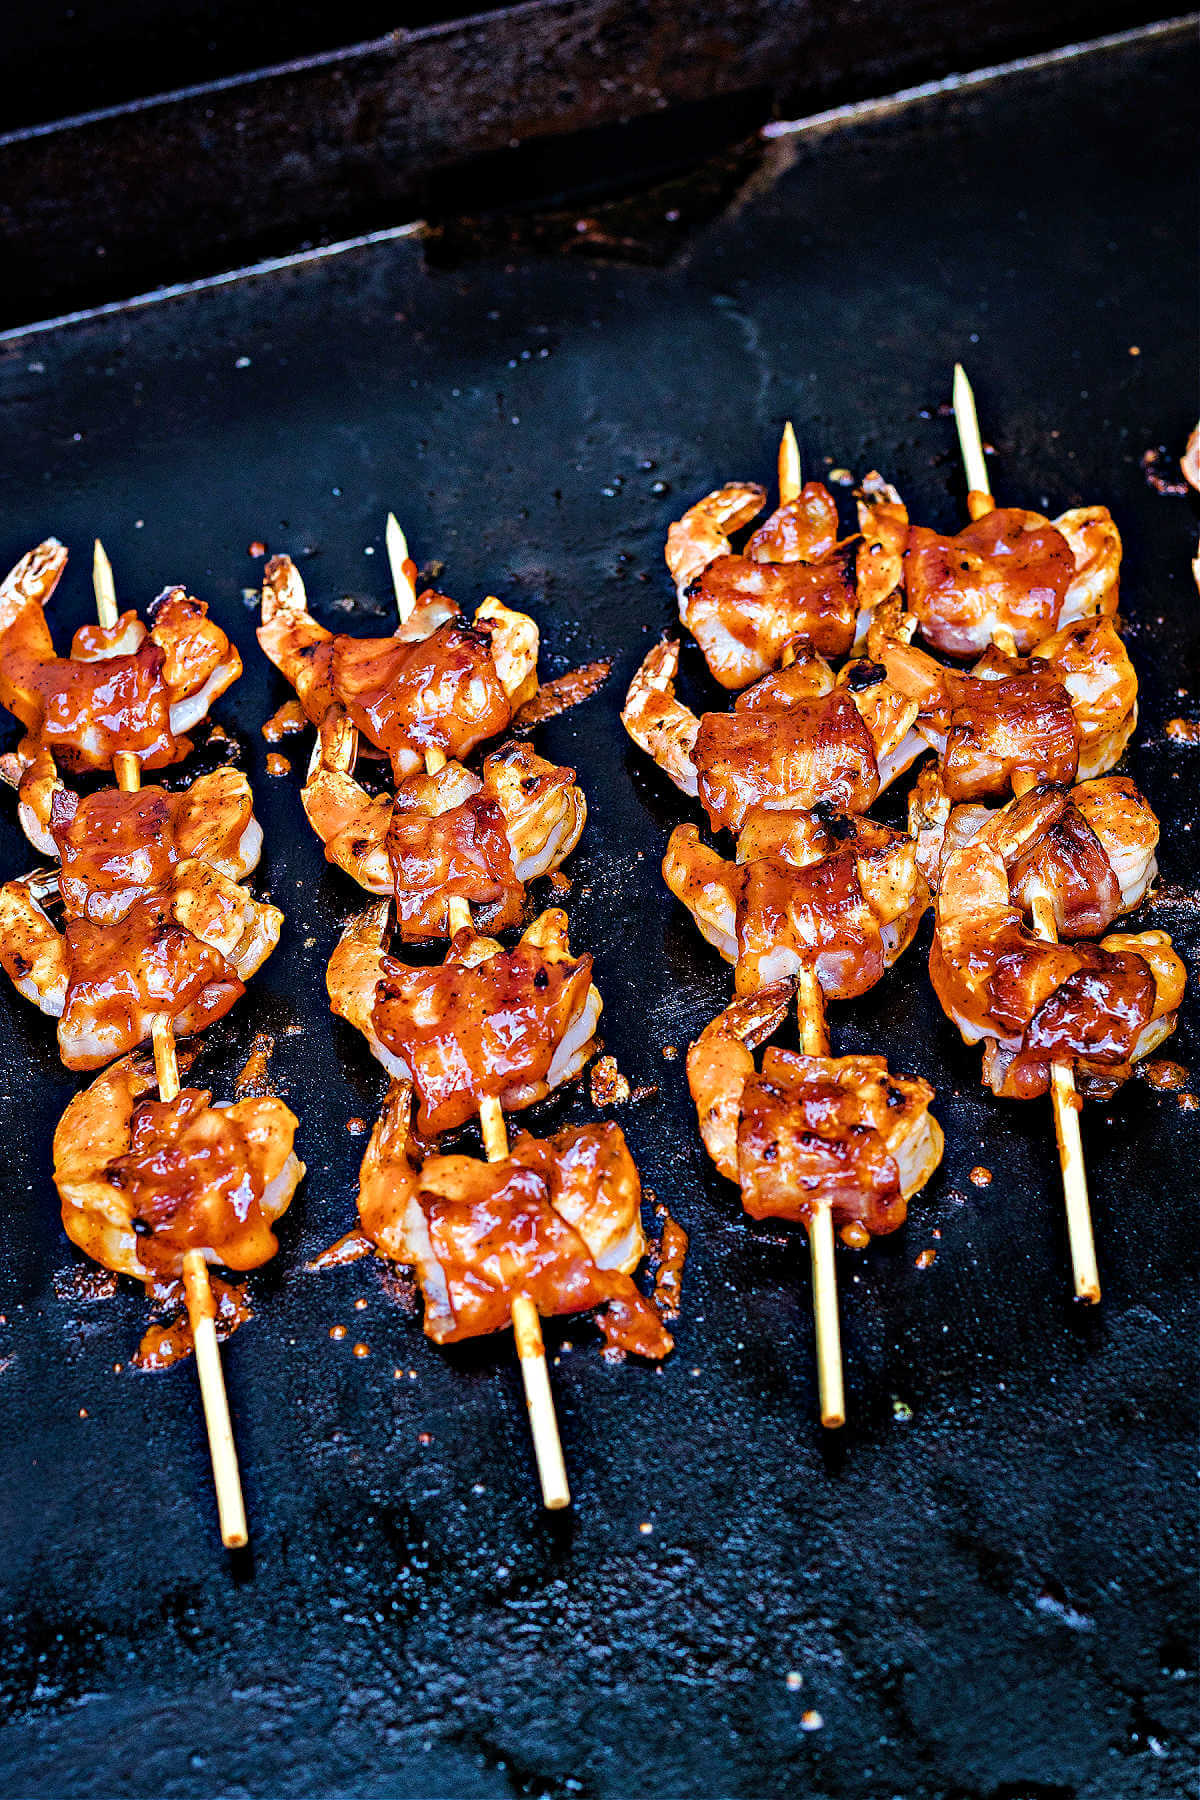
How to cook shrimp wrapped in bacon on the grill
Follow all of the previous prep instructions, then preheat the grill to 450 degrees. Cook the bacon wrapped shrimp skewers for 3 to 4 minutes on each side.
Baste liberally with the barbecue sauce and cook another minute or two until the bacon is crispy and the shrimp are beautifully glazed.
How to cook bacon wrapped shrimp in the oven
Again, follow all of the previous prep instructions, and preheat the oven to 400 degrees. Partially cook the bacon on a rimmed baking sheet, then wrap the shrimp and place on skewers.
Lay the shrimp on the baking sheet and bake for 15 – 20 minutes, until the bacon is mostly crisp and the shrimp are no longer pink. Baste the shrimp skewers with barbecue sauce and place under the broiler for another minute or two until the glaze is slightly caramelized.
Frequently asked questions
You’ll probably want to skewer the shrimp on toothpicks instead, but you can absolutely cook bacon wrapped shrimp in the air fryer.
Preheat the air fryer to 400 degrees, place the bacon wrapped shrimp in the air fryer basket and cook for 4 minutes. Flip the shrimp over and cook another 5 minutes. After that, baste with the barbecue sauce and cook each side another minute to glaze.
Par-cooking the bacon and assembling the shrimp skewers ahead of time is definitely a big help when you are entertaining. Store the skewers on a baking sheet sealed tightly with aluminum foil in the refrigerator until you are ready to cook.
Without the barbecue sauce (many contain a lot of sugar and carbs), bacon wrapped shrimp is definitely keto-friendly. If you crave BBQ sauce, try making your own tasty low-carb, sugar-free barbecue sauce and use that for basting.
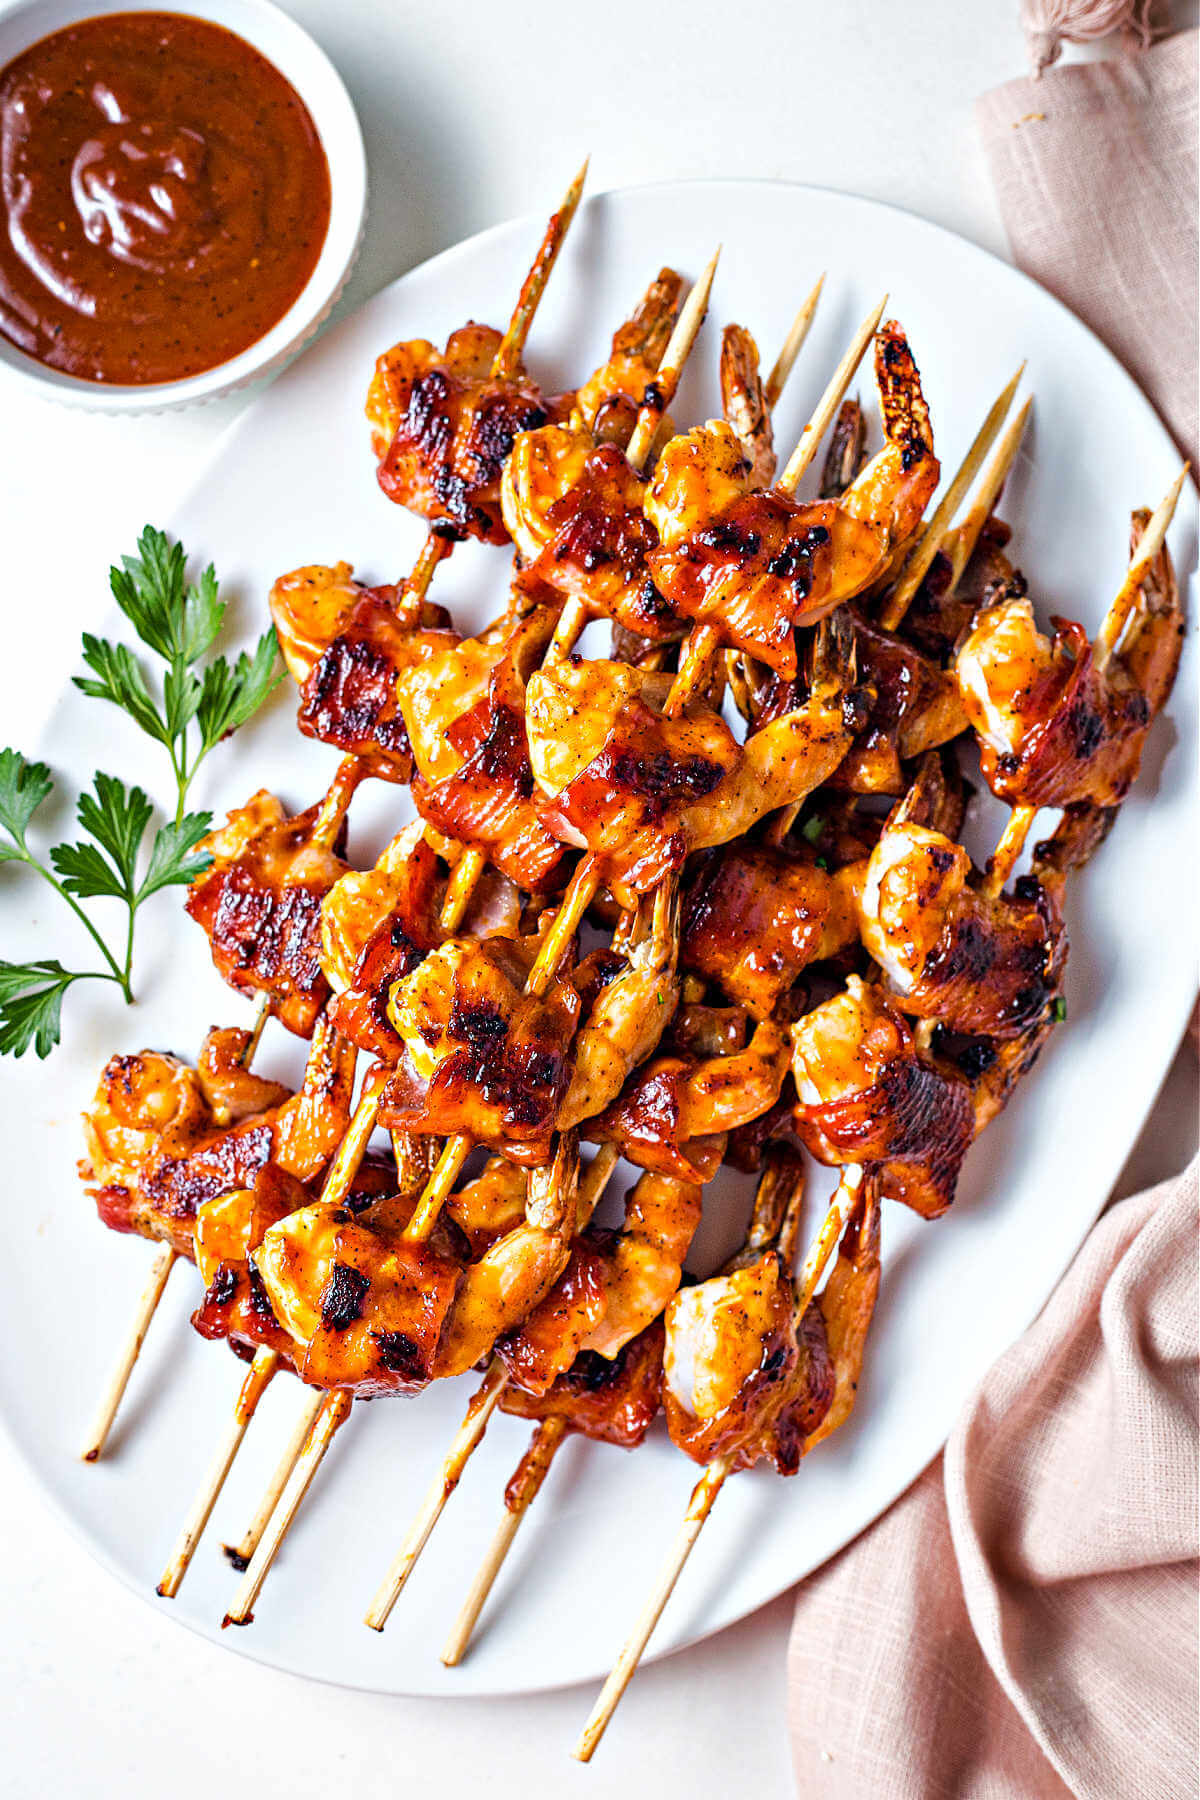
Serving suggestions
Make it a meal! Place bacon wrapped shrimp on a platter with a bowl of extra barbecue sauce (I like to warm it up a bit first) for dipping and serve alongside creamy mashed potatoes and green beans almondine or air fryer okra.
Complete the menu with a pineapple fruit salad and this strawberry pie — you won’t be sorry!
Bacon Wrapped Shrimp
Equipment
- Blackstone flat top griddle
- Skewers
Ingredients
- 12 ounces thin sliced bacon
- 1 pound jumbo shrimp deveined and shelled
- 1 cup barbecue sauce
Instructions
- Preheat the griddle to medium heat, then cook the bacon for just 2 to 3 minutes on each side to render off some of the fat. Do not crisp the bacon, it needs to stay pliable.
- Transfer the bacon to a paper towel lined plate to drain off some of the grease, then cut each slice in half.
- Pat the shrimp dry with paper towels. Carefully wrap a piece of the partially cooked bacon around each one. As you go, thread the shrimp onto a skewer to secure. Repeat until all the shrimp have been wrapped and threaded on skewers.
- Return to the griddle. Sear the skewers for 2 to 3 minutes on each side, until the shrimp starts to turn pink and the bacon is getting crispy.
- Baste the barbecue sauce all over the shrimp and bacon. Flip and baste the other side. Continue cooking and basting until the skewers are glazed, 2 to 3 more minutes.
Notes
- If using bamboo skewers, soak them in water for at least 30 minutes so they don’t burn when placed on the heat.
- To partially cook the bacon in the oven: Preheat the oven to 400 degrees. Arrange the bacon slices on a rimmed baking sheet lined with parchment paper. Bake for 5 to 10 minutes, being sure it is still pliable for easy wrapping.
- Leave a little space between each bacon wrapped shrimp on the skewers to ensure even cooking and that the bacon gets perfectly crispy all around.
- If serving this shrimp as an appetizer, you may prefer to skewer them individually on toothpicks instead. Again, soak the toothpicks in water 30 minutes before using.
Nutrition
Life Love and Good Food does not claim to be a registered dietician or nutritionist. Nutritional information shared on this site is only an estimate. We recommend running the ingredients through an online nutritional calculator if you need to verify any information.


