White Chocolate Peppermint Bark (Easy Christmas Recipe)
This post may contain affiliate links. Please read my disclosure policy.
This tasty White Chocolate Peppermint Bark recipe is beautifully made up of a layer of rich dark chocolate and a layer of creamy white chocolate, topped with crushed candy canes and flavored with peppermint! What could be more fitting for the holiday season?
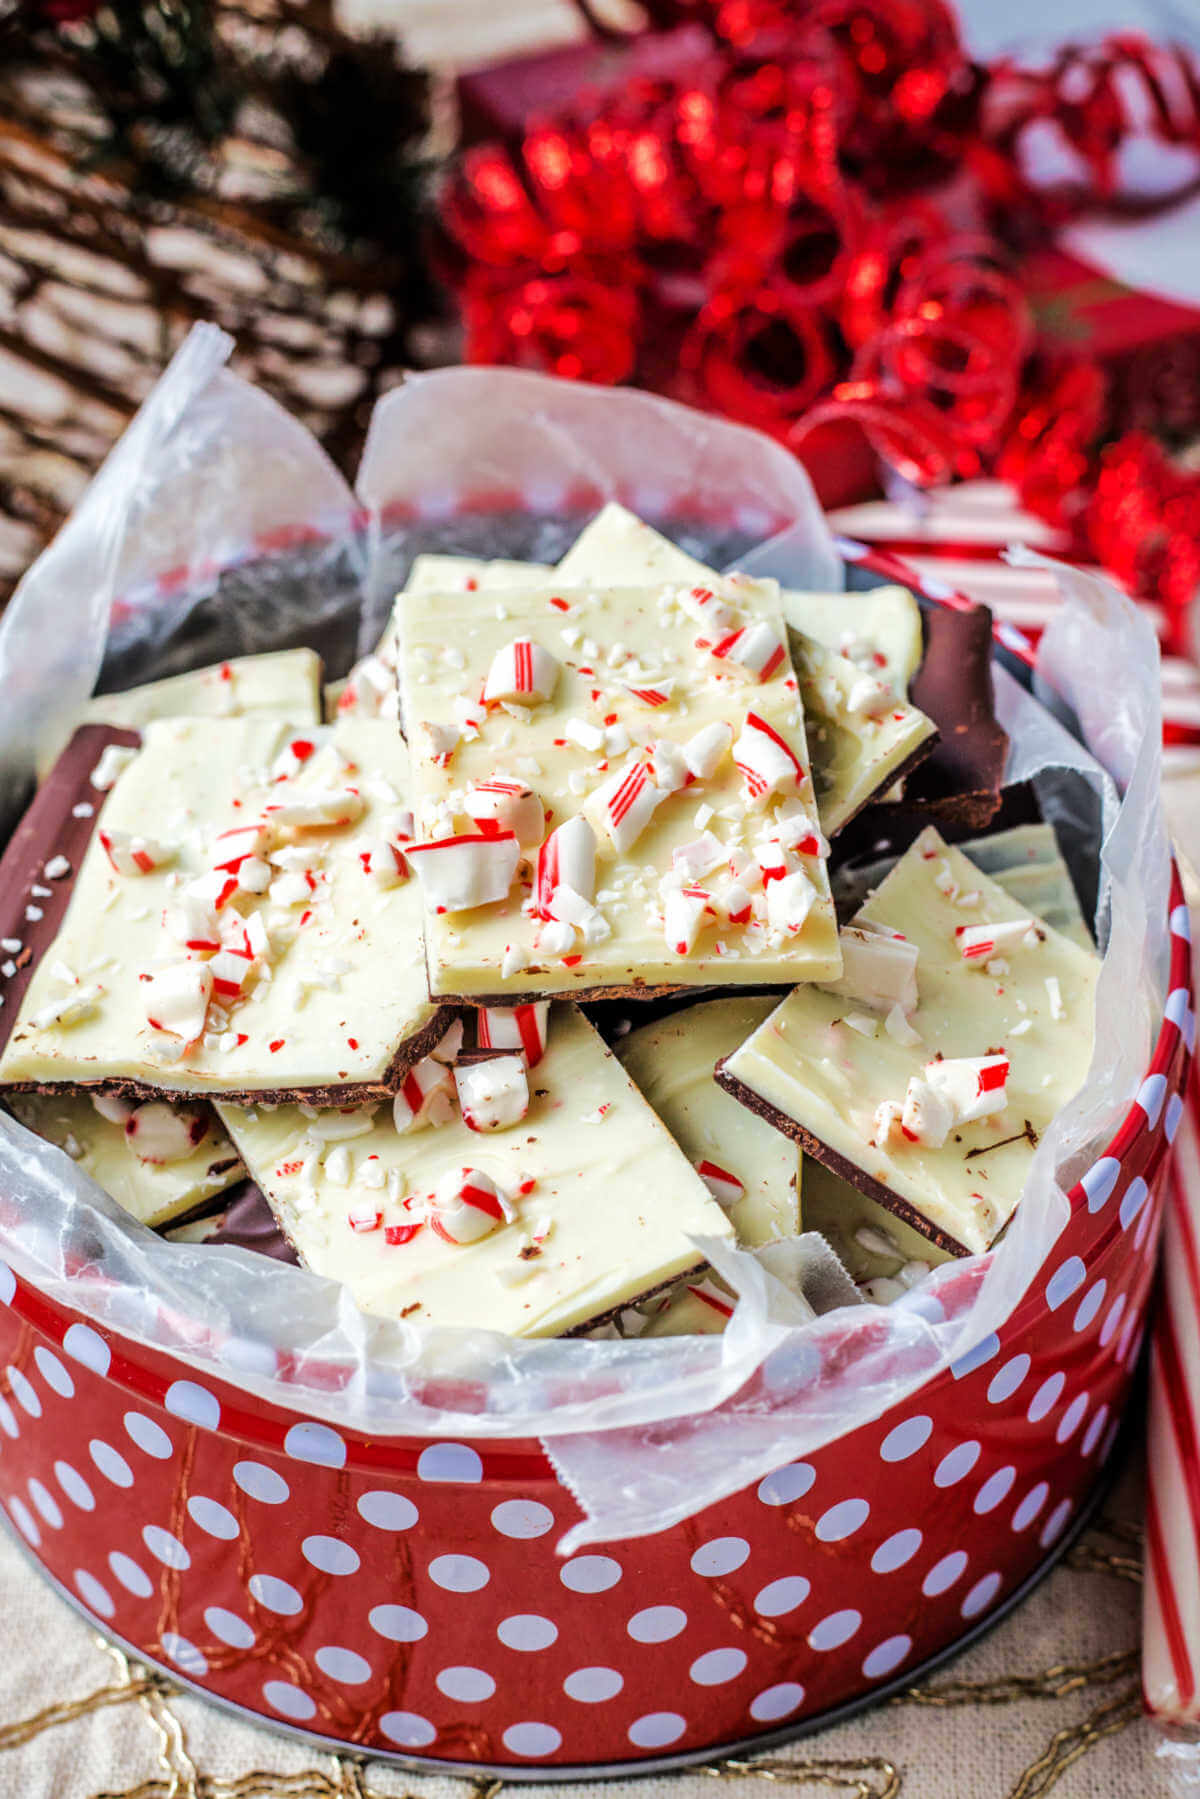
This is an easy candy recipe that I’ve made twice in the past week! Chocolate and Peppermint…yes, please. After all, ’tis the season!
Each Christmas, my mom and grandmother made tons of old-fashioned chocolate and peanut butter fudge to give as gifts to just about everyone — neighbors, teachers, our minister — even the mailman!
I’m a known chocoholic, but I must confess that I can do with just a single piece of fudge during Christmas. For me, fudge is a little too sugary and sweet.
However, this easy Peppermint Bark recipe is an entirely different story. The dark and white chocolate combination is just enough sweetness, and the peppermint adds just enough crunch. Pure and festive perfection!
Why you’ll love this easy recipe for Peppermint Bark!
Key ingredients & substitutions for the Best Peppermint Bark Recipe
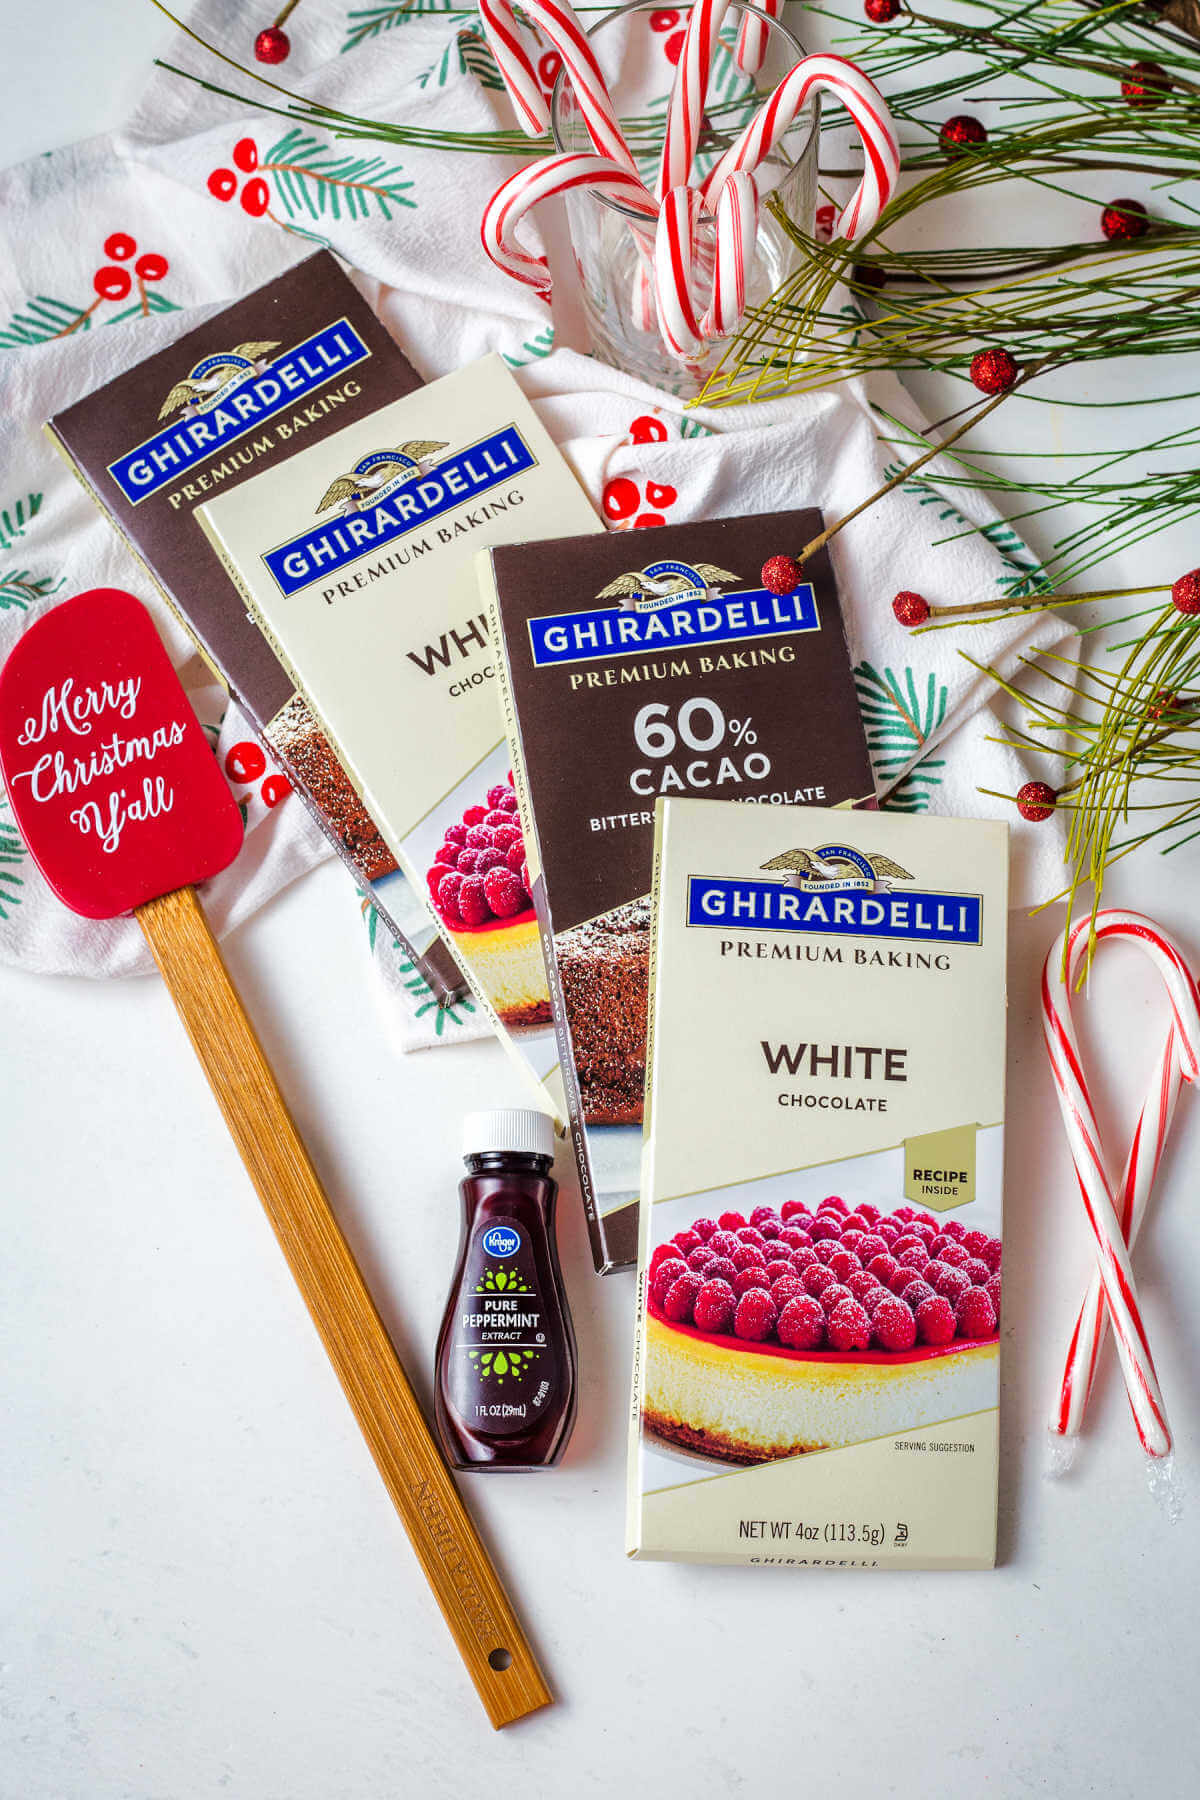
- Candy canes | Use full-size classic peppermint candy canes to add a crunch and holiday look to the delicious bark with crushed candy cane pieces. If preferred, use peppermint candies rather than candy canes.
- Dark chocolate | Use good quality chocolate baking bars for the best results. I used Ghiradelli 60% Cacao Bittersweet Dark Chocolate. If necessary, swap the baking bar for candy melts.
- White chocolate | Contrast the rich and bitter dark chocolate with sweet and creamy white chocolate. I used Ghiradelli’s white chocolate baking bars.
- Vegetable oil | Vegetable oil aids with melting down the chocolate baking bars and helps to reduce the chance for it to burn in the microwave.
- Peppermint extract | Add a little peppermint extract to the two chocolate layers for more holiday flavor. If necessary, you can omit the peppermint extract or use peppermint oil.
How to make Homemade Peppermint Bark recipe
This recipe is simple and delicious — the perfect sweet treat to add to your Christmas menu.
STEP 1 | Crush the candy canes
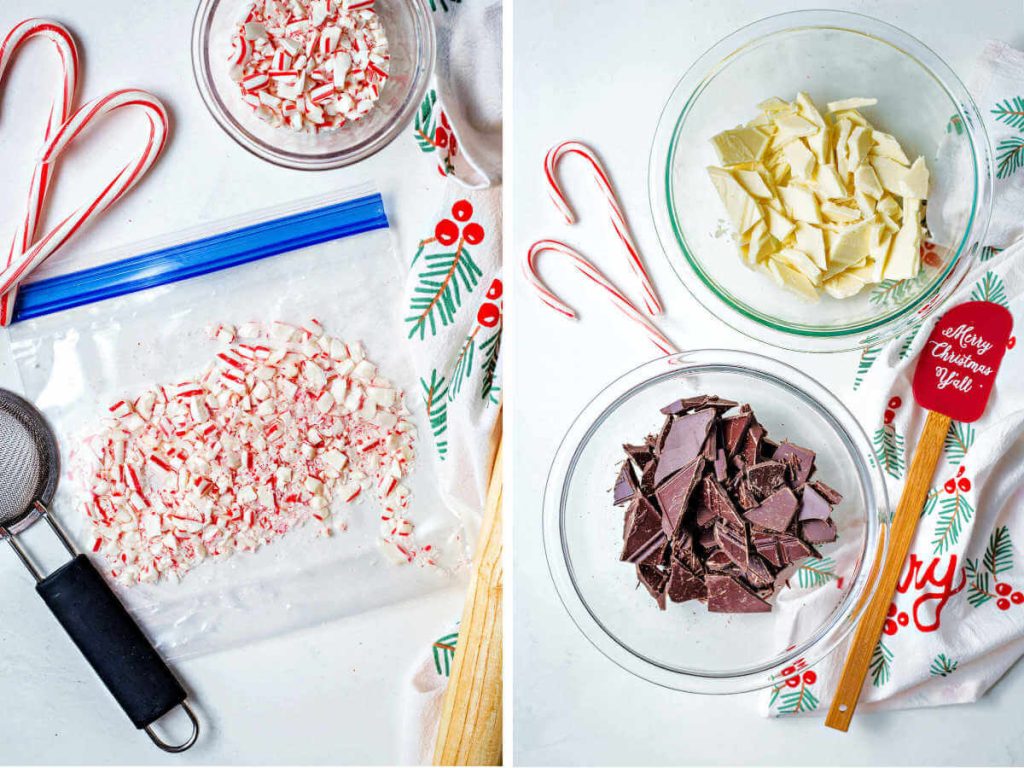
Start this fun recipe by letting out some of your holiday frustrations on minty candy canes! So, grab a Ziplock bag and unwrap your candy canes.
Dump the candy canes into the bag and use a rolling pin to coarsely crush them, using light taps. Be careful not to overdo it — you want a good mix of larger and smaller peppermint pieces.
If necessary, finely crush half the candy canes. Then, pour them out and put the rest of the candy canes into the bag to crush them a little less, giving you larger pieces.
STEP 2 | Sift the crushed candy
Next, remove the flaky dust from crushing the candy canes. Place them in a fine mesh strainer over a bowl and sift to remove the dusty powder. Now that the two are separated reserve the powder and crushed candy for later in the recipe.
You’ll add the dust to the chocolate layers and sprinkle the crushed candy on top of the finished peppermint bark.
STEP 3 | Prep the chocolate
Now for the chocolate! Chop the dark chocolate and the white chocolate into large chunks. Next, place each chocolate in separate medium-sized bowls and add one teaspoon of vegetable oil to each.
STEP 4 | Melt the dark chocolate
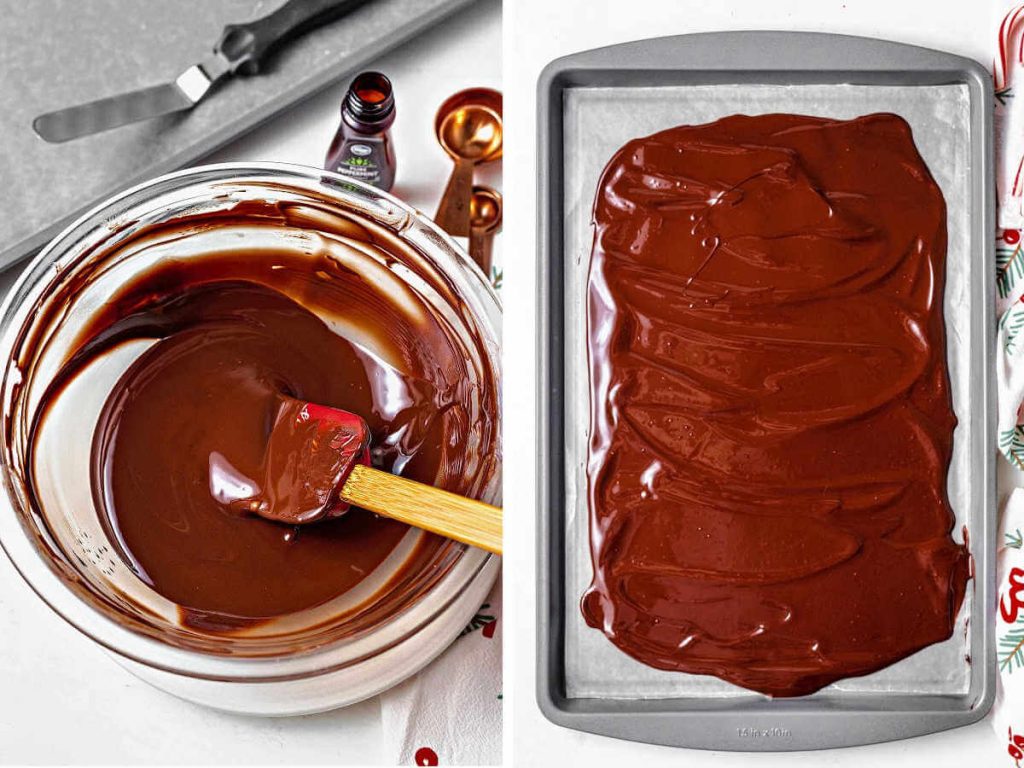
Then, melt the chopped dark chocolate in the microwave. Use 30-second intervals at 50% power to avoid burning the chocolate.
You’ll also want to stir the chocolate after every 30 seconds in the microwave. Once fully melted, add 1/4 teaspoon of peppermint extract and stir it into the bitter dark chocolate.
STEP 5 | Chill the dark chocolate layer
Next, line a cookie sheet with parchment or wax paper. Make the dark chocolate bottom layer by pouring the melted chocolate onto the baking sheet.
Then, smooth the chocolate with an offset spatula to make an even layer and place it in the refrigerator for 30 minutes to chill. The layer is finished cooling when the chocolate has completely set.
STEP 6 | Create the white chocolate layer
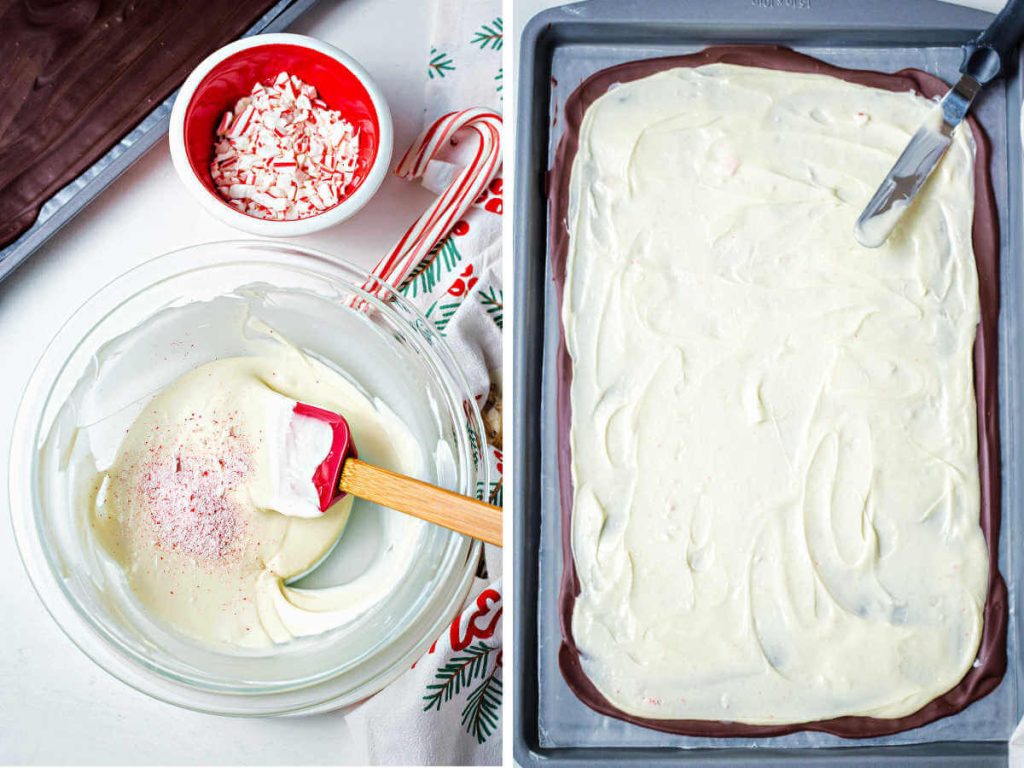
After the dark chocolate has chilled for 30 minutes, repeat the same melting process with the white chocolate. It’s essential to wait until the dark chocolate sets, so the layers stay intact.
When the white chocolate is fully melted, stir in the reserved candy cane dust and add the remaining 1/4 teaspoon of peppermint extract.
tips
- When adding the white chocolate layer, carefully spoon small amounts all over the dark chocolate layer and gently smooth with a spatula to avoid melting the dark chocolate layer. However, if the layer does melt some, don’t worry because it still will taste just as good!
- This recipe has only five ingredients, so spending the extra buck on high-quality products makes a big difference.
STEP 7 | Pour the white chocolate and refrigerate
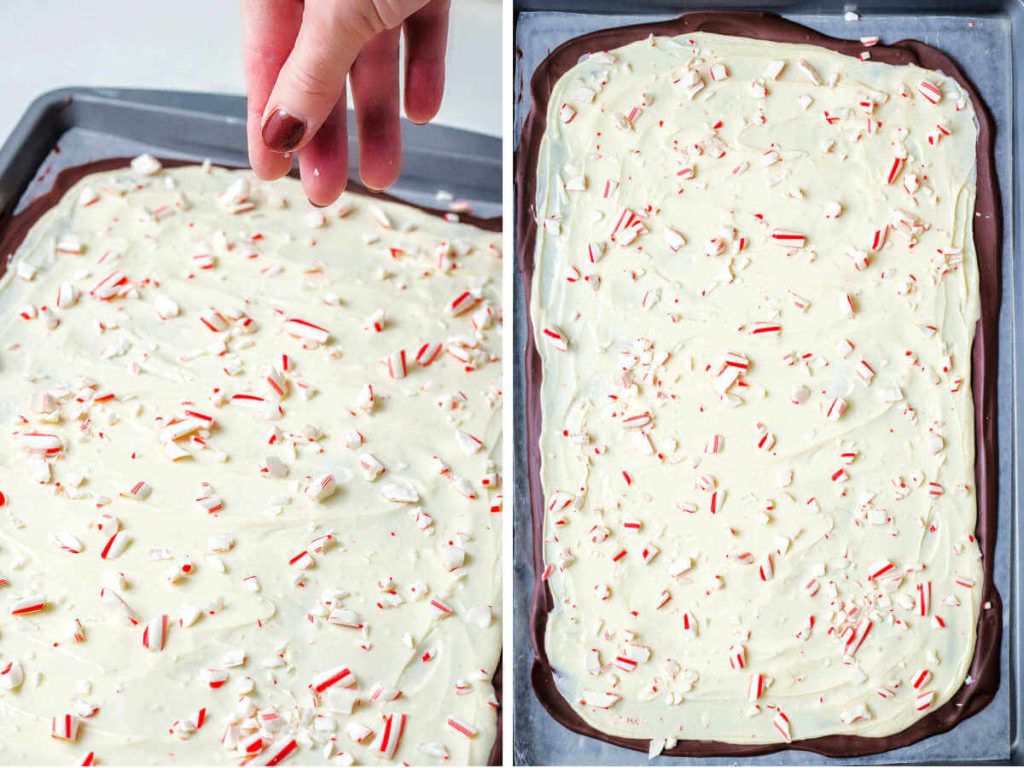
Remove the cookie sheet from the refrigerator and carefully pour the melted white chocolate over the dark chocolate layer. Then, smooth the layer with an offset spatula.
Finally, sprinkle the crushed candy canes evenly over the top and refrigerate until the peppermint bark is fully set.
STEP 8 | Break up the bark and serve!
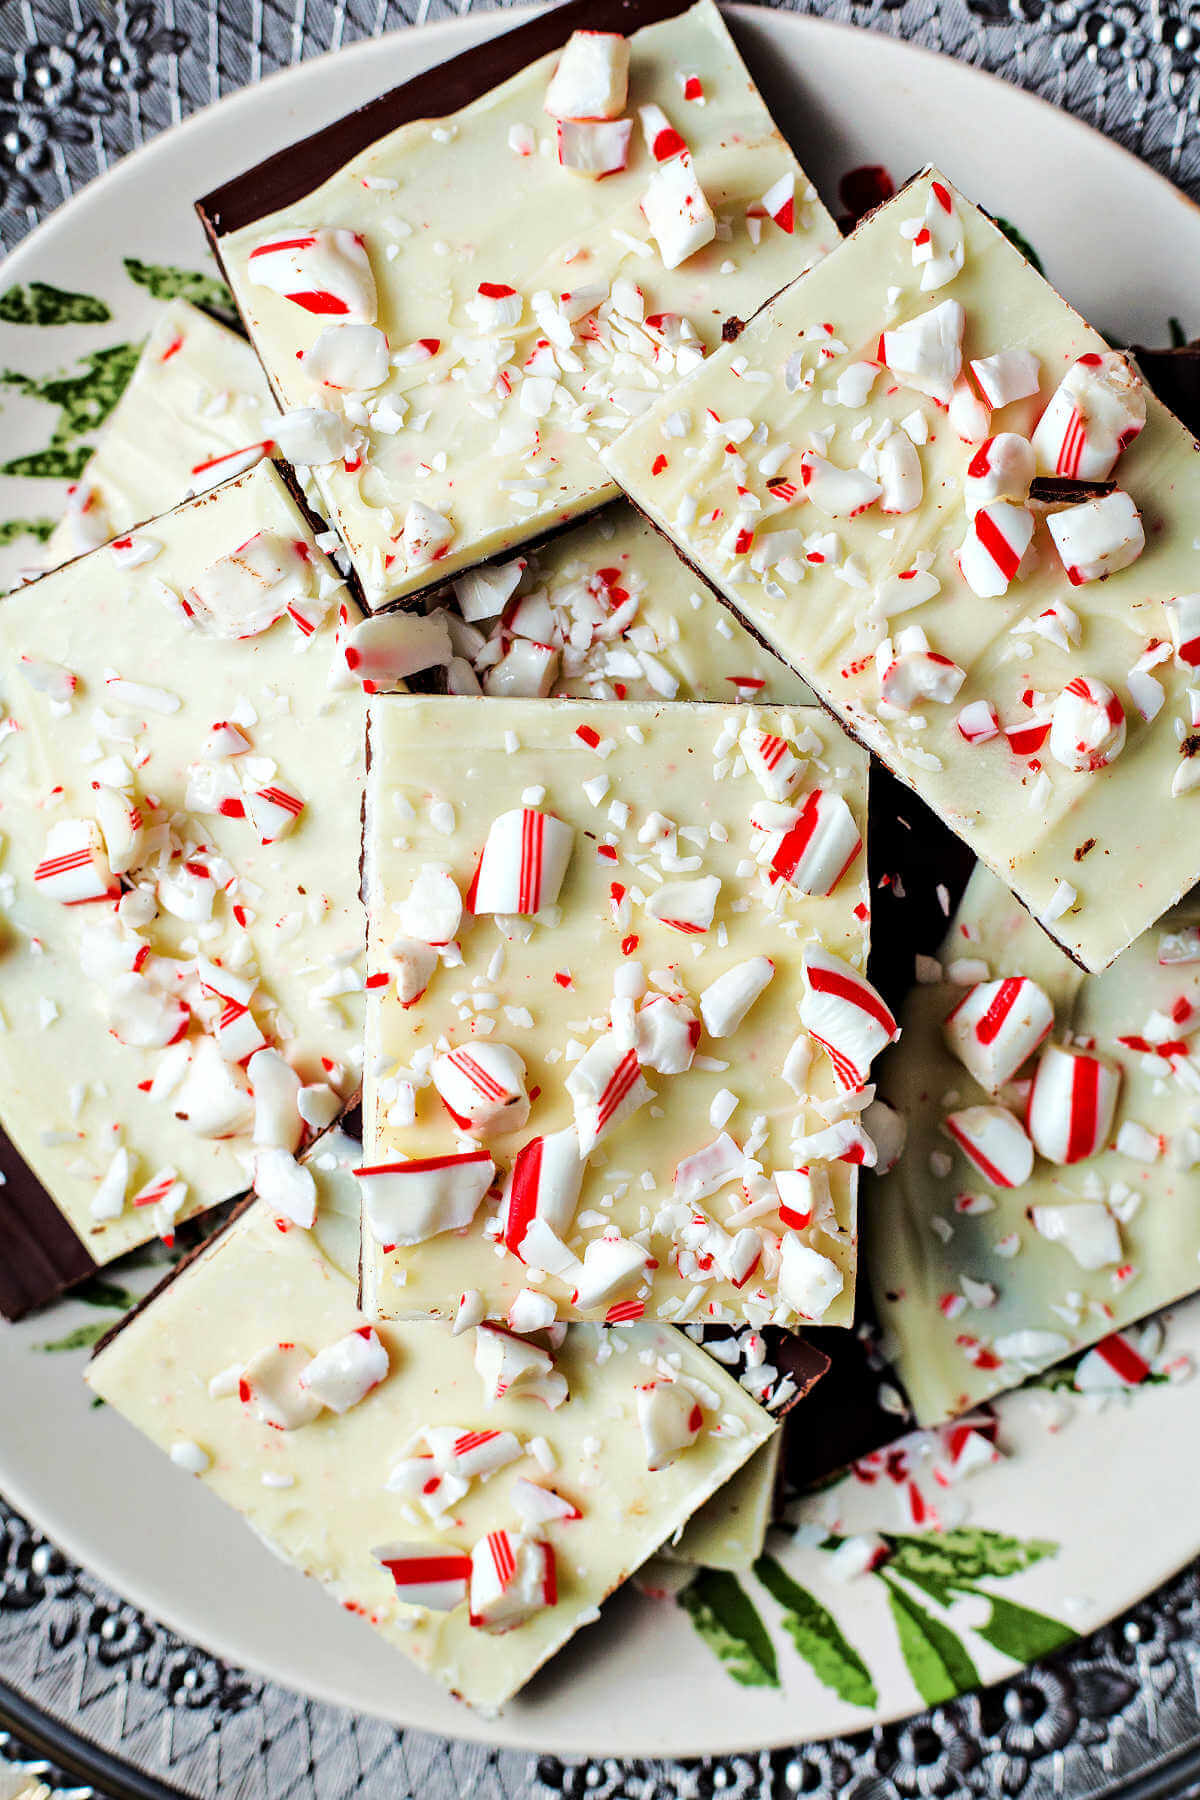
Once the bark is chilled and solid, break or cut the peppermint bark into pieces. The size of each piece will be based on your preference.
Keep in mind that cutting the bark will result in clean-cut squares or rectangles while breaking it up will create that iconic organically-shaped peppermint bark look.
If you’re a fan of this classic recipe, try more of my peppermint masterpieces to get you in the holiday spirit. Look forward to White Chocolate Peppermint Popcorn, Peppermint Cheesecake Bars, Peppermint Ice Cream, and Peppermint Chocolate Drop Cookies!
Frequently asked questions
Store this delicious peppermint bark in an airtight container at room temperature for up to two weeks. Stack the peppermint bark pieces in layers separated by parchment paper so the bark won’t stick together.
If the room temperature is above 72 degrees Fahrenheit, I recommend storing the peppermint bark in the refrigerator instead.
This sweet treat also lasts well in the freezer for long-term storage. Stack the pieces on a plate with parchment paper between each layer and wrap the dish in aluminum foil or plastic wrap.
Then, place it into a large freezer-safe Ziplock bag.
When ready to dive into this chocolatey goodness, allow the bark to thaw in the fridge overnight.
There are two potential causes for the layers of your peppermint bark to separate. First, ensure you use white chocolate made with cocoa butter and avoid products made with palm or coconut oil. Dark chocolate is made with cocoa butter which doesn’t like to bond with coconut or palm oil in white chocolate.
Secondly, breaking the bark at room temperature rather than fresh out of the fridge may help the layers not to crumble apart from one another.
Customize this simple recipe by trying one of the various creative variations. For instance, substitute half of the crushed candy canes for red and green sugar sprinkles for an even more festive look. You can also use milk chocolate or semi-sweet chocolate chips instead of dark chocolate.
If you can’t get enough creamy and sweet white chocolate, skip the dark chocolate layer and use only white chocolate! Or make a triple layer peppermint bark starting with white chocolate as the base, then dark chocolate in the middle and white chocolate on top!
Additionally, try adding M&M’s to the recipe, using the original or mint-flavored candy—YUM!
If your white chocolate and dark chocolate layer mix as you pour over the white chocolate, there’s no need to fret — the peppermint bark will still taste amazing! However, the best way to avoid this is to allow the white chocolate to cool some before smoothing it over the dark chocolate layer.
Serving suggestions
- Allow this peppermint bark recipe to inspire a spread of sweet treats for the holidays! Feature sweet and rich desserts like English Toffee and Buckeye Brownie Bites. Then, sprinkle in with some simple recipes, like Crispy Coconut Balls and Easy Microwave Peanut Brittle.
- One of my favorite things about this holiday recipe is how it makes an excellent Christmas gift! Even better, you can check off multiple people from your list by making as many batches as you need.
- Homemade peppermint bark is perfect for teachers, neighbors, co-workers, employees, grandma, and grandpa — the sky’s the limit!
- Wrap them in holiday packaging and send them off with a heartfelt note wishing the receiver Happy Holidays! It also makes for a great stocking stuffer.

Behind the recipe: Peppermint Bark
Did you know December first is National Peppermint Bark Day? This makes me wonder what the origins of this classic holiday treat are. Like other traditional sweets, the exact history is difficult to track down.
However, what we do know is that a peppermint bark ad was featured in a newspaper all the way back in 1966. The candy’s recent popularity can be credited to Williams Sonoma.
In 1988, the company decided it’d like to come up with a delicious, nostalgic, and festive treat. It took no time for William Sonoma’s peppermint bark to gain a massive following of chocolate addicts and Christmas lovers!
Peppermint Bark
Ingredients
- 5 – 6 6-inch candy canes
- 2 4-oz. dark chocolate baking bars
- 2 4-oz. white chocolate baking bars
- 2 teaspoons vegetable oil divided
- ½ teaspoon peppermint extract divided
Instructions
- Unwrap the candy canes and place in a ziplock bag. Use a rolling pin to coarsely crush the candy canes, using light taps. You want some larger pieces, so be careful not to over do it!
- Place a fine mesh strainer over a bowl and empty in the crushed candy. Sift to remove the "dust" or powder, reserving both the powder and the crushed candy. Set aside for now.
- Coarsely chop the dark chocolate and the white chocolate and place each in separate medium-size bowls. Add 1 teaspoon of the vegetable oil to each bowl.
- Starting with the dark chocolate, melt the chocolate in the microwave in 30 second intervals at 50% power. Stir well after each 30 seconds. When fully melted, add 1/4 teaspoon peppermint extract and stir well.
- Pour the melted dark chocolate onto a parchment or wax paper lined cookie sheet. Smooth the layer with an offset spatula, then place in the refrigerator for 30 minutes, or until the chocolate has set.
- After 30 minutes, repeat the same melting process with the white chocolate. When full melted, stir in the reserved candy can dust and the remaining 1/4 teaspoon peppermint extract.
- Carefully pour the melted white chocolate over the dark chocolate layer and smooth with an offset spatula. Sprinkle the crushed candy canes evenly over the top, then refrigerate until fully set.
- To serve, break or cut the peppermint bark into pieces. Store in the refrigerator for up to a week.
Notes
- When adding the white chocolate layer, carefully spoon small amounts all over the dark chocolate layer and gently smooth with a spatula to avoid melting the dark chocolate layer. However, if the layer does melt some, don’t worry because it still will taste just as good!
- This recipe has only five ingredients, so spending the extra buck on high-quality products makes a big difference.
Nutrition
Life Love and Good Food does not claim to be a registered dietician or nutritionist. Nutritional information shared on this site is only an estimate. We recommend running the ingredients through an online nutritional calculator if you need to verify any information.





Great recipe. I love the addition of the peppermint dust to the white chocolate to give it an extra minty taste. Easy, clear instructions. Turned out perfect!
Thank you! I think the peppermint dust is a nice touch, too!