Homemade Pickled Okra Recipe for Canning


This post may contain affiliate links. Please read my disclosure policy.
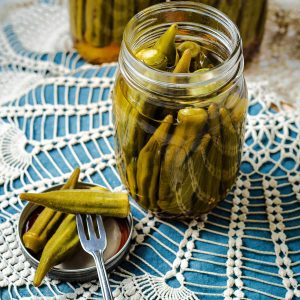
Make the best Homemade Pickled Okra Recipe for Canning! This fool-proof recipe produces perfectly crisp and slightly sweet pickled okra that is delicious served on burgers, salad, or snacked on by itself!
“They came out great. I used pickled spices.” — Ruby


Sheila’s Recipe Snapshot for Canning Pickled Okra
If you’re serving southern folks or love a southern dish yourself, this is a must-make and must-try recipe!
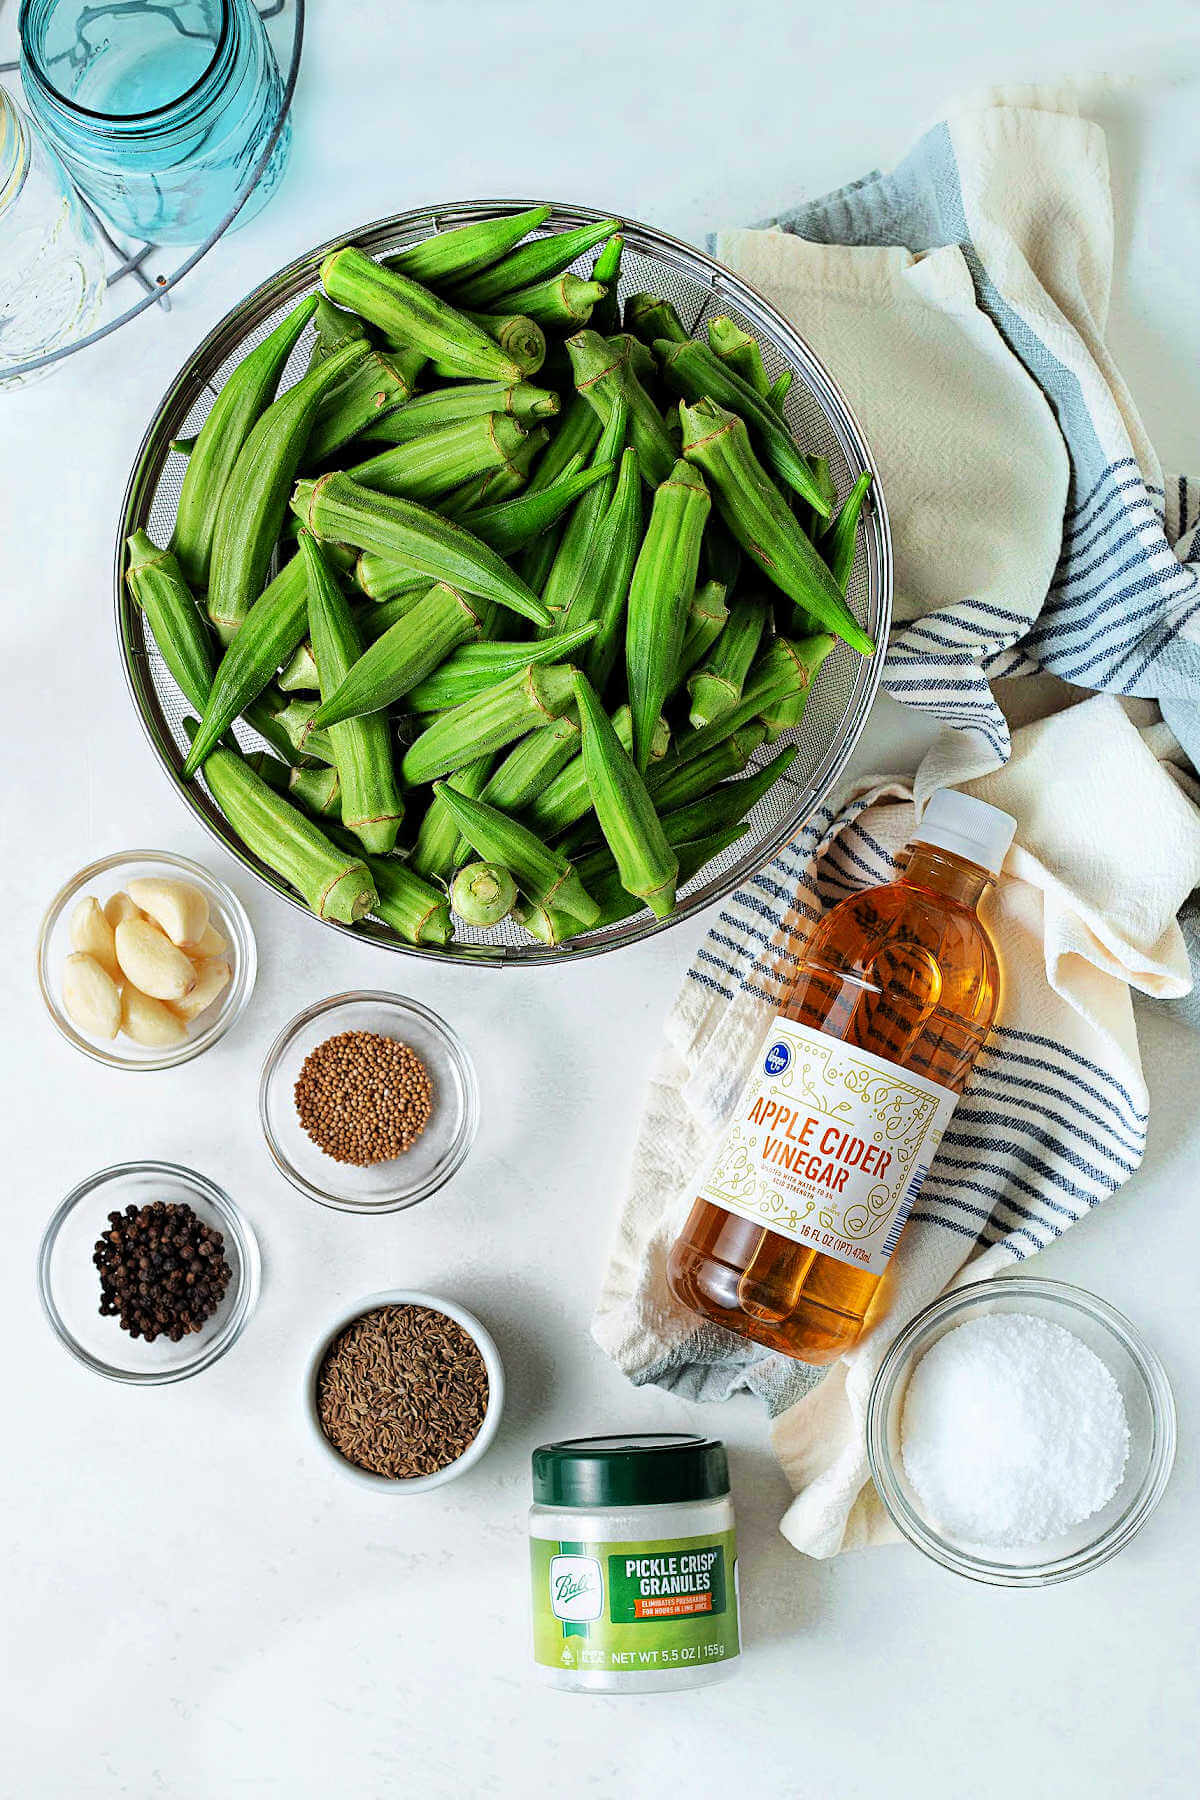
Ingredient Notes for Pickled Okra
- Okra | Use small pods of fresh okra, about 4 inches each, to fit correctly in an average-sized jar.
- Seasoning | Add some flavor to the pickled okra with dill seeds, mustard seeds, whole black peppercorns, and a dash of sugar. If desired, customize it with your preferred seasonings.
- Pickle Granules | I like to use Ball pickle crisp granules to pickle okra and other veggies properly.
- Garlic | Add a garlic clove to each far to further boost the flavor.
- Water and vinegar | The base of the pickling brine include water and a couple of cups of apple cider vinegar. If preferred, use wine, malt, or white vinegar instead.
- Salt | Add a pinch of kosher salt before boiling the brine so it completely dissolves.
Variations and Substitutions
- Make spicy pickled okra: Add dried red peppers to the jars for a hint of heat before adding the brine. Red pepper flakes and other spicy seasoning may also do the trick.
- Larger okra? Use extra large mason jars if you want to pickle larger okra pods. This recipe is written for single-pint jars. Keep in mind that smaller okra pods produce the best flavor and texture.
- Make it sweet: Some recipes call for a sweeter version. If that is your thing, add granulated sugar to your liking.
How to Pickle Okra
The pickling process spans a couple of days, but the steps of this easy recipe are simple and require minimal effort!
STERILIZE THE JARS. Start by sterilizing the jars and lids in simmering water or place them in a 250-degree oven for about 10 minutes.
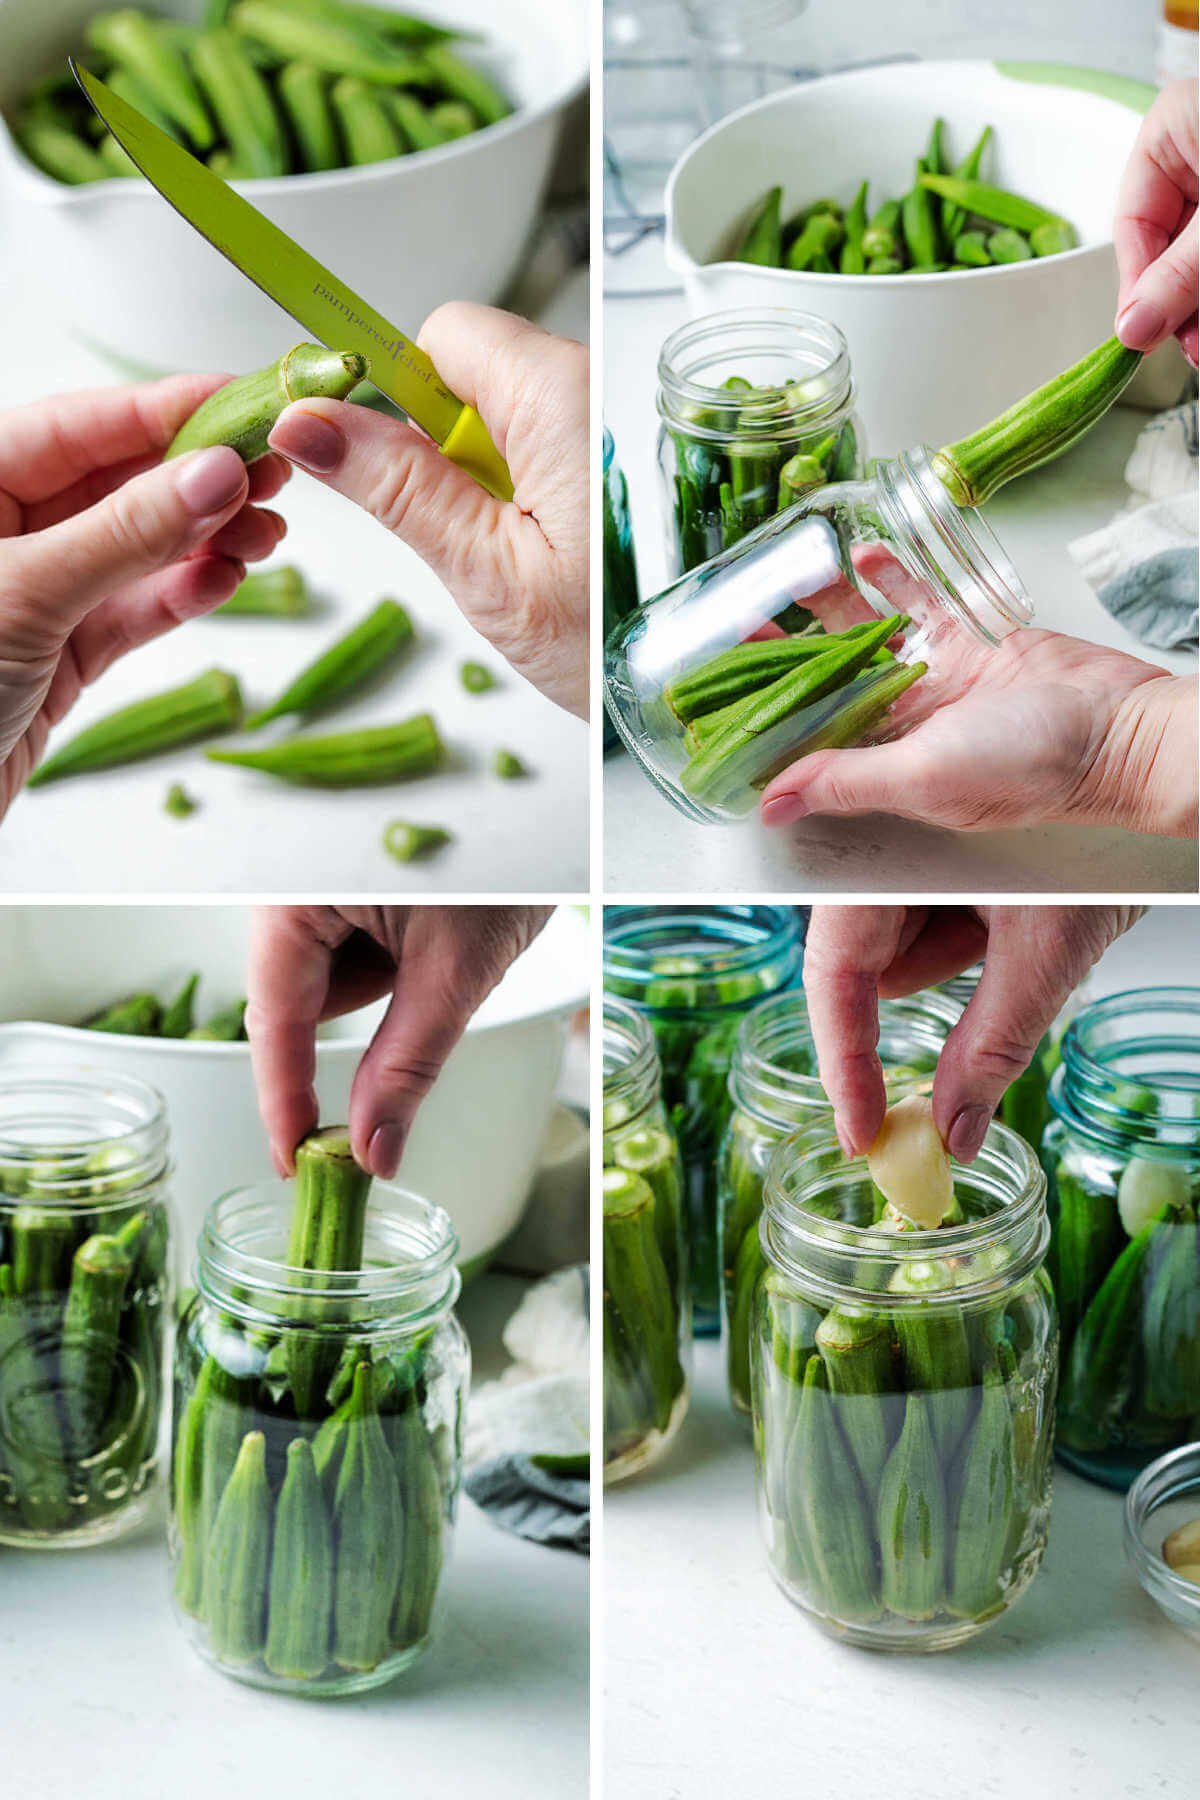
PREP THE OKRA AND FILL THE JARS. Once the jars are well sterilized and cooled, rinse the fresh okra and trim the tops, being careful not to cut into the pods.
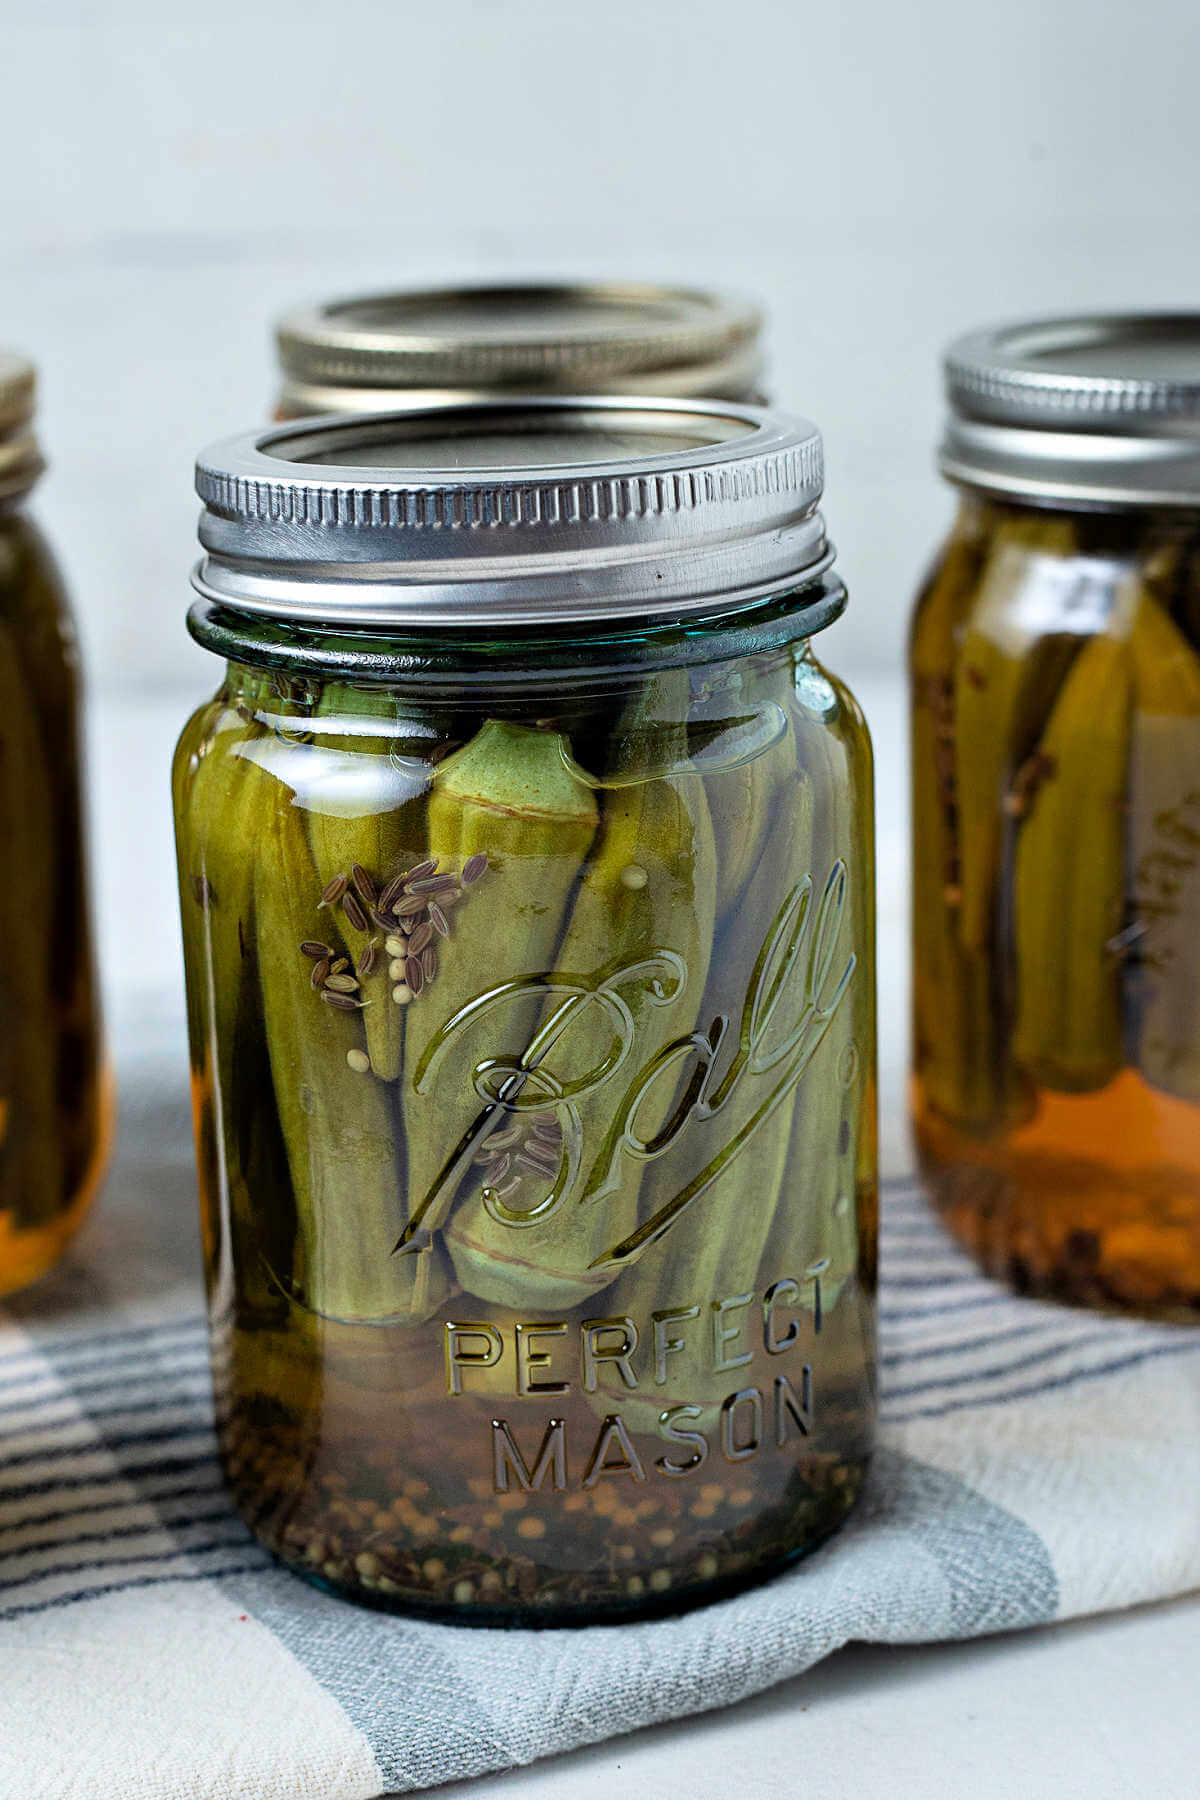
Next, fill the jars by placing some pods stem up and some stem down, fitting as many pods in the pint-sized jar as possible.
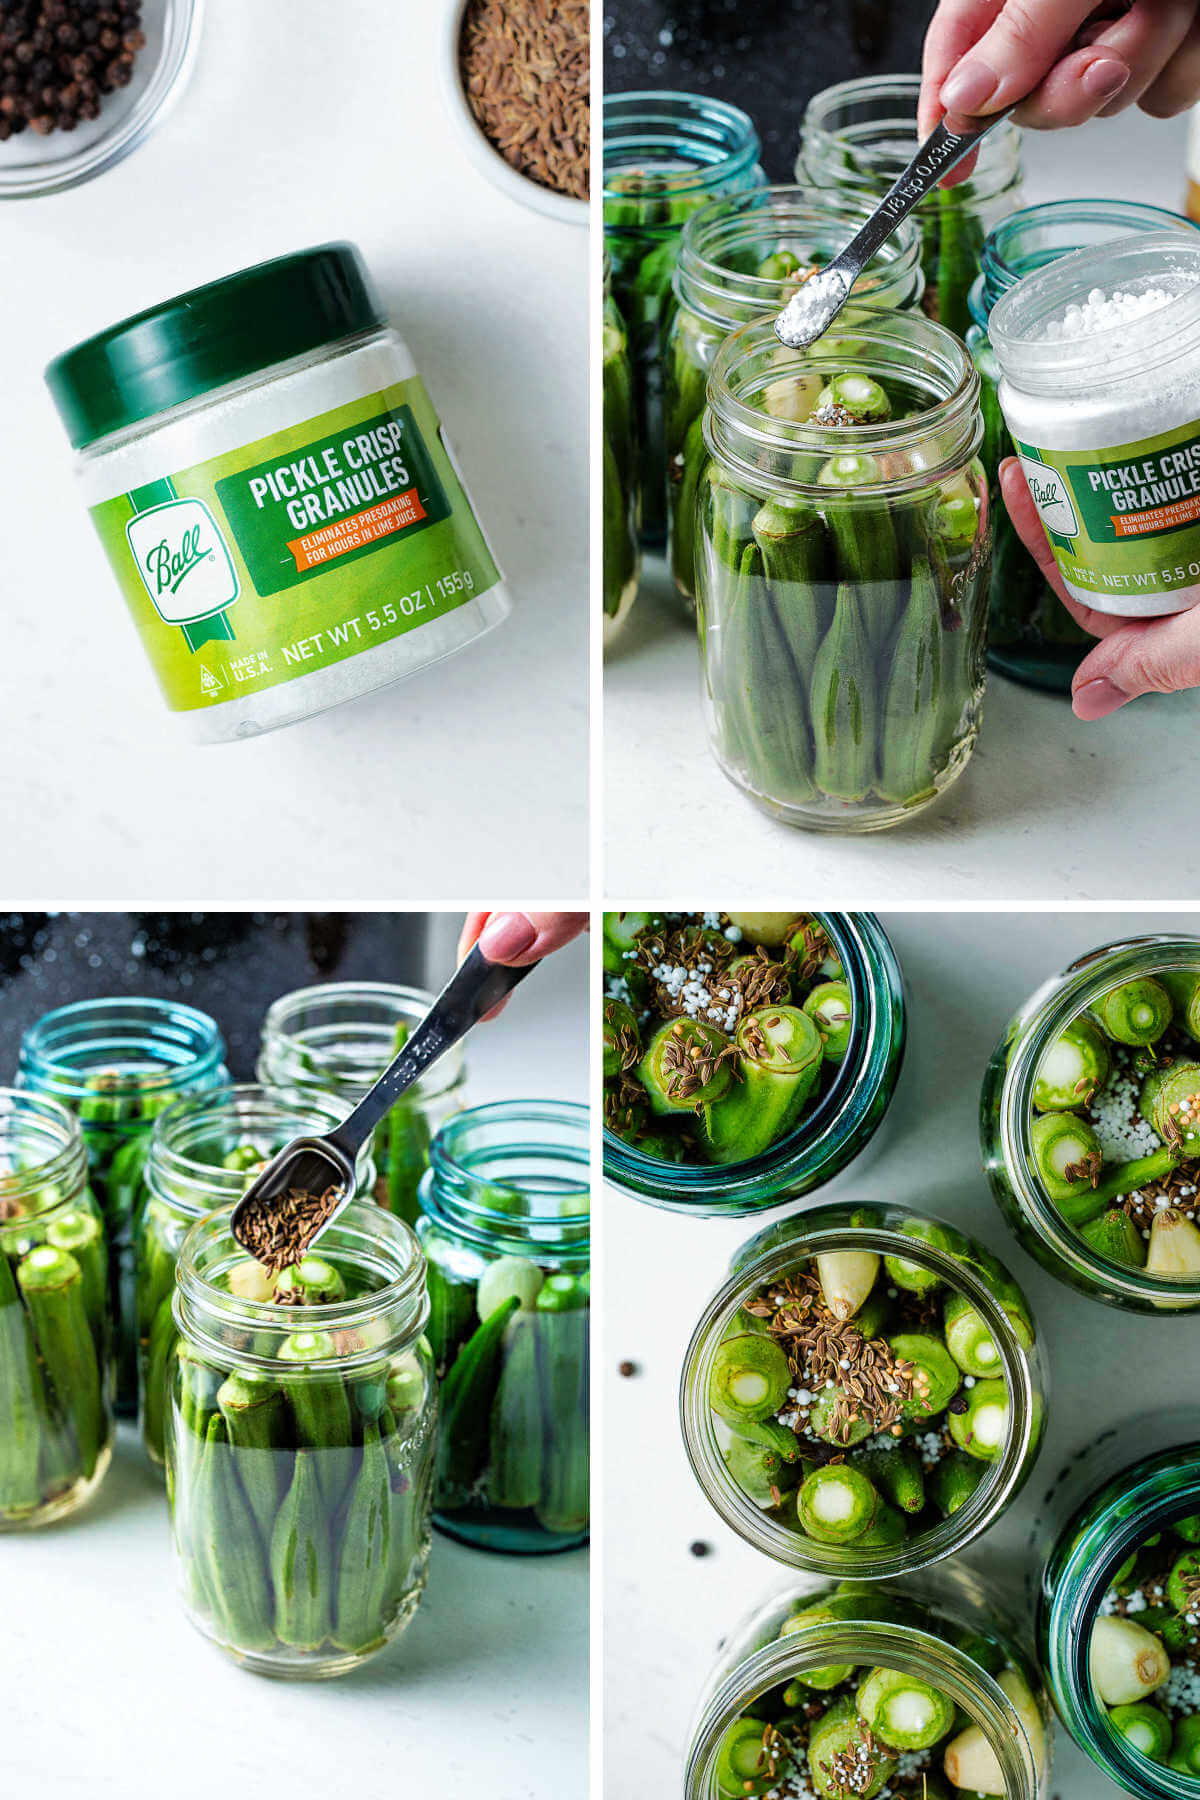
ADD GARLIC, GRANULES, AND SEASONING. Then, add a clove of garlic to each jar and sprinkle in the pickle crisp granules.
Season with 1 teaspoon of dill seed, 1/4 teaspoon of mustard seeds, 1/4 teaspoon of peppercorns, and 1/2 teaspoon of sugar.
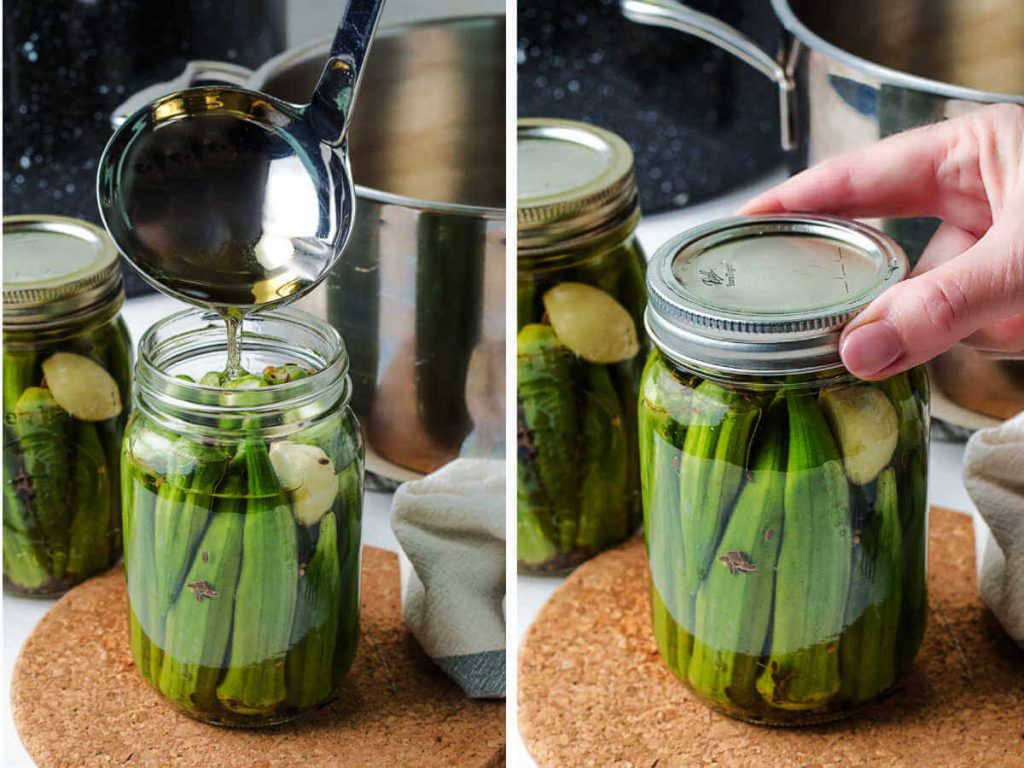
ADD HOT BRINE TO JARS. Combine the water, apple cider vinegar, and salt in a large pot. Bring the ingredients to a rolling boil, then turn off the heat and carefully begin to ladle the hot pickling liquid into each jar, filling to within 1/4 inch from the top.
SEAL THE JARS. Next, wipe any drips from the rims with damp, clean towels, place bands and lids, and tighten the rings.
PLACE JARS IN THE HOT WATER BATH. Now, process the jars in a boiling hot water bath for 10 minutes, ensuring the water level is 1 inch over the top of the jars.
COOL JARS. Remove the hot jars from the water bath and place them on a clean, dry towel on the counter. Cool completely, leaving them undisturbed for 12 to 24 hours.
Save This Recipe
TEST SEALS OF JARS AND STORE. Finally, ensure the lids have been sealed properly by gently pressing down in the middle. Allow the okra to sit in the pickling brine for at least 3 days before serving.
Then, store and serve when ready!
Make Quick Pickled Okra With the Refrigerator Method
You can easily make a small batch or single jar of pickled okra by simply skipping the water bath canning.
Follow the recipe up to the water bath canning step. After adding brine to the jars, cool completely before storing them in the refrigerator.
As with the home canning method, let the okra set in the brine for 3 days before eating. Refrigerator pickles are good for 3 to 4 weeks.

More Recipe Success Tips
Storage Tips
- When your pickled okra is stored in a cool, dark place, it should last approximately one year. Before storing, ensure the lids are sealed to prevent air leaks.
- When it is time to pull them out of storage, check for air bubbles or mold. Unfortunately, those jars need to be tossed.
- If a jar does not seal from the get-go, go ahead and place it in the fridge and use it immediately.
- Once a jar has been opened, store it in the refrigerator.
Frequently Asked Questions
Because the freezing process softens the okra, I don’t recommend using frozen okra for pickling.
Not at all! Because you never cut into the pod, the pickled veggie stays crisp, and the vinegar neutralizes any chance of slimy texture anyway.
Okra has health benefits, like fiber, antioxidants, and vitamins. They are known for lowering blood sugar levels, and pickled okra is good for your gut!

Looking for More Okra Recipes?
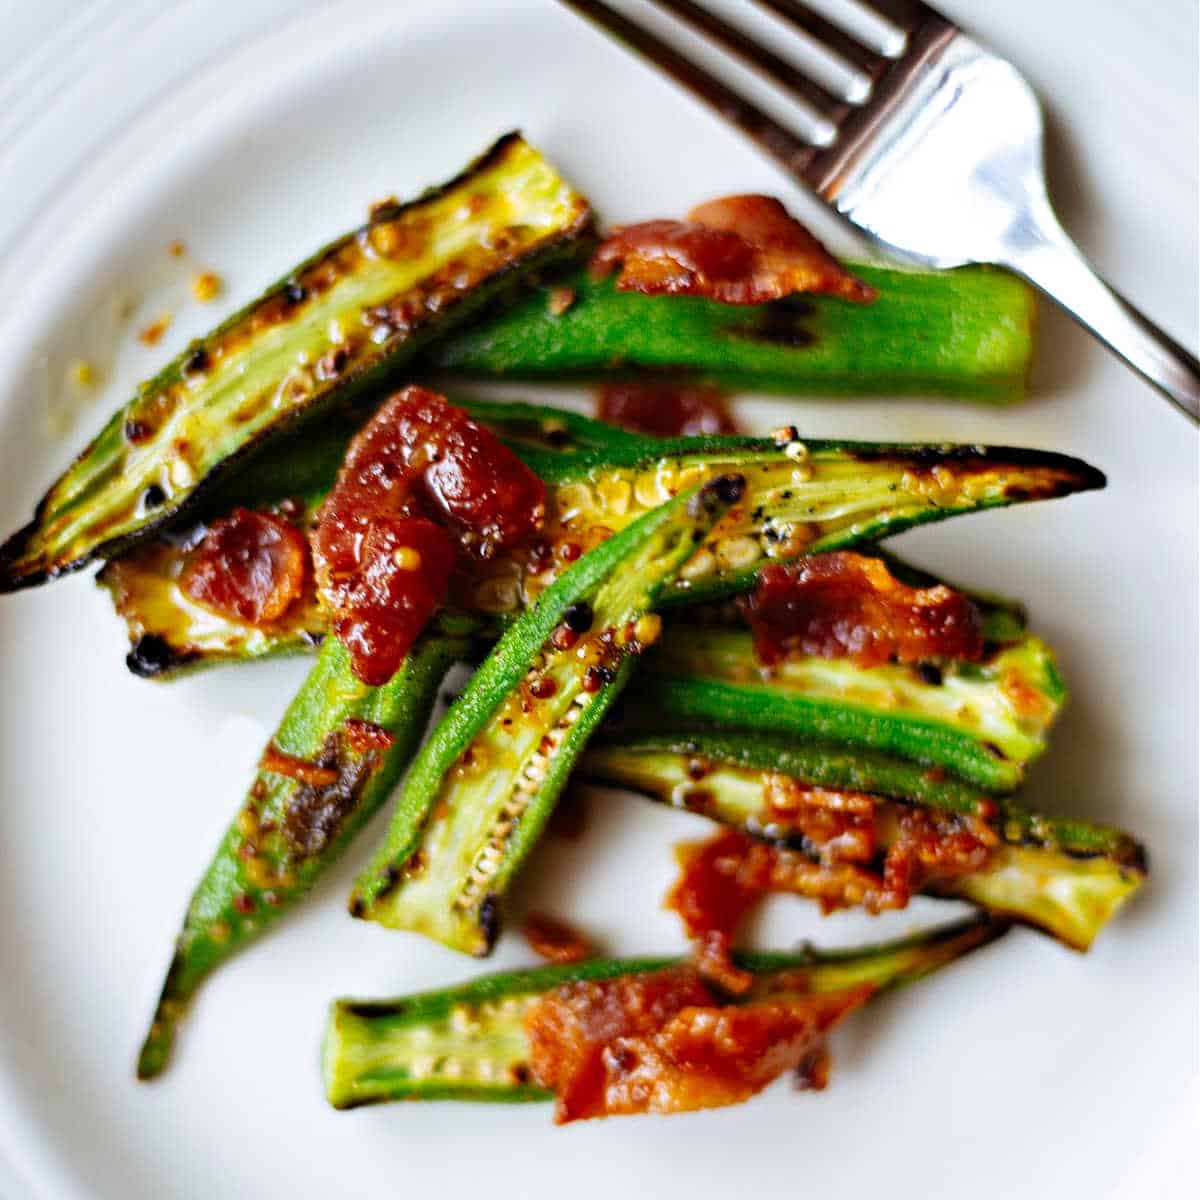
Well, there are plenty of ways to enjoy this tasty veggie! Try my peppery Grilled Okra for a classic taste, crispy “oven-fried” Baked Okra, or Roasted Okra with bacon vinaigrette for more delicious flavor!
What to Serve With Pickled Okra
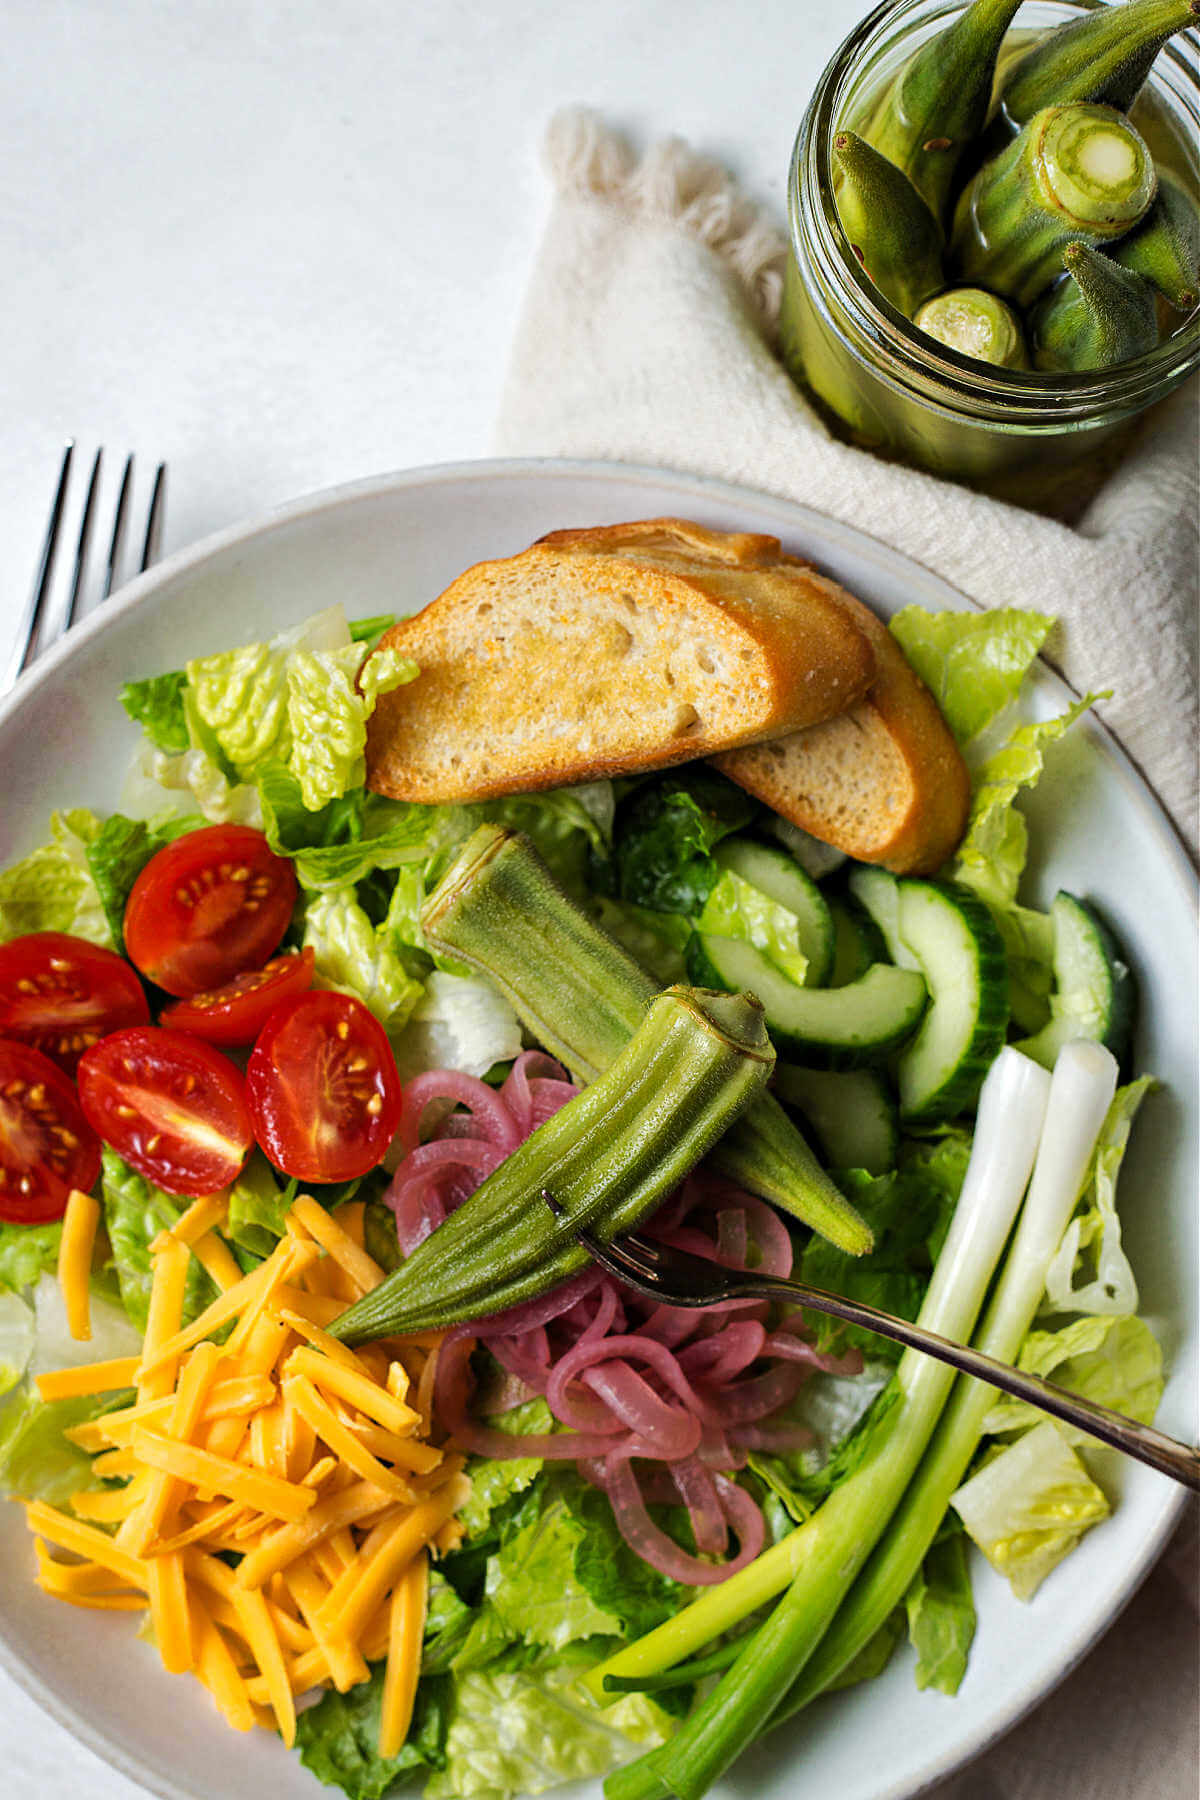
Serve your homemade pickled okra as the perfect garnish on this Taco Salad with Catalina Dressing with Fritos or on this Grilled Turkey Burgers recipe to bring extra flavor to the dish!
It also pairs wonderfully on salads with this easy Pickled Red Onions Recipe that takes under an hour to make!

Love this recipe? Bookmark it for the future!
Simply tap the heart symbol located in the lower right corner of your screen, and the recipe will be securely stored in your own recipe box.
Homemade Pickled Okra Recipe
Ingredients
- 2-3 pounds fresh okra small pods, about 4 inches each
- 7 teaspoons dill seed
- 1 ¾ teaspoons mustard seeds
- 1 ¾ teaspoons whole black peppercorns
- 3 ½ teaspoons sugar
- 1 teaspoon Ball pickle crisp granules
- 7 cloves garlic
- 5 cups water
- 2 ½ cups apple cider vinegar
- ⅓ cup kosher salt
Instructions
- Sterilize jars and lids directly before using (heat in simmering water or by laying jars on oven rack in a 250-degree oven for about 10 minutes).
- Rinse okra and trim tops — do not cut into the pods. Fill jars by placing some pods stem up and some stem down.
- To each jar, add 1 teaspoon dill seed, 1/4 teaspoon mustard seed, 1/4 teaspoon peppercorns, 1/2 teaspoon sugar, 1/8 teaspoon pickle crisp granules, and a clove of garlic.
- In a large pot, combine the water, apple cider vinegar, and salt. Bring to a boil, then turn off the heat and carefully begin to ladle the hot pickling brine into each jar, filling to within 1/4 inch from the top.
- Wipe any drips from the rims with a clean damp cloth, place the lids, and finger tighten the rings.
- Process in a boiling water bath (making sure the water level is 1 inch over the top of the jars) for 10 minutes.
- Remove the jars from the water bath and place them on a clean dry towel on the counter. Cool completely, leaving them undistrubed for 12 to 24 hours.
- Ensure the lids have sealed properly by gently pressing down in the middle. Let the okra sit in the pickling brine (in the jars) for at least 3 days before serving. Store
Notes
- You can easily make a small batch or single jar of pickled okra by simply skipping the water bath canning.
- Follow the recipe up to the water bath canning step. After adding brine to the jars, cool completely before storing them in the refrigerator.
- As with the home canning method, let the okra set in the brine for 3 days before eating. Refrigerator pickles are good for 3 to 4 weeks.
Nutrition
Life Love and Good Food does not claim to be a registered dietician or nutritionist. Nutritional information shared on this site is only an estimate. We recommend running the ingredients through an online nutritional calculator if you need to verify any information.


What pickle okra recipe should I use for mild pickle okra, like I buy from the food store? I really like Mild Pickle Okra.
Diana, this recipe is not spicy, so I believe you would like it if you give it a try.
They came out great. I used pickles spices.
Im looking for receipe that no refridgeration needed until after opening. Is this it?
Sharon, I haven’t heard of a pickled okra recipe that doesn’t need refrigeration after opening. That would indeed be amazing!